Email marketing is performing worse and worse. Dropping from a 6% to 3.2% clickthrough rate (CTR) in the last 7 years.[*]
This is why Twilio, an SMS API, is becoming a game-changer for savvy marketers. Twilio:
-
Has 40,000 customers including Airbnb, Lyft, and Yelp[*]
-
Went public in 2016 at $1.07 billion[*]
-
Is still affordable (< $0.01 per text)
Today I’m going to show you how to leverage the superpowers of Twilio’s SMS automation in your ecommerce marketing stack to achieve double-digit engagement rates from your fans and potential customers.[*]
What the heck do I know about ecommerce marketing?
I’m the founder of Fomo, a social proof marketing platform that helps thousands of ecommerce websites drive and convert traffic on their store.
%(tableofcontents)
How SMS Marketing Automation Works
A potential shopper comes to your online store. They may not want to subscribe to your emails. But text messages? Easy. Lightweight. Personal. Approachable.
(It’s so simple and safe, in fact, that the SMS we’re using to power this strategy will automatically unsubscribe your contacts if they say “stop” in a reply.)
I’ll show you how to let shoppers on your ecommerce site:
-
Request more information about your products.
-
Get automatic text message replies.
-
Send questions (via SMS) to your team members.
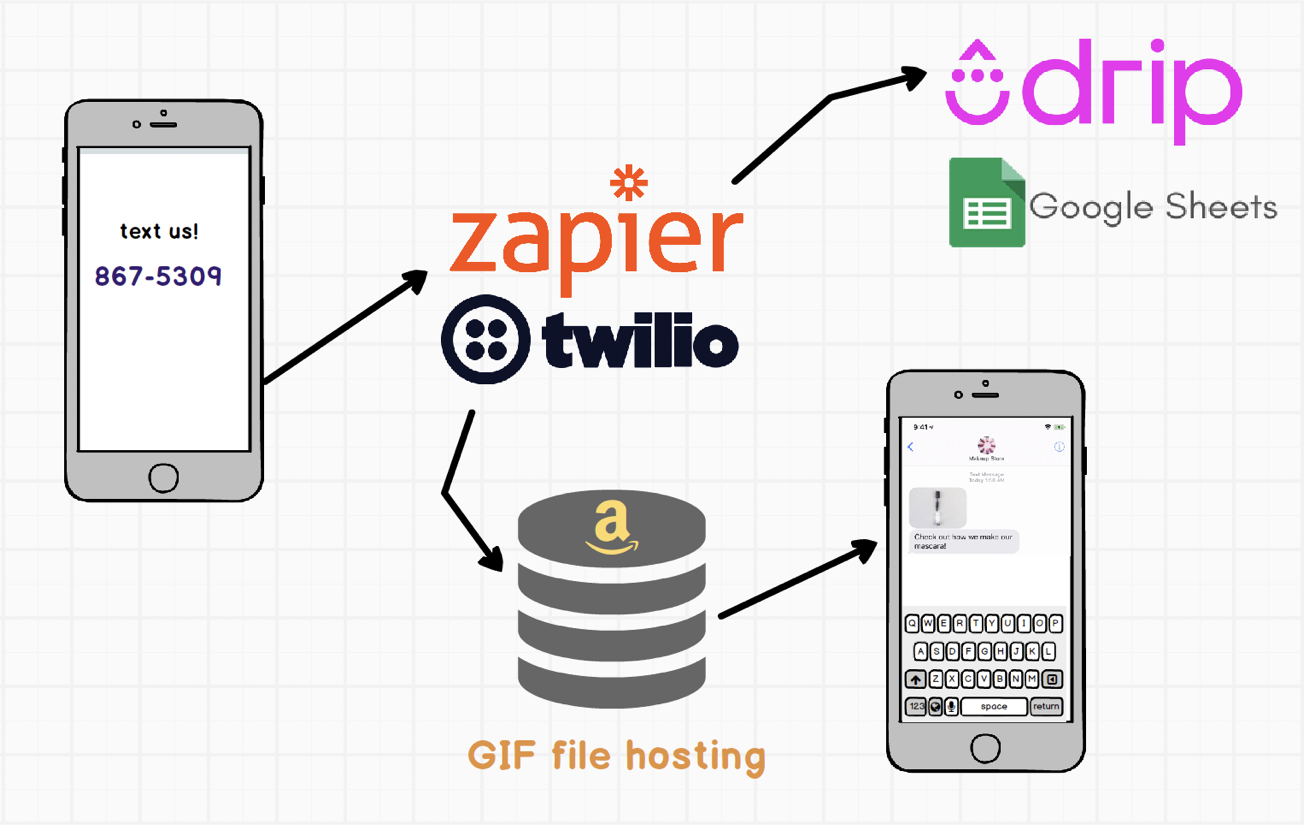
Here’s what the final product looks like:
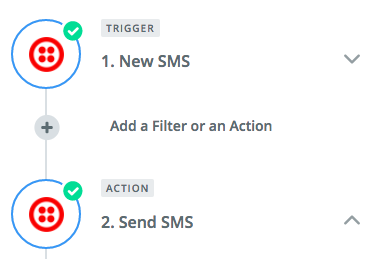
And here’s a rough overview of how it works:
Let’s get started!
SMS Automation Tools You Need
For today’s build you need:
-
A Zapier.com account (free plan OK).
-
A Twilio account (setup instructions below) + $1/month phone number.
-
The ability to edit HTML on your ecommerce store.
I’m going to assume you have a Zapier account (it’s easy to get one if you don’t), so let’s move on to your Twilio setup.
Head to Twilio.com and select Sign Up or Get a free API Key. Their signup form may ask different questions, as they do a lot of A/B testing, but make sure to specify you want to use this for SMS or that you’re a developer; answering that you’re not a developer or you’re doing this for marketing may block the account creation.
After signing up, you’ll be asked to verify your account with a working cell phone number. I recommend using your real cell phone (versus a Google Voice number) because the Sandbox mode is free, and you’ll use that for testing.
Verify your identity (with the verification code sent by text) and give your Twilio project a descriptive name. I suggest your company or ecommerce store name. After naming your project, select continue, then find the Get a number button on your Twilio dashboard. To make calls or send messages through the Twilio API, you need to have a Twilio phone number.
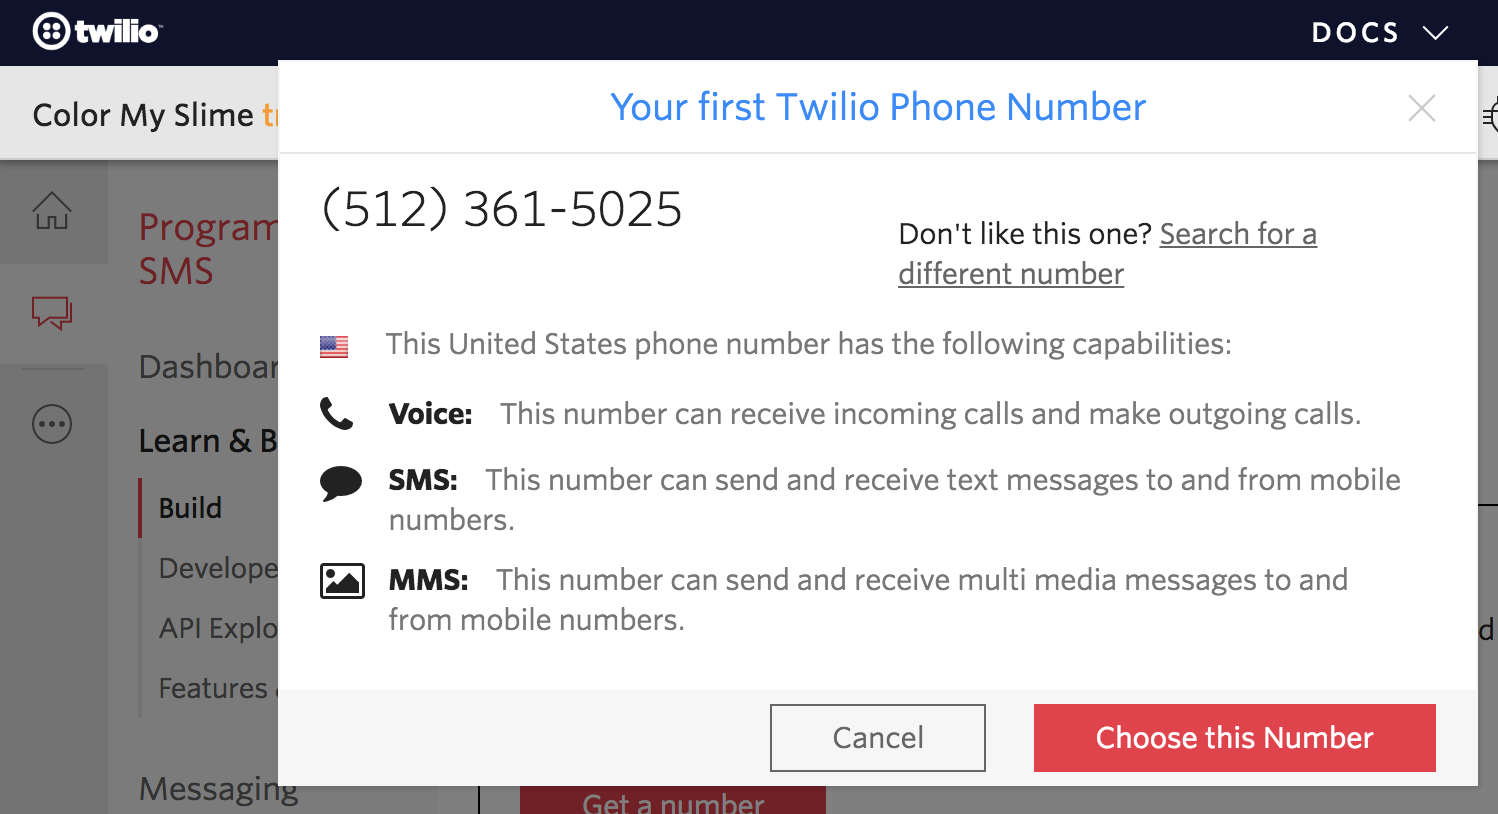
Here you can choose the default number Twilio recommends, or you can select Search for a different number to find another.
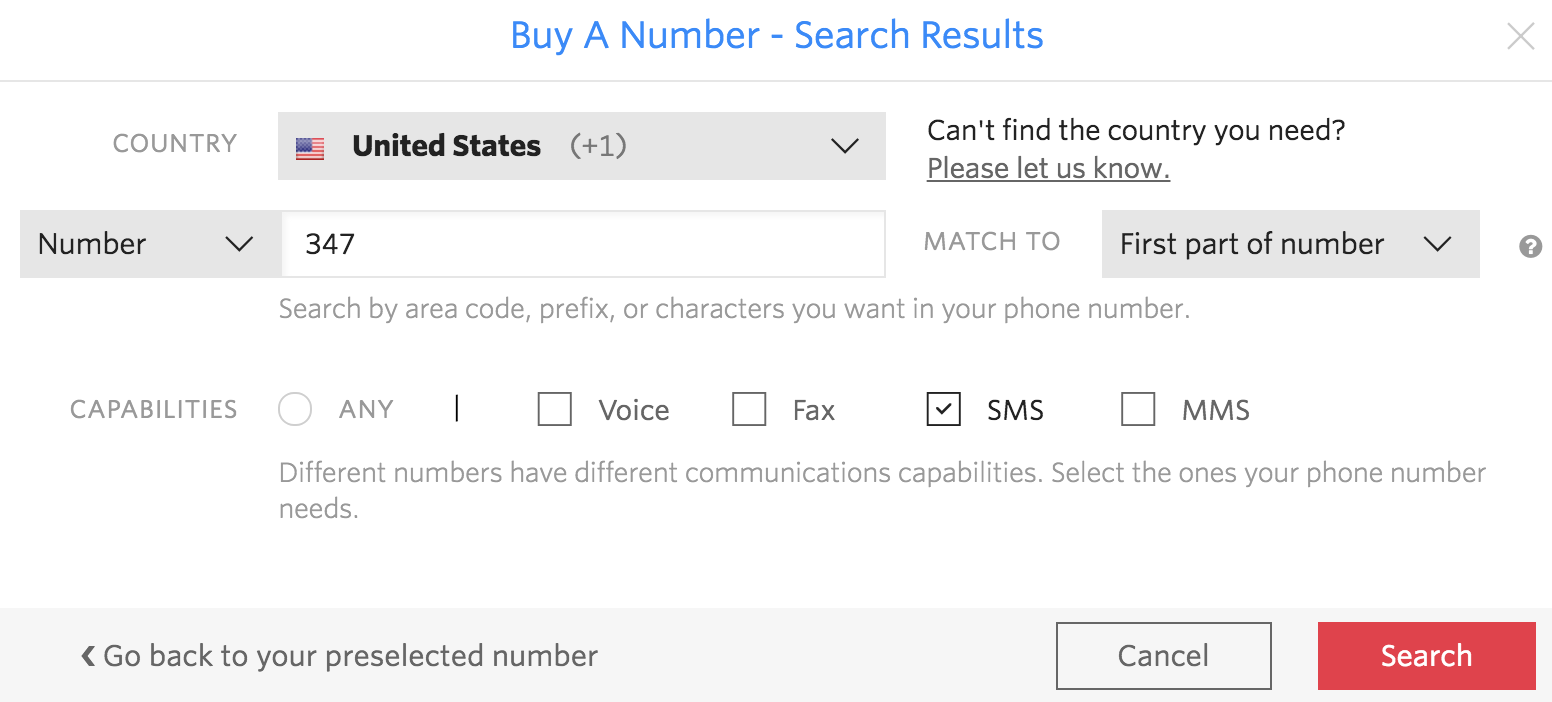
If you choose another phone number, make sure it’s SMS capable (see check boxes below the number for capabilities).
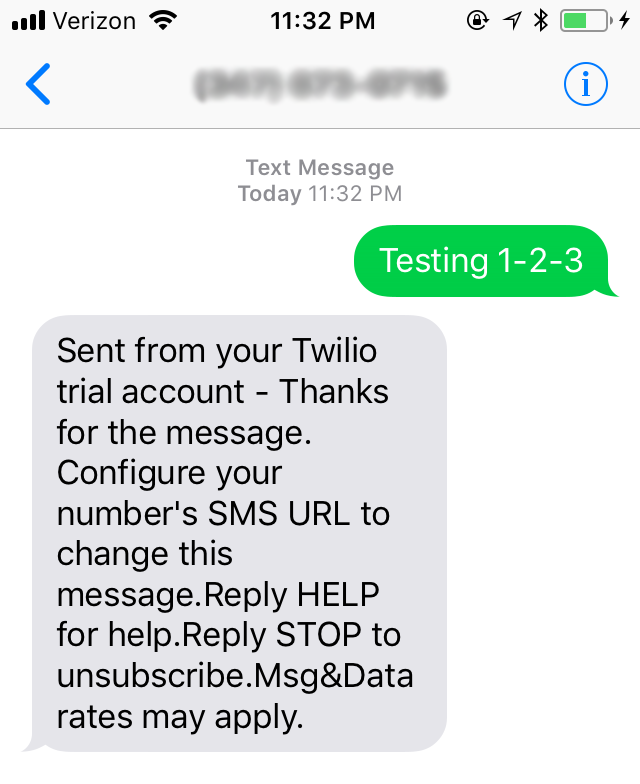
Finally, let’s test that your number is set up. From your personal cell phone (the same one you used to verify your Twilio account), send a text message to your new Twilio phone number. You should receive a reply that says something like “Sent from your Twilio trial account…”
Now let’s remove that pesky autoreply.
Visit this link and select your new phone number. On the Configure tab, delete the “demo.twilio.com” URL inside Messaging > A Message Comes In.
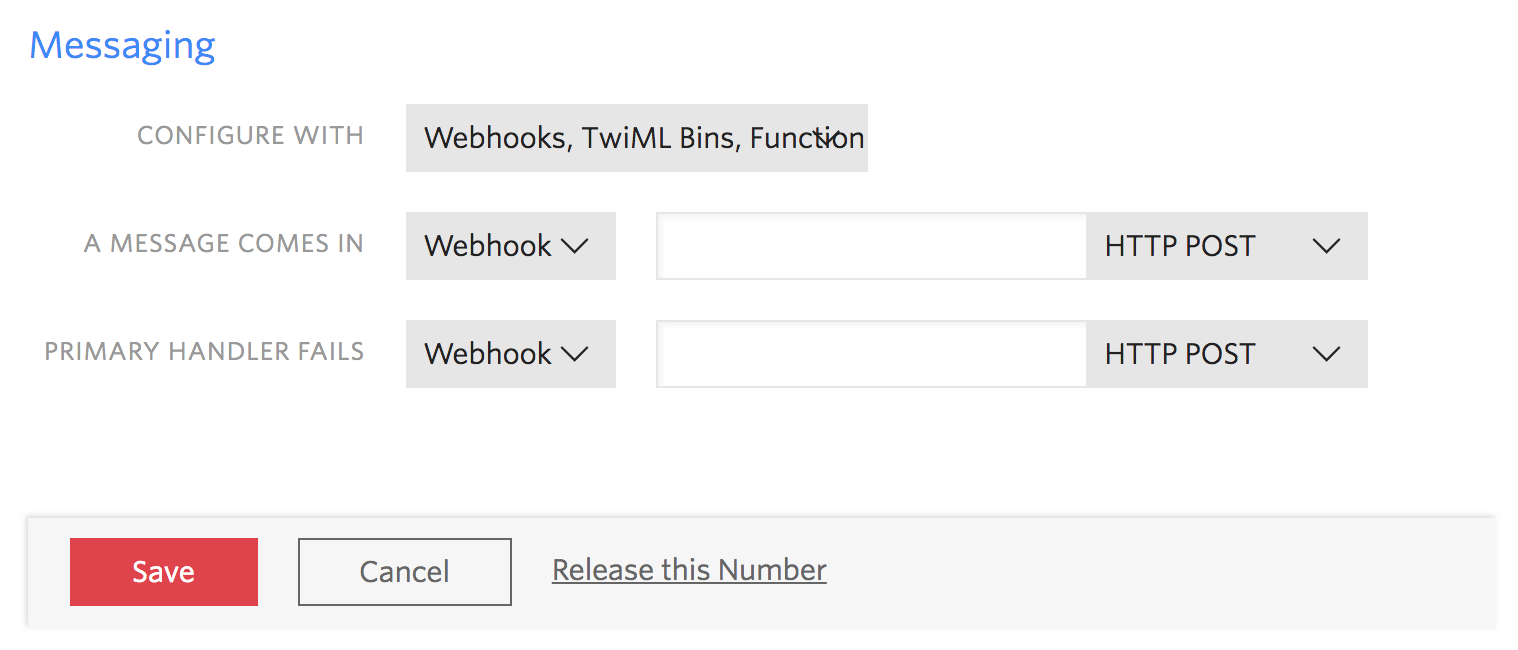
Save your changes, and send one more test message to your Twilio number to ensure the default autoreply is disabled.
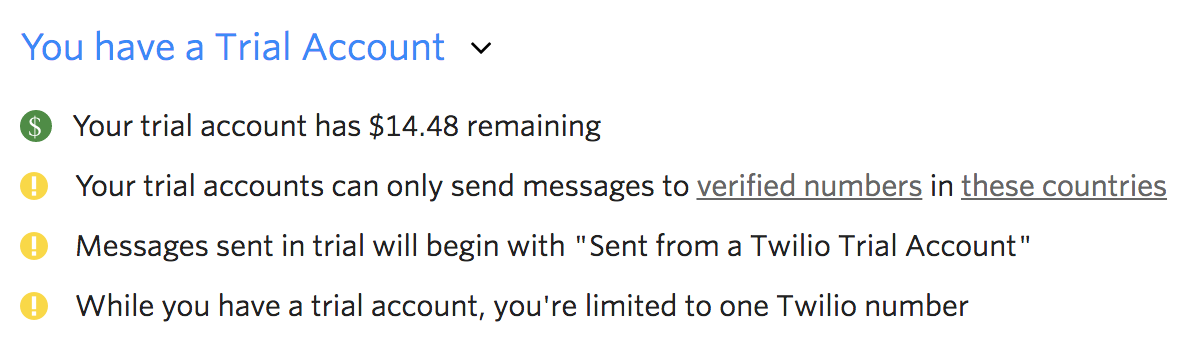
Lastly, make sure to upgrade your account by adding $10 or more to remove the “trial” status. Otherwise, only your personal cell phone or manually added phone numbers will be accepted by Twilio’s servers.
(If you prefer to continue this guide first, everything will work on your personal cell phone, just remember to revisit this step before going live on your website.)
Set Up Your Inbound SMS Automation
In this section, you’ll configure the logic for the text message autoreply your website visitors can receive.
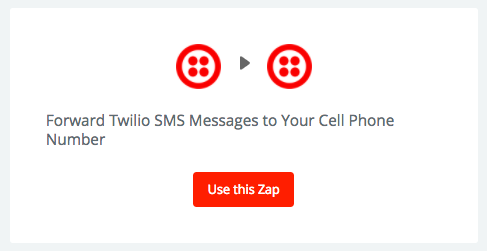
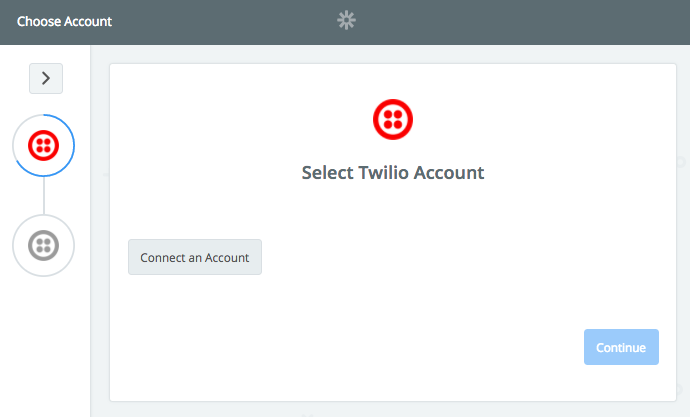
With your Twilio phone number in hand, log into your Zapier account and create a new Zap with Twilio as Step 1. Here’s a shortcut to get you started.
After selecting Use this Zap, follow the prompts to connect your Twilio account in Step 1, and input credentials using the helpful links inside the form.
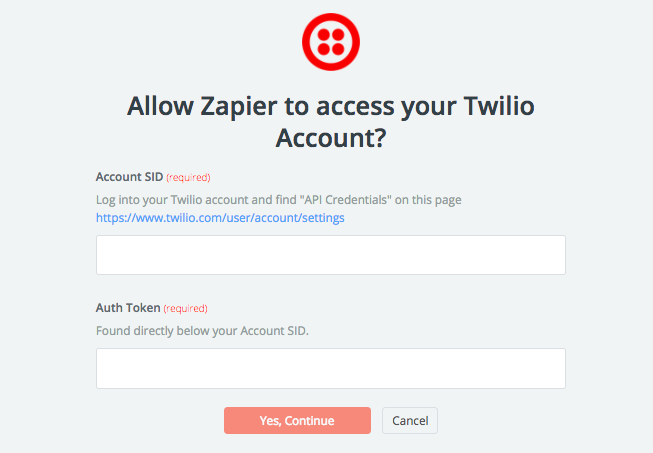
Rename your Twilio connection to your ecommerce store name for clarity.
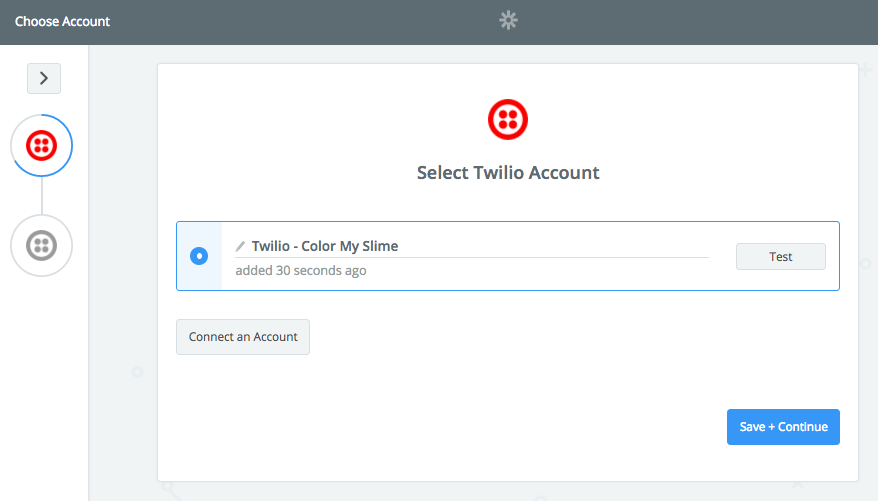
Select Save + Continue then select your Twilio phone number from the drop-down menu.
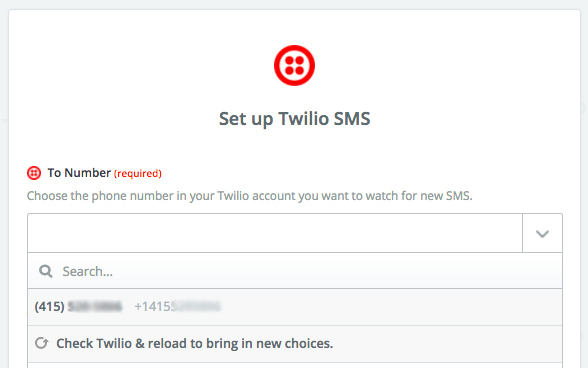
Assuming you’re in the United States, choose Yes in the Apply US Prefix drop-down menu. Select Continue.
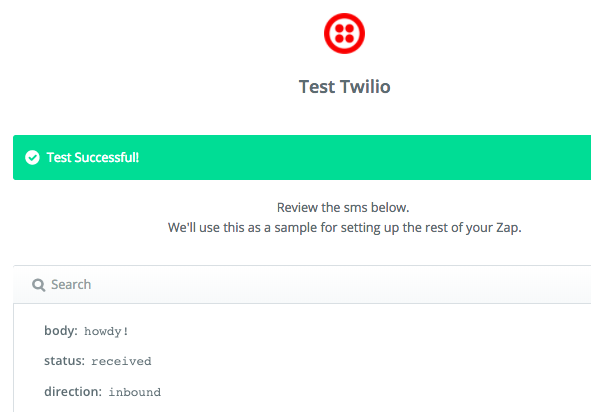
From your personal cell phone, send a text message to your Twilio number.

Then select Fetch & Continue.
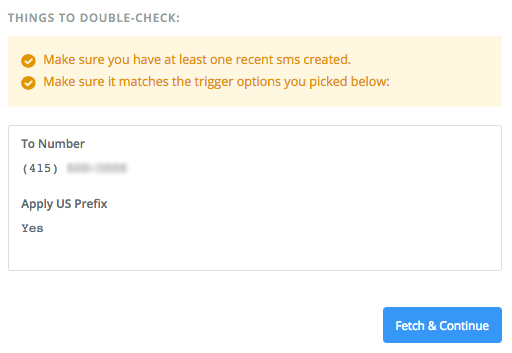
You should see “Test Successful” on the screen. View the test data and ensure your message (in this case I sent “howdy!”) was received.
Select Continue then Continue again after choosing Send SMS as your trigger response.
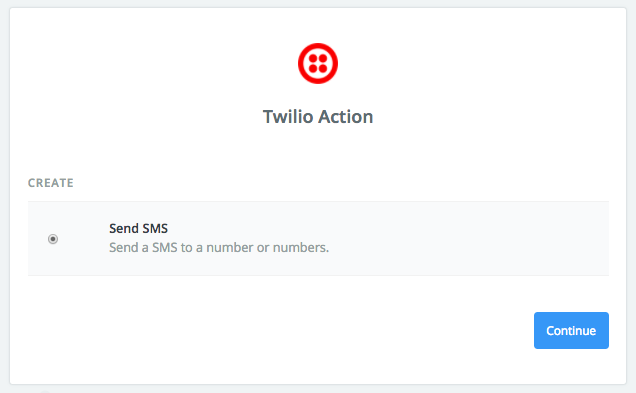
You’ll now be asked to select another Twilio account for handling the outbound message. Simply select your existing Twilio connection. This means Zapier handles inbound as well as outbound triggers, which you want.
Now the fun part.
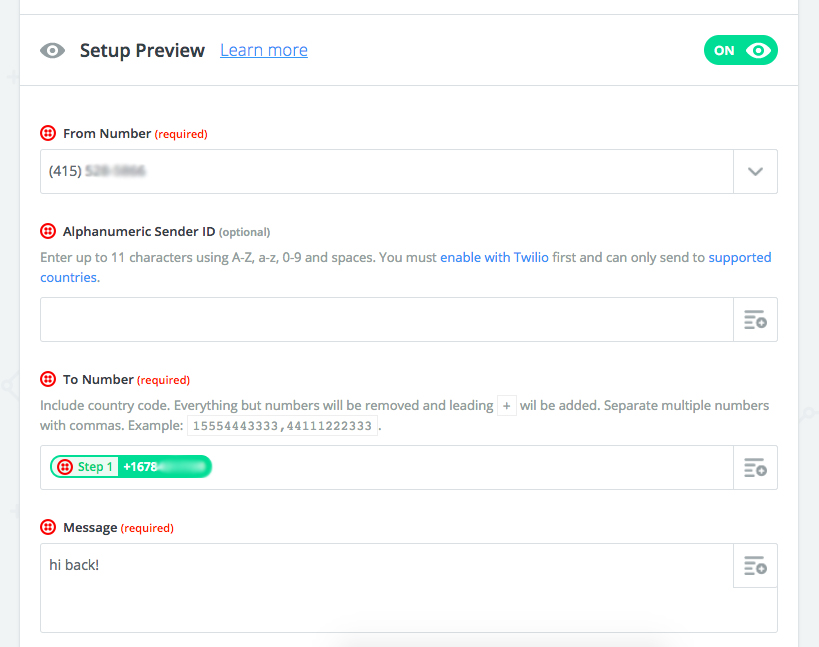
Map your variables like the screenshot below:
-
From Number: your Twilio number.
-
Alphanumeric Sender ID: (leave blank!).
-
To Number: your personal cell phone, labeled “From” in the drop-down menu options.
-
Message: input anything here, like “hi back!” (you’ll change it later).
-
Media URL: optional; you can link to a [public] image file here.
Note: including a Media URL will increase the cost to $0.02 or $0.03 per sent text, which is 2-4x more expensive than a text-only message.
Select Continue then send an SMS on the next page. You should instantly receive a message to your personal cell phone.
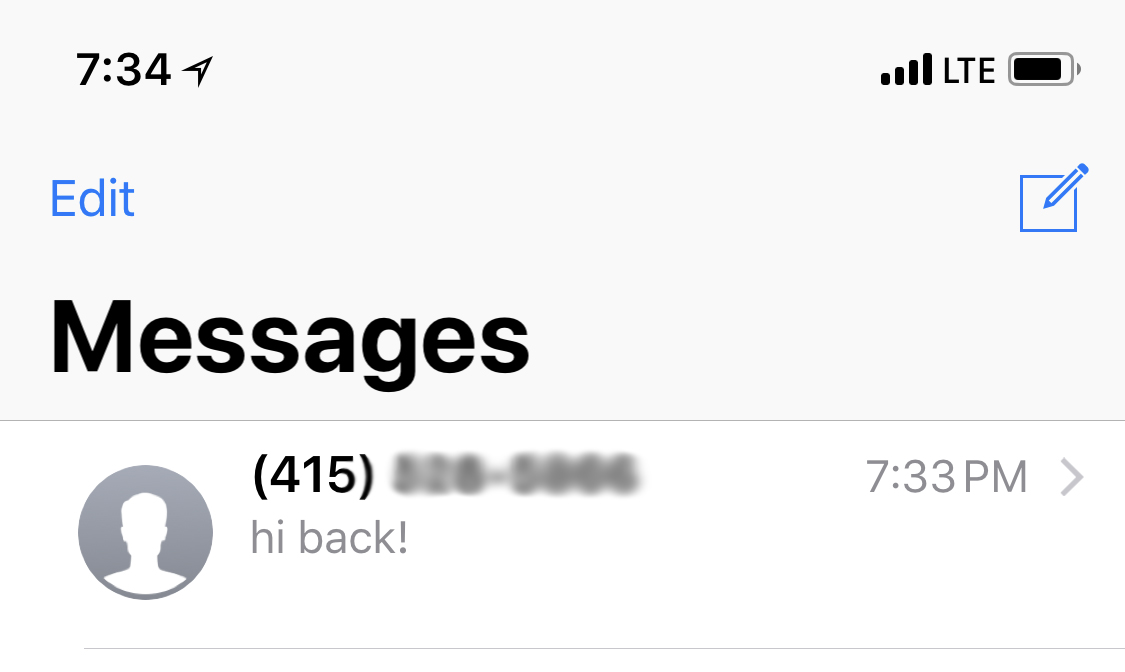
Now you have a working autoreply to your Twilio number. Select Finish to save the Zap.
To recap:
-
Our Twilio number costs $1 per month.
-
Each text-only message costs < $0.01.
-
We haven’t personalized messages or integrated marketing automation tools (yet).
Let’s do that now.
Set Up Your Outbound SMS Automation
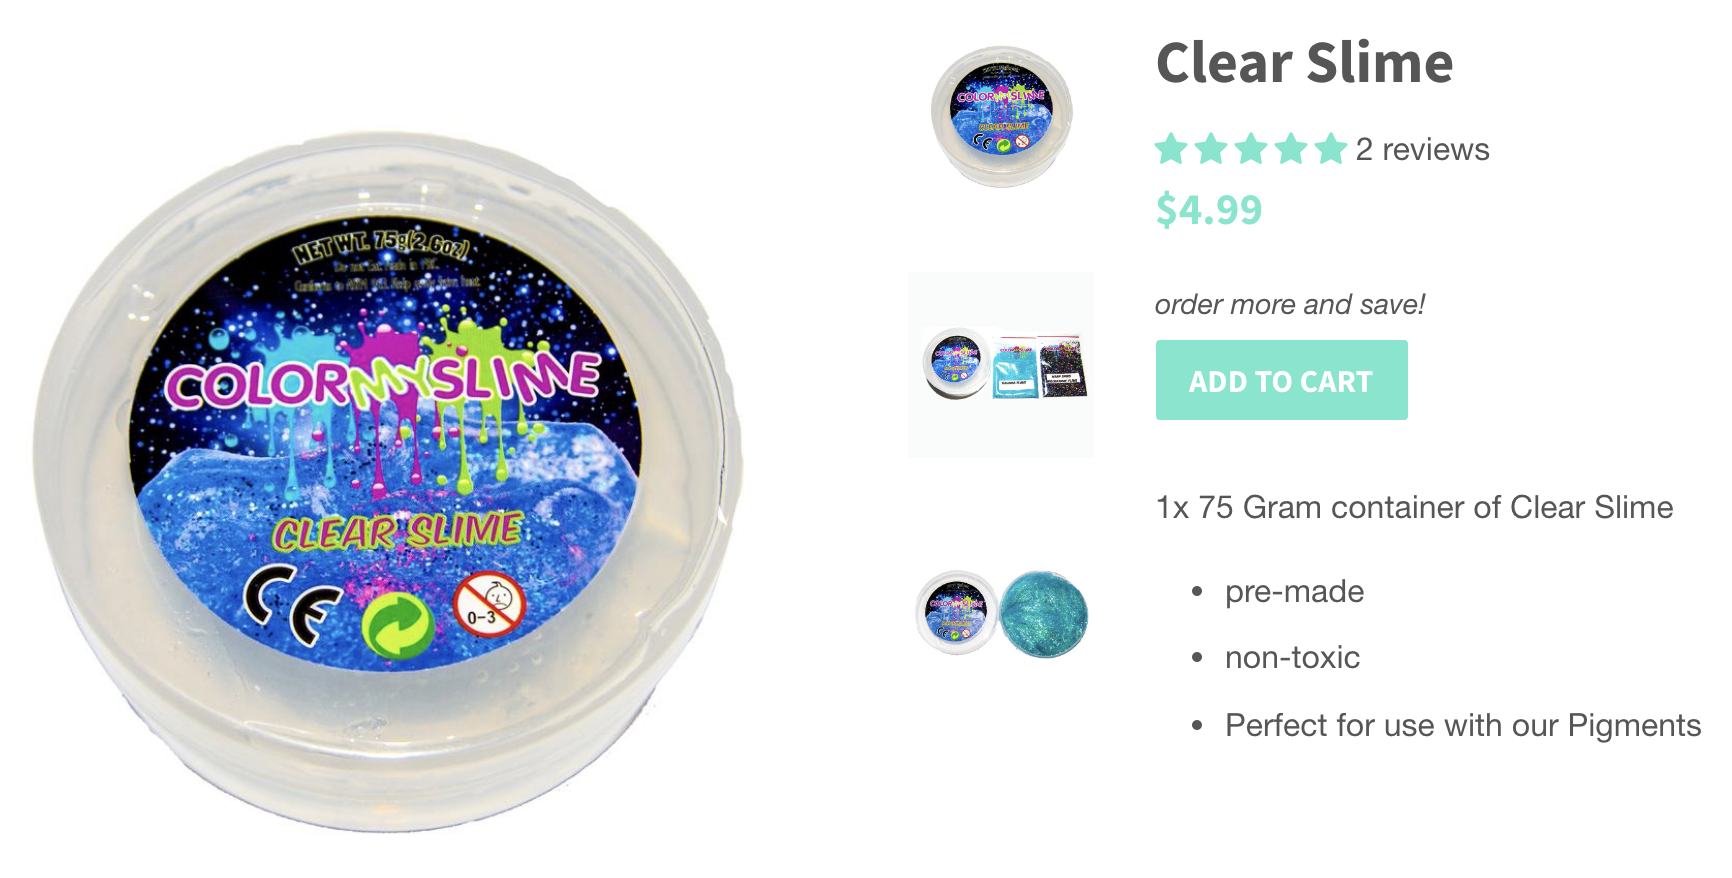
In today’s example, I’m setting up SMS automation on my side project, Color My Slime. This is a Shopify store that sells slime color pigments to parents for their kids to play with.
To illustrate how you can customize the content of your outbound messages, let’s think about the audience of shoppers looking for slime (the squishy stuff), versus shoppers looking for colors (the powder).
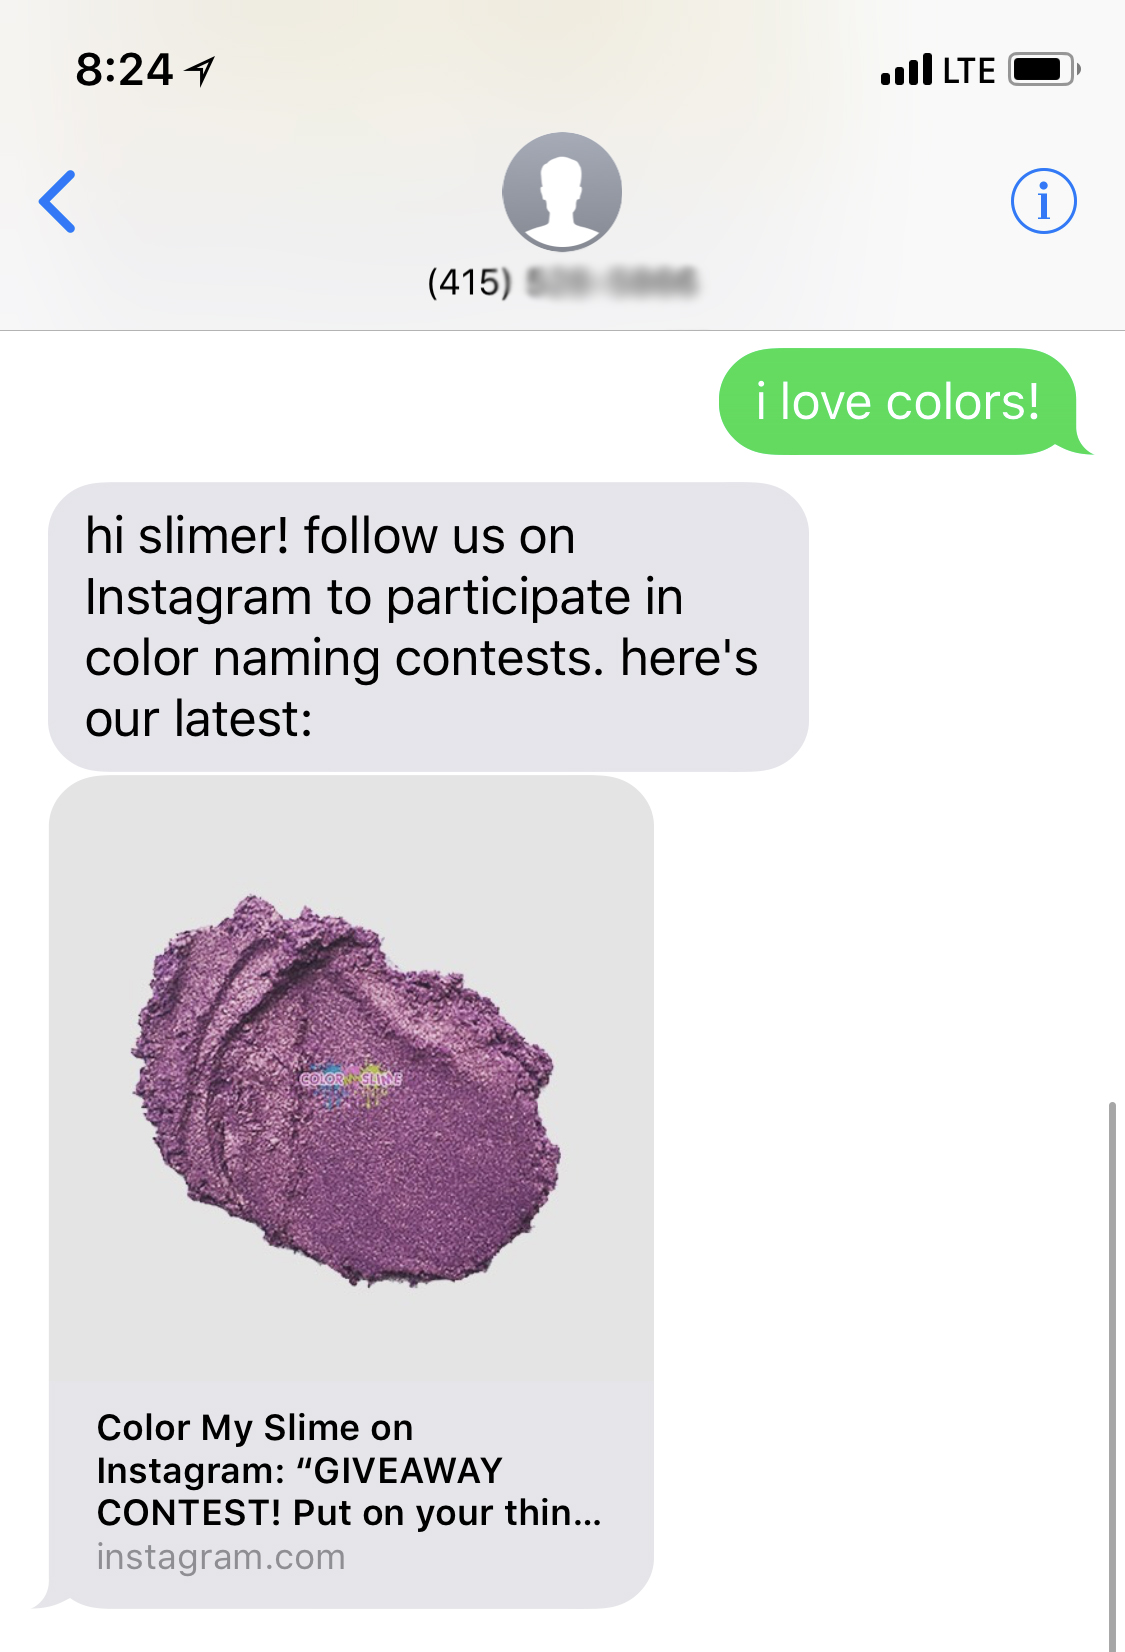
Let’s send slime lovers a link to a blog post about slime, and color shoppers a link to an Instagram color naming contest, something I run a monthly basis.
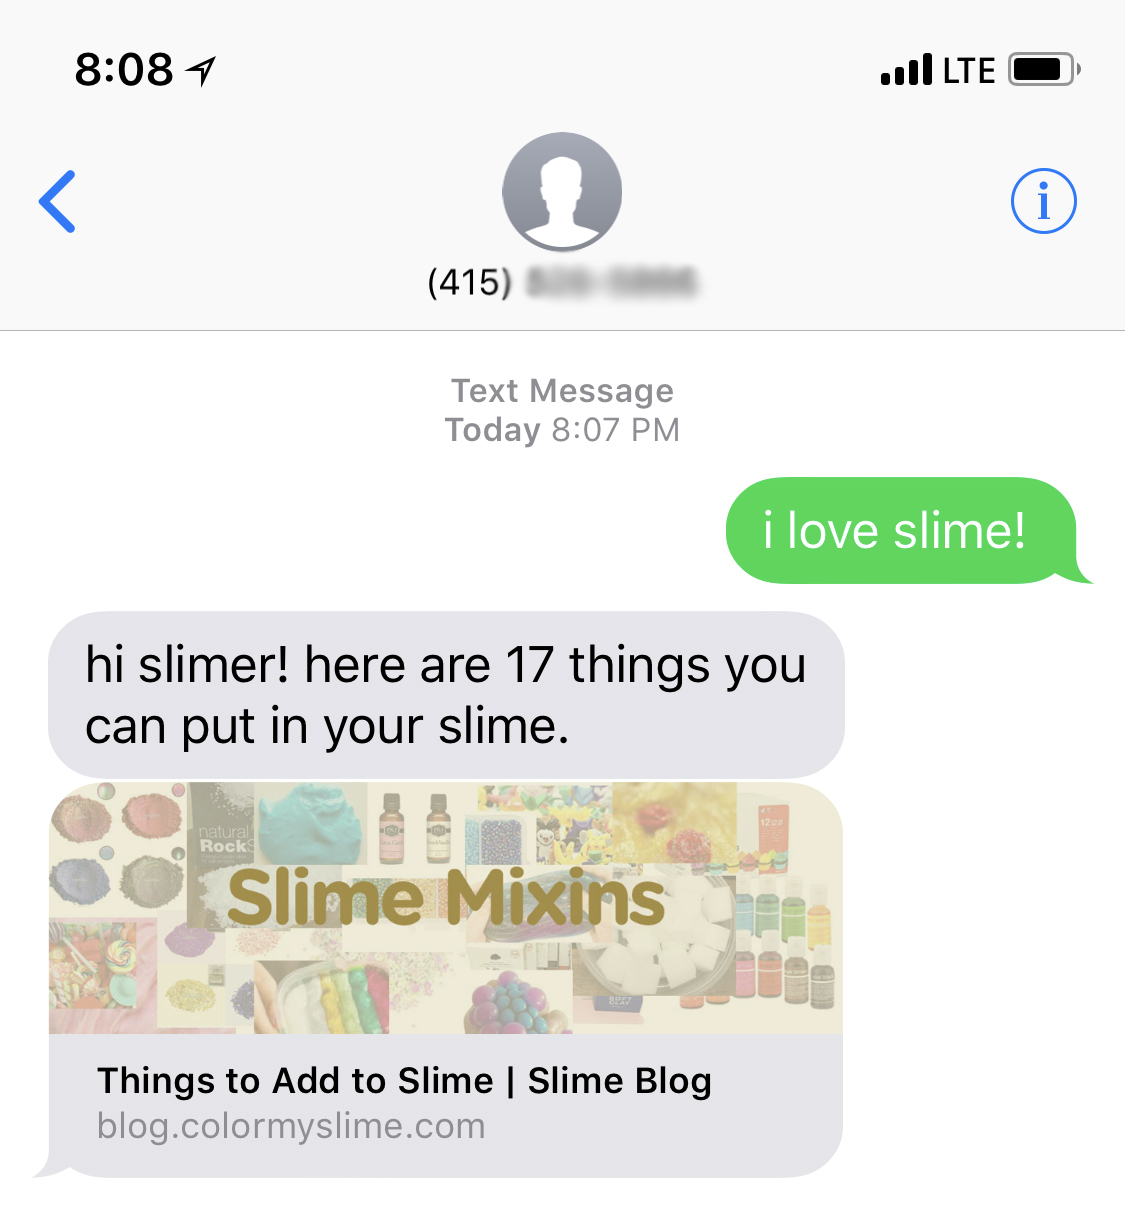
The green bubble is text from the “slimer” to my publicly available Twilio phone number. The response is our autoreply (“hi slimer!…”) which includes a link to one of our popular blog posts.
If you’re curious about how the link and image appeared automatically, this is a relatively new feature in iOS 10 and most Android phones that will automatically expand text links into clickable images.
SMS Automation — Slime
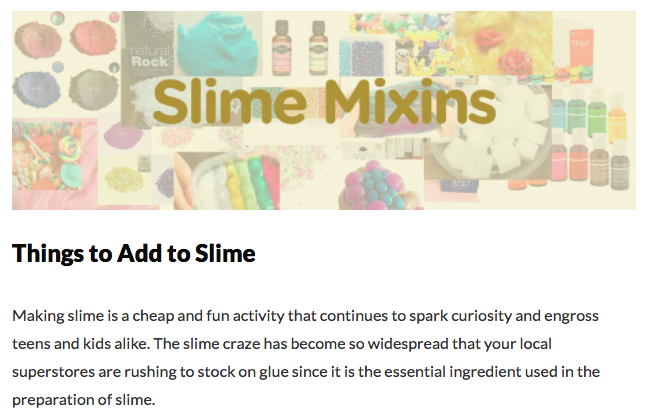
When a mobile shopper is browsing one of my product pages, I’d like to give them the ability to ask me questions directly (Zap) in one tap from their phone. I’d also like to send them this blog post about things they can mix into their slime:
Even if the visitor doesn’t purchase from me, I’m adding value to their slime hobby.
To configure this, log back into Zapier and open the SMS Zap.
Select the drop-down arrow on the far right, then select Edit.
On the left side of your screen, click the + sign to see Add a Filter or an Action.
Select Filter and then Continue after selecting Only continue if…
Next, select the Body variable from the first drop-down and then enter the logic that meets your needs. Here I’ve set it up so that “If body [of the text message the shopper sends me] contains slime, continue.”

Continue to the next screen, and optionally send your Twilio number another test message that should trigger the Filter you just created.
Pro tip: Use Zapier Actions (next to the Filter option, left-side menu) to first convert the text message body to all lowercase. This guarantees your filter won’t be too strict, and fail to fire when someone texts “Slime” or “sLime” or “sliME,” etc.
Click to continue, then skip to Step 3: Edit Template from the left side menu.
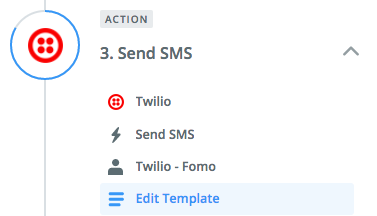
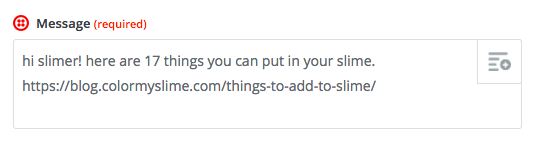
You now need to customize the message you’re sending in response to this “slime” message. Below, I’ve modified our “hi back!” test message to be a message that gives the shopper a link to a blog post about things to add to slime.
After selecting Continue, test, then resave and turn back on your Zap (Zapier will turn off your Zap if you’ve made significant changes.) You can now text your Twilio number again, making sure to include your specific Filter logic, and receive a tailored reply:
%(image6)
Pro tip: Depending on your plan, Zapier may only look for incoming messages every 1-15 minutes. You can manually trigger your Zap to run during this testing phase.
Now let’s do this one more time for online shoppers looking at color pigments, not slime.
SMS Automation — Color Pigments
This second iteration will be easier since you already added a Filter to your first version.
Simply copy the Zap from your dashboard, and follow the same steps above to modify the Filter logic and response content.
Change the filter from “slime” to “color:”

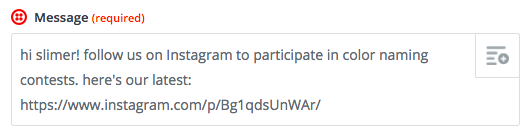
Change the message, from the slime mixins blog post to an Instagram contest:
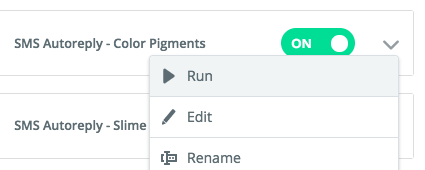
Just like before, select Next and Continue to save and turn on your new Zap. Here I’ve renamed both Zaps so I can easily maintain them or add new ones later:

And of course, test your second Zap to ensure the logic is functional.
Add Your Phone Number To Your Ecommerce Site
You’re just one step away from going live. Now you need to make this Twilio phone number visible to your visitors.
I’ll show you how to make it visible to only your mobile guests, and we’ll sweeten it with tappable text messages that will auto-populate on iPhone and Android devices.
Let’s do it!
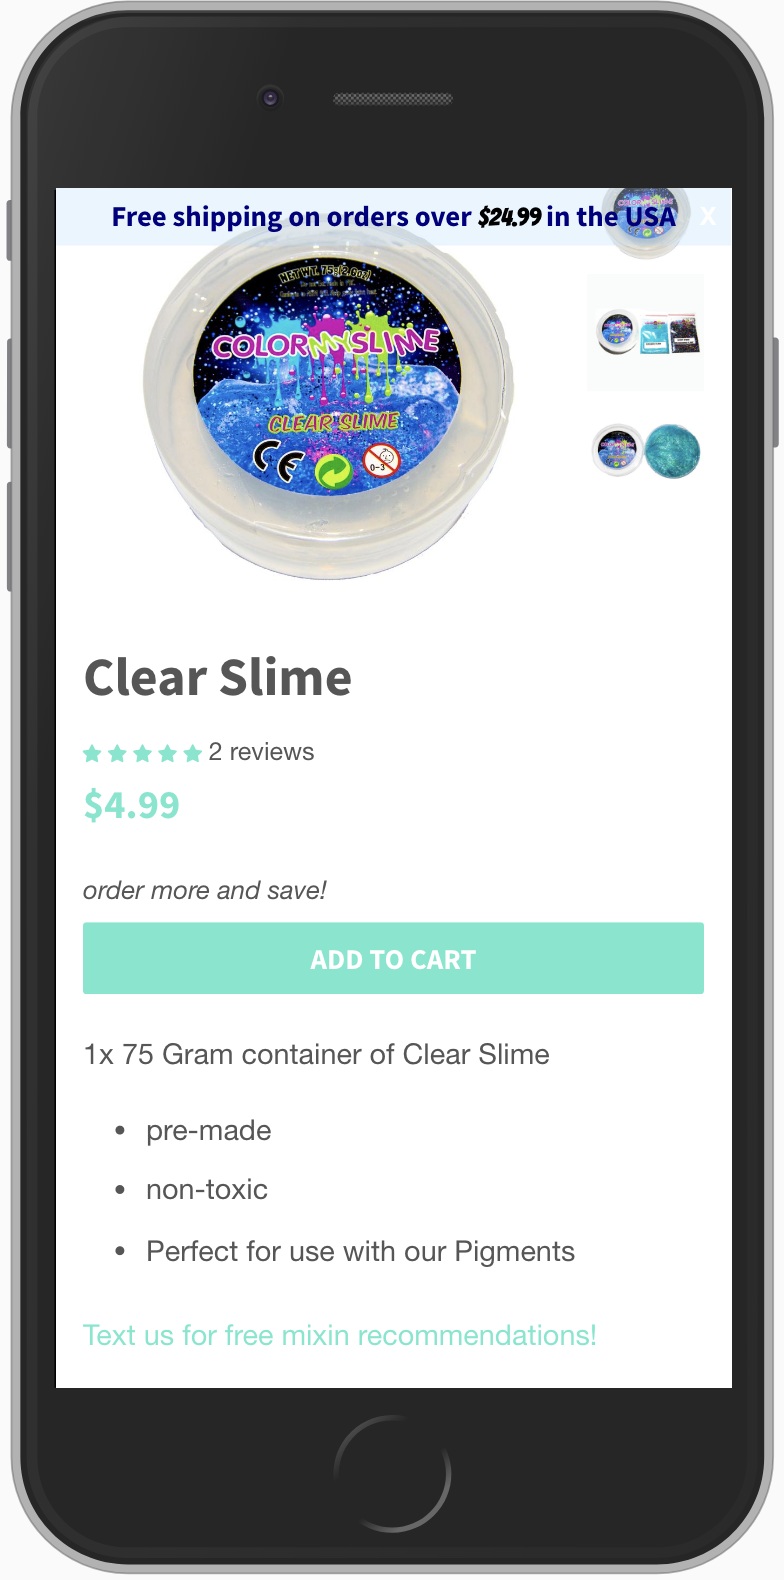
Inside my Shopify store, I’m opening up the admin page for our clear slime.
To make changes involving HTML and CSS, which I want to do in order to show the text message option for mobile visitors only, I’m selecting the <> icon to access the source code view.

First I’ll paste a new CSS style, which allows me to hide our phone number for desktop users:
<style>
@media (min-width: 980px) {
  .hide-on-desktop, .show-on-tablets, .show-on-mobile { display: none; }
}
</style>
Below this, paste the following code.
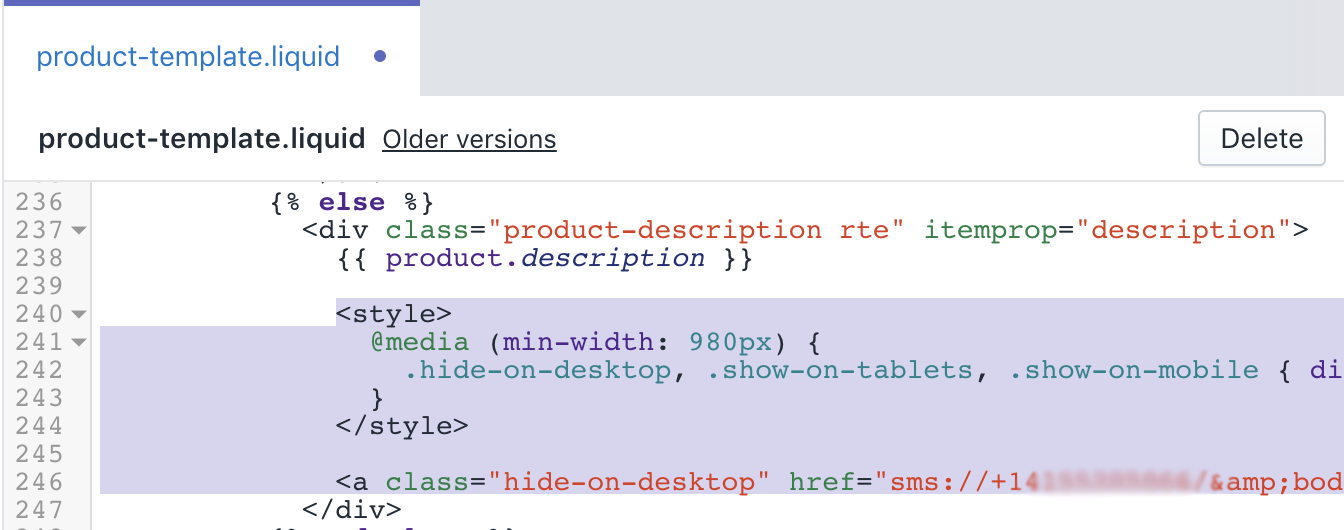
<a class="hide-on-desktop" href="sms://+1XXXXXXXXX/&body=i love slime!">Text us for free mixin recommendations!</a>
(Swap “XXXX” with your Twilio phone number and “Text us for free…” with your preferred call to action.)
Save your work and visit the chosen webpage from your mobile phone. Here’s a working demo of our full automation:
If you visit the same URL on your laptop or non-mobile device, the SMS link should be invisible:
And if you’re on a mobile device, it will be visible:
Note, the above “sms://” syntax will pre-populate text messages on iPhones only. To automatically populate texts on both Android and iOS devices, follow this longer guide I published on Quora.
If you want this kind of one-tap SMS link on more than just a few pages, I suggest adding the CSS and <a href> link above into your global theme editor.
As an example, here I’m visiting Online Store > Themes > Actions > Edit Code.
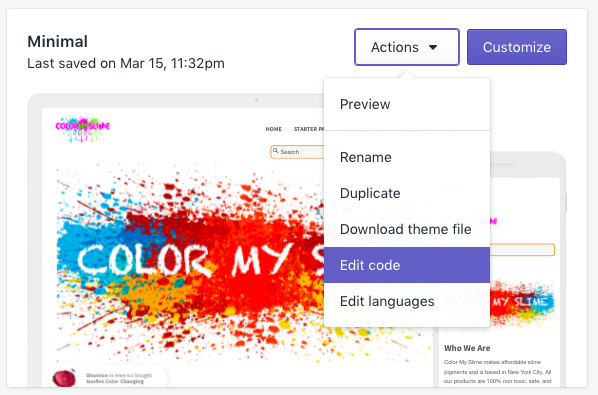
Depending on your ecommerce software, this will be a similarly named area of your admin panel.
Now I’ll visit my product template and paste the same code below Shopify’s {{ product.description }} code. Selecting Save automatically populates a one-tap link on every one of my product pages.
(Again, this is optional and not something I want to do here because I’m adding separate links to my slime versus color pigment pages.)
Speaking of which, the last step is to repeat the process above for each of my SMS automations, or in other words, for each Zap I set up in the previous section.
After adding a similar <a href=""> link to my color pigment pages, with new text and pre-populated message, I’m done.
Pro tip: Consider adding tracking, such as “?utm_source=sms” to your text message autoreplies (inside Zapier > Step 3 > Edit template) so you can easily manage clickthrough rates from your Google Analytics dashboard.
Sync Your SMS Contacts With Google Sheets
By now your SMS automation integration should be fully functional on your ecommerce website. But, there are still a couple things you can do to unlock more marketing value from this feature.
Let’s start by returning to Zapier and sending a copy of each inbound text message to a Google Sheet. For this, you’ll extend our existing Zap(s) with a fourth step.
To recap:
-
Step 1: Incoming text message to our Twilio number.
-
Step 2: Zapier “Filter” that handles logic and personalized message routing (optional).
-
Step 3: Outbound message (autoreply) to the incoming number, with a marketing CTA.
-
Step 4: What you’re doing now!
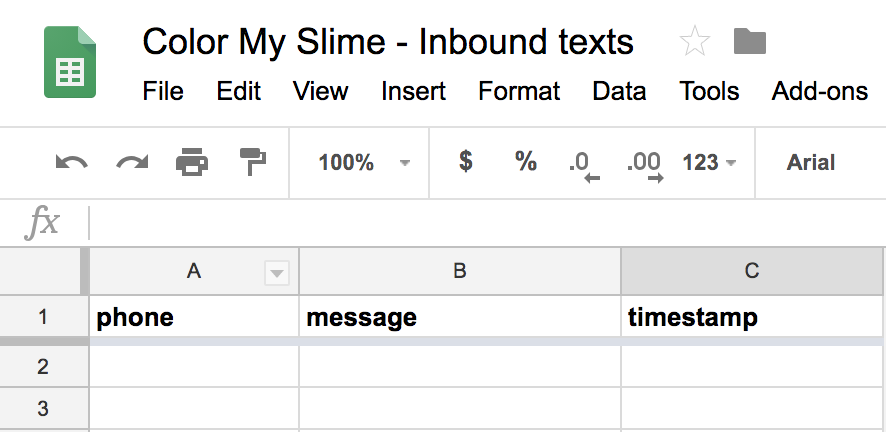
First, create a Google Sheet with the following columns.
Then, visit your SMS Zap and add another step, connecting that same Google Sheet.
Here you’ll map the incoming “From” number from Zap Step 1, along with the incoming Body and Date Sent fields.
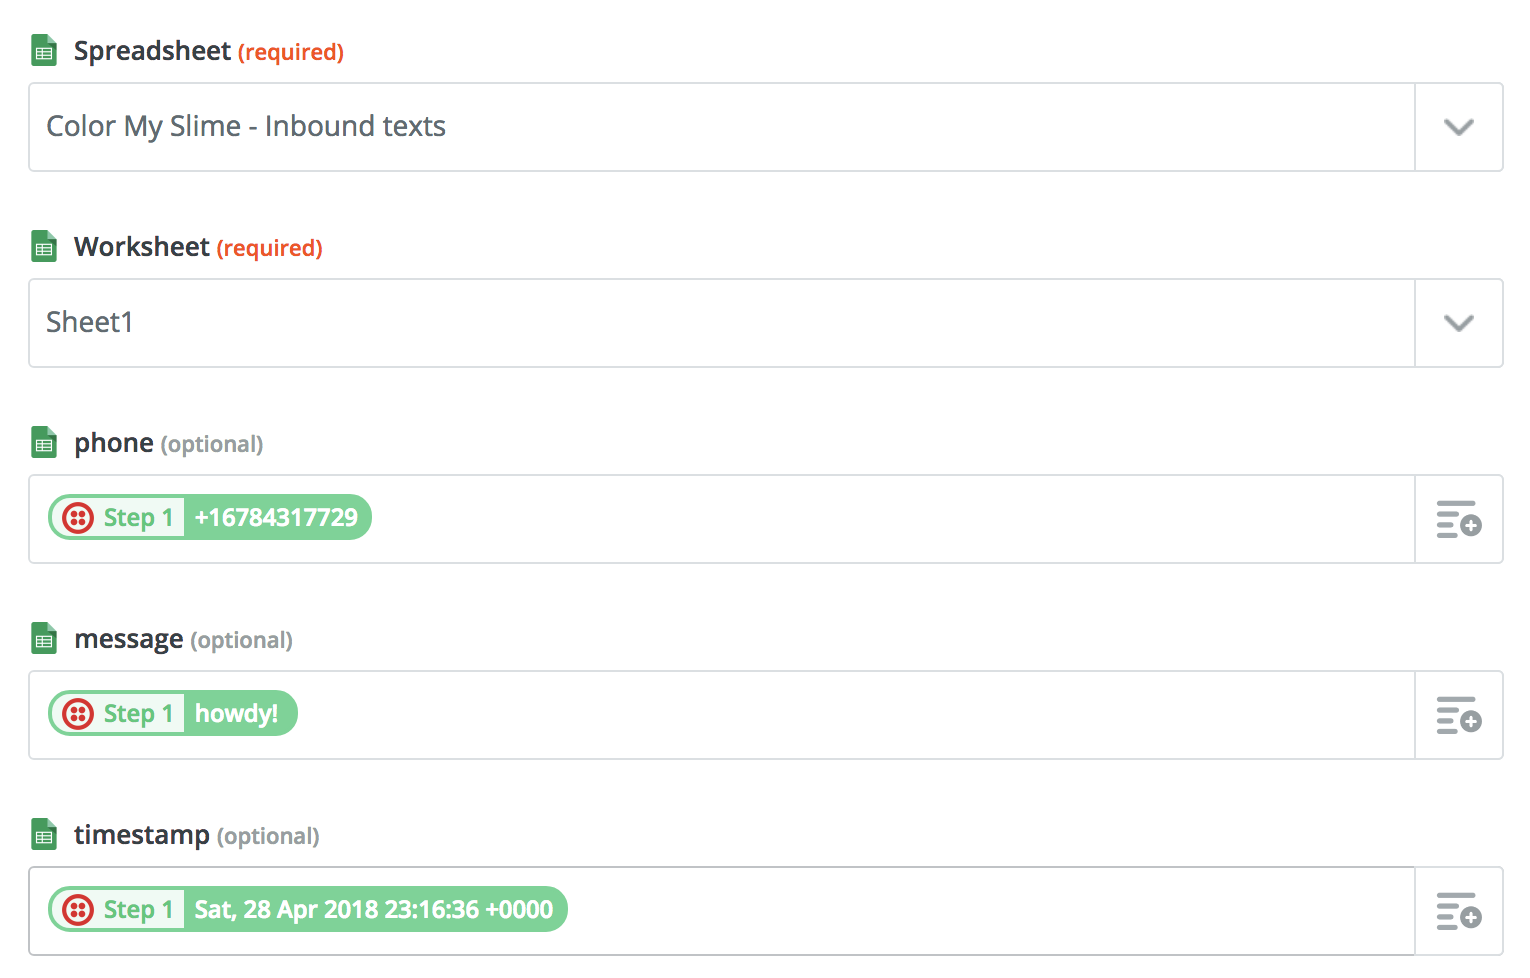
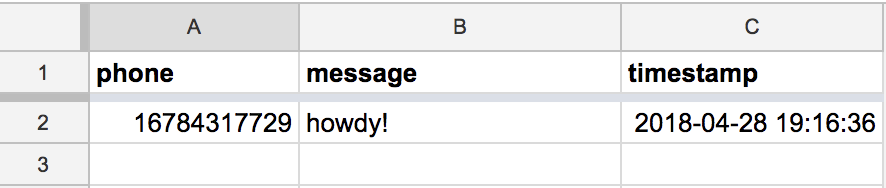
Click to Continue, then optionally allow a test to be sent to your Google Sheet.
Finally, select Finish and re-enable your Zap, which has likely been turned off due to our editing.
Awesome.
You’ve now set up a couple SMS automations that filter for inbound message content, and wired those up to our ecommerce store in a way that lets mobile visitors text us in one tap.
You also set up basic link tracking to follow along inside our web analytics tool, and are now storing incoming leads in a Google Sheet.
Want to get an email notification every time someone texts your business, so you can send them another message?
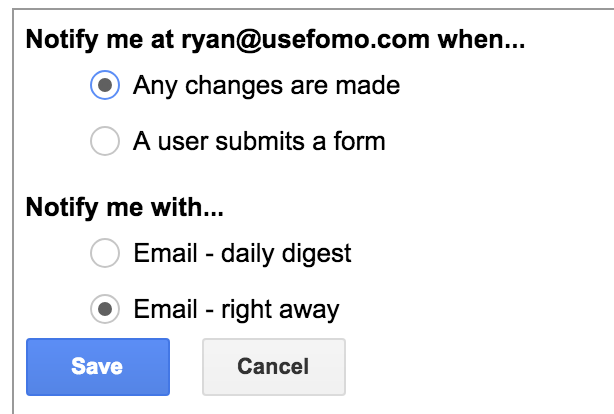
Great, inside your Sheet navigate to Tools > Notification Rules.
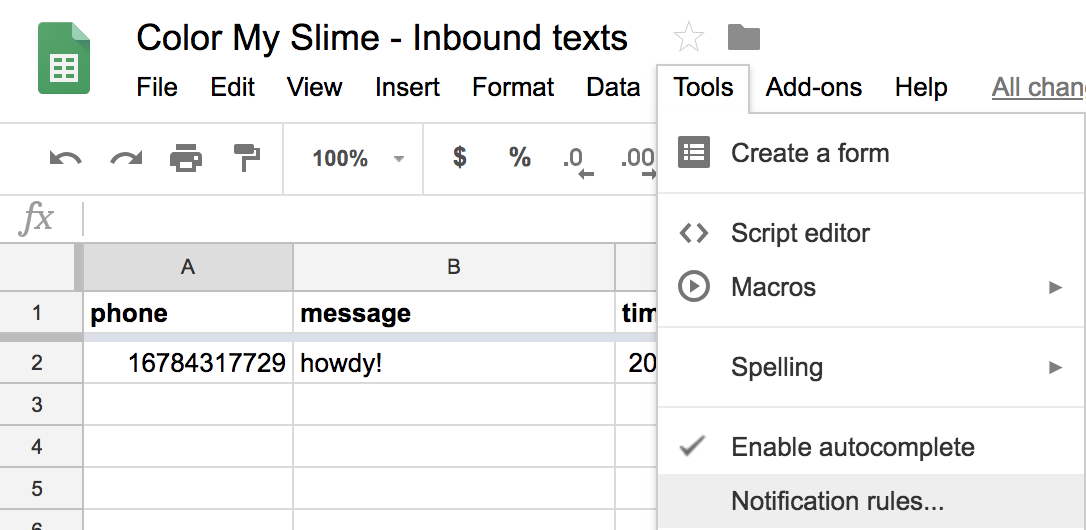
Configure notifications any time changes are made, to be sent either right away or daily.
You’re done!
If Google Sheets isn’t your jam, swap out this step with a marketing automation tool of your choice, or simply post an update to your team’s Slack channel, etc.
Conclusion
For just $1 per month and another $1 per ~100 text messages you can build personal, high-touch relationships with fans and potential customers using Twilio, Zapier, and a bit of HTML/CSS.
In today’s guide, I showed you how to implement this on a Shopify store, but the same code snippets and logic could be applied to a regular webpage or WordPress blog post.
You also saw how easy it is to set up multiple user journeys by duplicating Zaps and tweaking the Filters.
Here’s what I encourage you to do next:
-
Configure at least 2-3 text message automations with smart Zapier filters (remember the lowercase Zap idea from earlier!).
-
Add tracking parameters to your autoreply URLs and configure a shortcut inside Google Analytics to see how it’s working.
-
Store all incoming numbers in a Google sheet.
-
When you reach 10 or 20 phone number leads, send them personal messages from your phone or a Google Voice number, to see if there’s anything you can help them with.
This experiment with SMS barely scratches the surface of what’s possible… imagine tailoring your email support or live chat to include SMS, where users can text you from their phones, on the go, and get great service?
For ecommerce stores, think about the ability to upsell or send product discounts directly, skipping dozens of email filters and avoiding inbox fatigue.
For a list of more advanced SMS marketing automations (like texting shoppers from your computer, and sending multiple texts at once), get my list of advanced automations below:


Add A Comment
VIEW THE COMMENTS