Hey Sumos! Sean here, and this update brings a lot of small optimizations that make a big impact on your productivity in Sumo.
Let’s dig in:
Update #1: Location Matters
In Facebook Ads, you can target people by countries, states and cities. Same goes for Google Adwords. And Twitter Ads. And basically any other targeting platform you can think of.
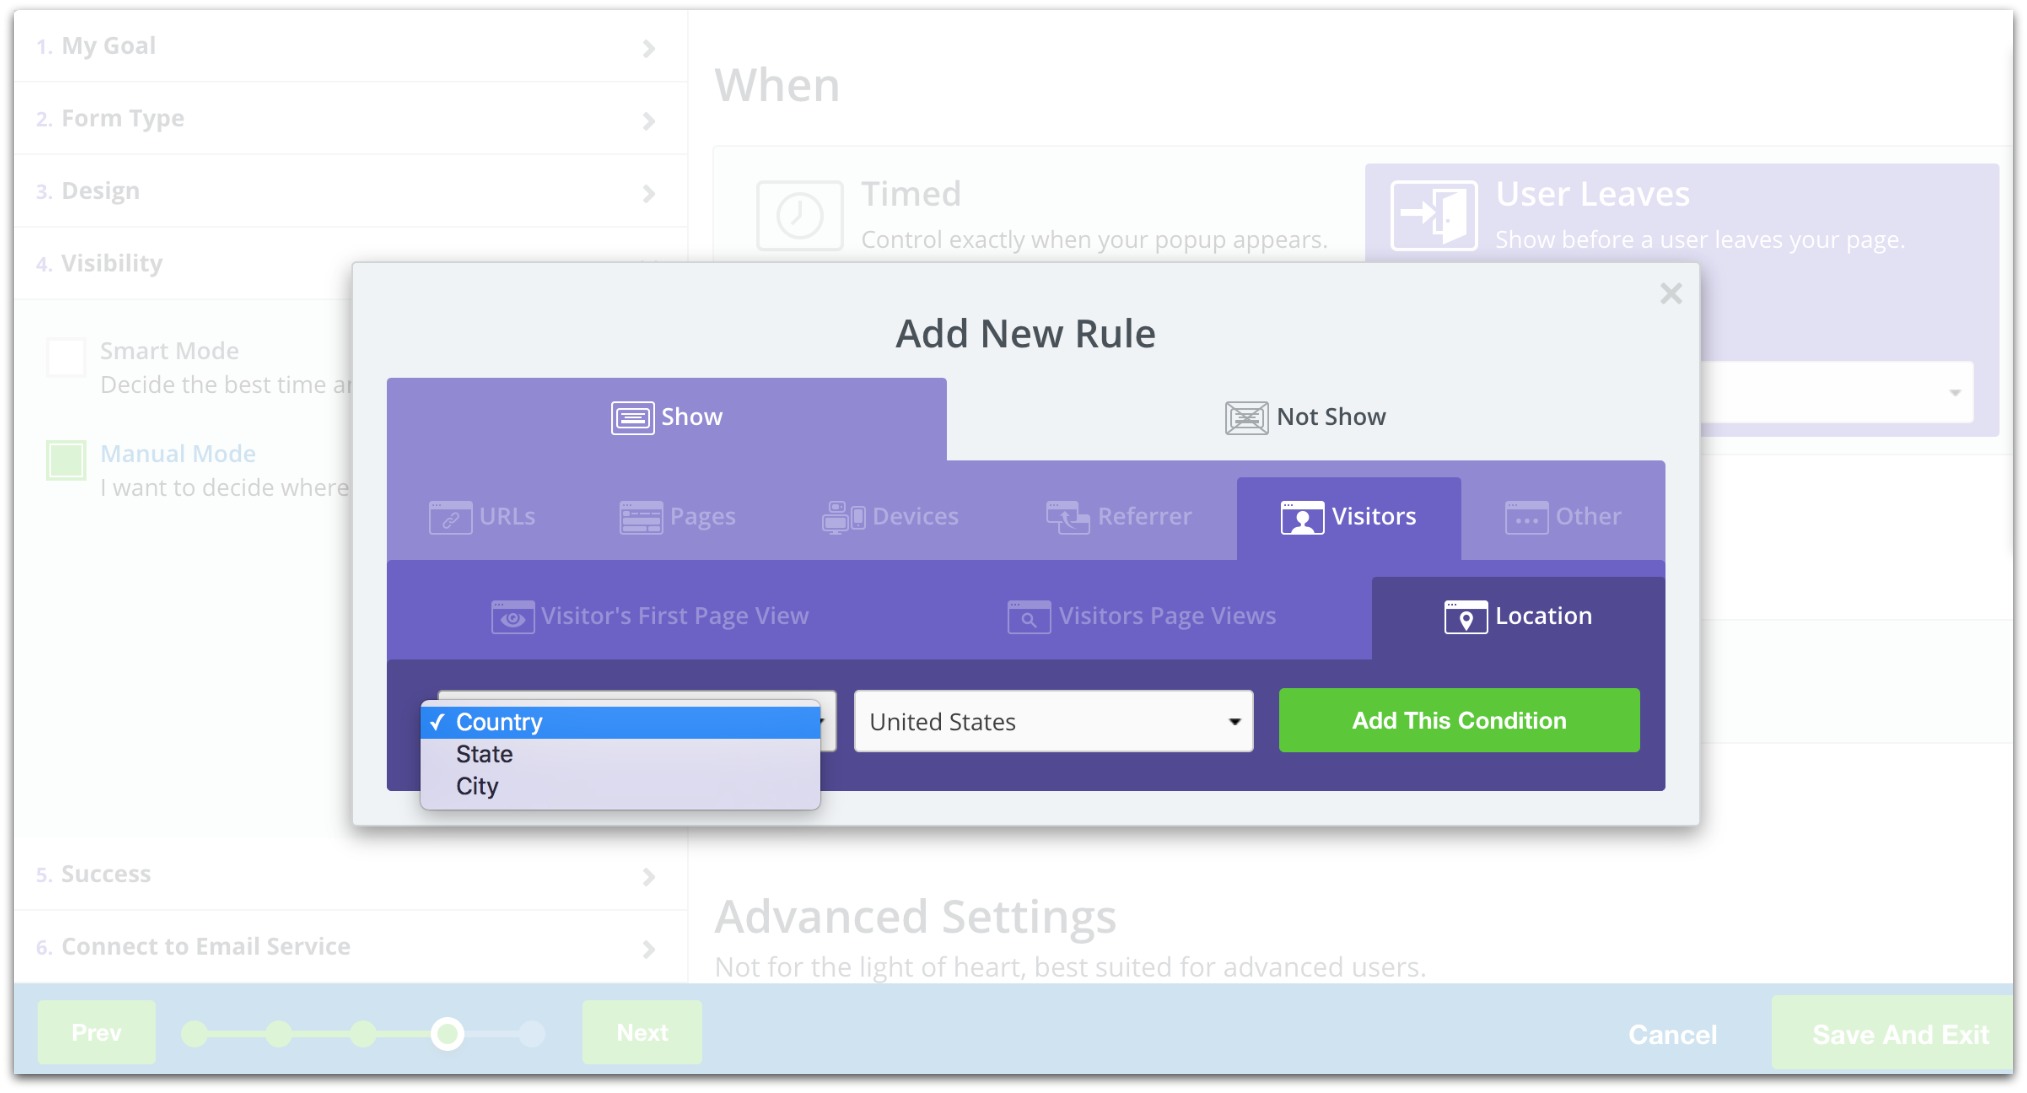
So we brought that power to Sumo. Starting now, you can create rules to show your popups to visitors from specific locations. All you have to do is go to your “Visibility” tab in List Builder and set it like this:

From there, your popup will only show to visitors from the locations you set. This gives you an incredible opportunity to really speak to specific audiences — increasing your conversion rates in the process.
If you’re a Pro user, this is ready for you to use. If you’re a free user, just upgrade to Pro and you can start targeting by location.
Update #2: Naming Popups Just Got Easier
If you recall, the very first thing you used to do before you created your popup was name it. But that’s problematic if you don’t know what your popup even looks like.
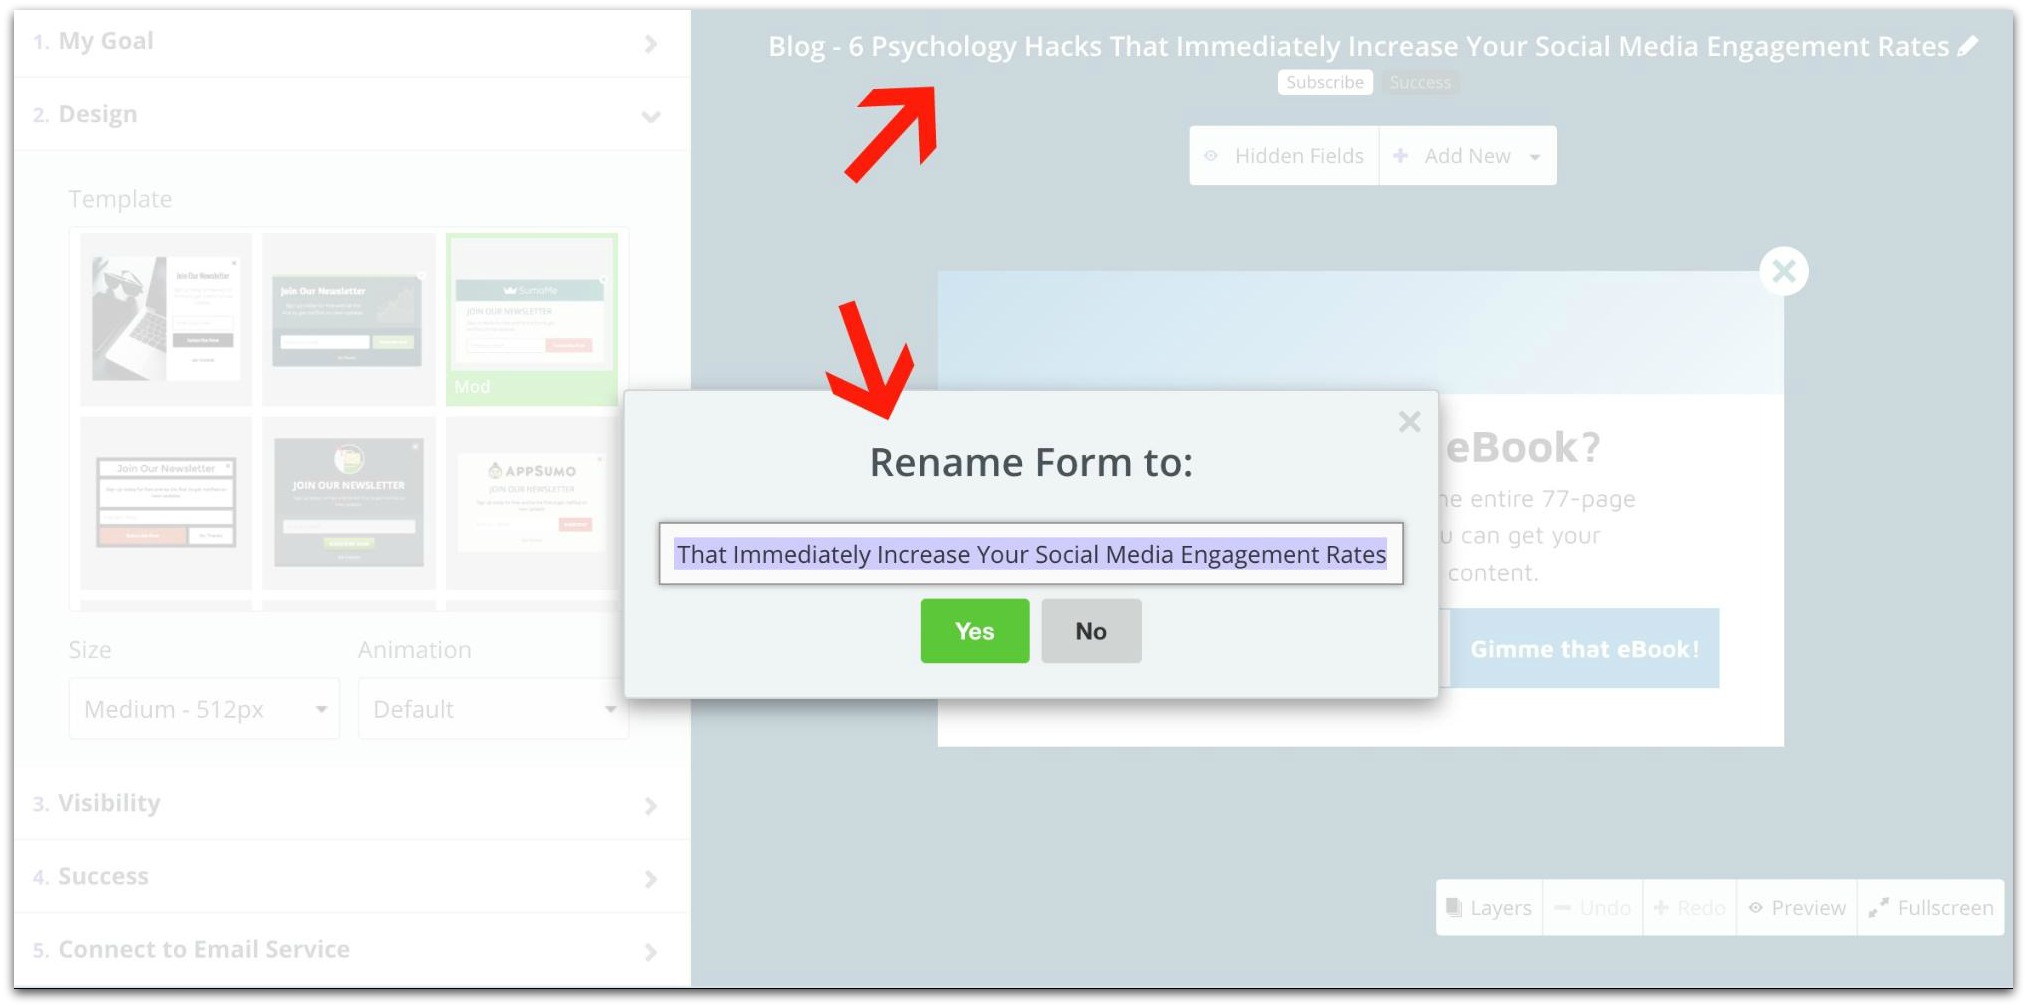
Instead of taking forever to think of a popup name (and changing it later anyways), we’re naming all your new popups by their headlines and date created.
This small change helps you get to creating popups faster. Plus, you can always change the popup’s name by clicking on the title at the top of your screen:

It’s a small touch that you’ll notice every time you create a popup.
Create a Popup in List Builder
Update #3: Auto Links in Auto Responder
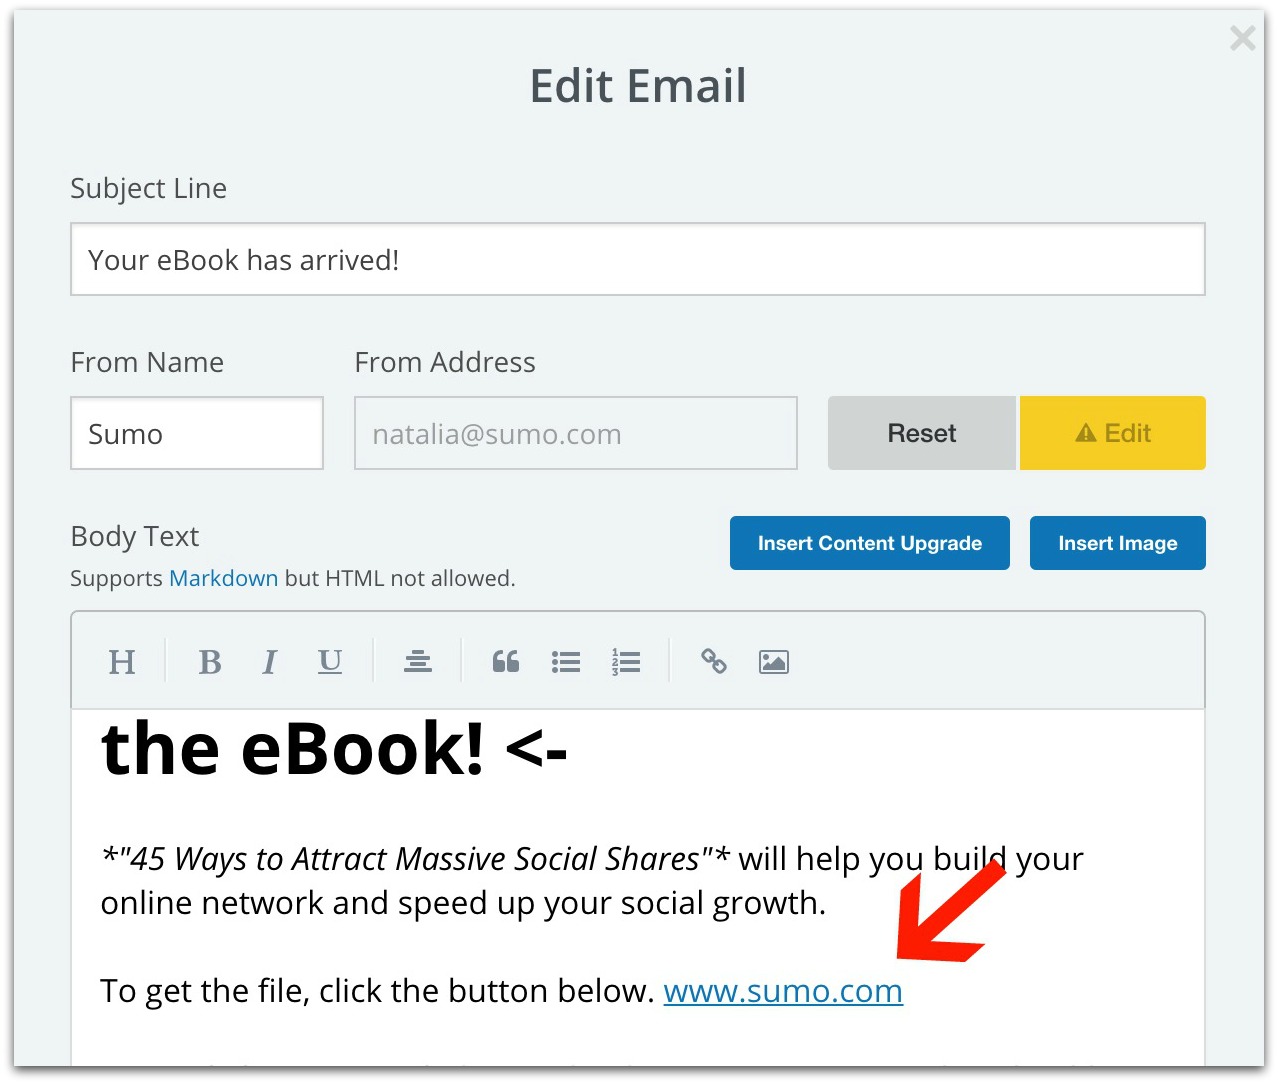
When you insert a link in Auto Responder, you have to highlight the words you want to link, click a button, insert the link and hit “Ok.” That’s a few too many steps for a link. So we made that process easier.
If you want to insert a link, you can A) Copy/paste the link directly into the email or B) Manually type the link in. Both options will automatically hyperlink the text:

Add all these updates up and you’re saving serious time when you create your popups.
Stay tuned for our next updates. You won’t believe how we’re going to change the way you talk to subscribers (it’s a legit game-changer).
Enjoy the new updates,
Sean “Coach” Bestor
Add A Comment
VIEW THE COMMENTS