Want to grow your email list with Facebook as easily and efficiently as possible?
With over 2 billion monthly active users, Facebook is within the top five most-visited sites in the world.[*]
That means it has eyeballs from virtually every demographic and psychographic you can imagine, making it a fantastic way to build your email list.
In today’s article, I teach you how to grow your email list with Facebook groups and ads. Let’s dive in!
Before You Begin: Create A Lead Magnet
If you don’t already have one, you need to create a lead magnet to attract email subscribers. This is a downloadable asset, such as a PDF, your visitors will get in exchange for their email.
There are so many options for this that we could write an entire article on it. (Actually, we have — check out our guide to lead magnets.)
For now, I’ll give you the down-and-dirty steps to create your lead magnet as fast as possible. Once you’ve gotten some experience with lead magnets, feel free to go back to the article linked above and tweak things for higher conversion rates.
First, decide on your offer. Here are some options:
E-book
Checklist
PDF
Worksheet
To keep things super simple, let’s say you’re making a one-page checklist.
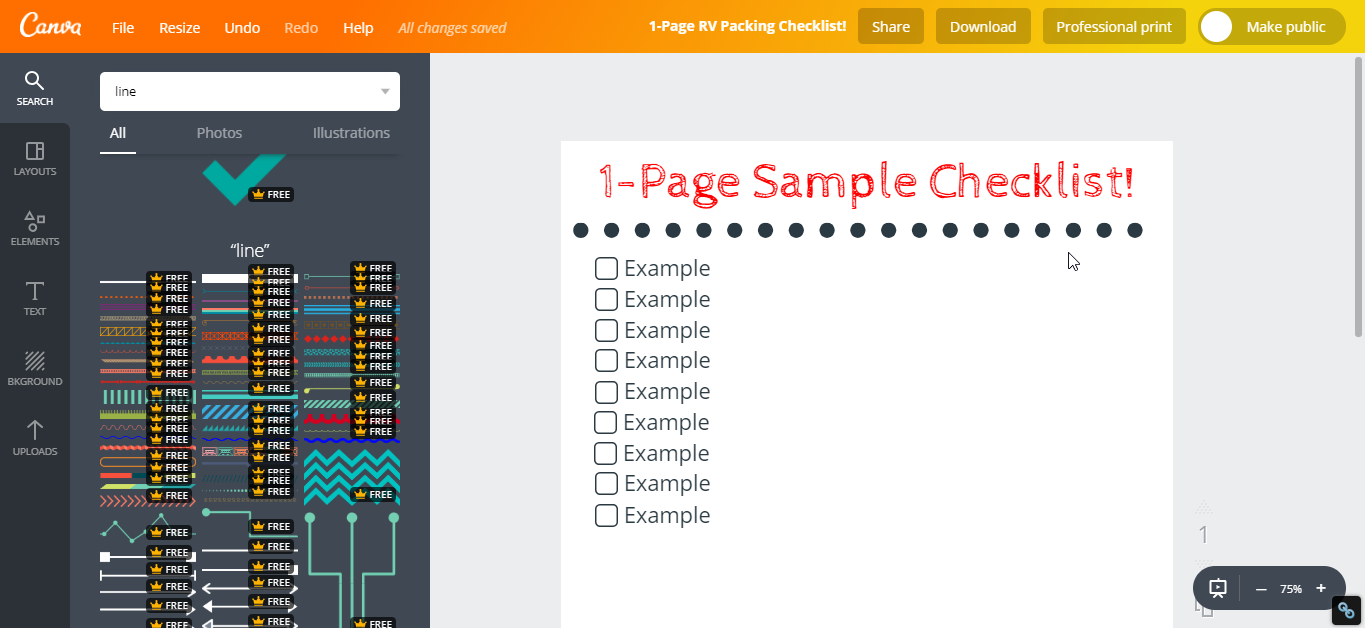
Personally, I’d go to Google Docs, write my checklist, then use Canva to put the content into a great-looking format.
Once you’ve created your lead magnet, it’s time to set up your landing page where you’ll send ad traffic.
This can be a super-simple page with a form. Use whatever tool you're comfortable with — I prefer Thrive Architect, but Leadpages, Instapage, Unbounce, or even a WordPress page using a form plugin will work.
AppSumo use lead magnets to get thousands of email signups, and recommend it for people who want to get their first 1,000 email subscribers fast.
Growing Your Email List With Facebook Ads
Ads are a fantastic way to grow your email list with Facebook. However, it’s easy to throw up some ads that fail miserably, and waste your ad spend.
Don’t worry — I’ll teach you how to run a smooth ad.
Facebook ads require no prior experience in advertising and no audience. All you need is some cash and (good) step-by-step training.
Before we get into growing your email list this way, you need your business's Facebook page connected to your Facebook Business Manager account.[*]
Then add (or create) your ad account.[*]
So let’s do it!
Step 1: Set up your Facebook ads.
Go to Facebook Ads Manager to create your ad.[*]
Select “Conversions” as your ad objective, name your campaign, then click next.
Pro Tip: You can create a custom audience with just your current customers, then add that custom audience as an exclusion from your ads so you’re not advertising to people who have already bought from you.[*]
You'll name your ad set then create a new pixel conversion event for your landing page. Don’t have a Facebook pixel set up? Watch this guide:
Finally, define the audience you’ll show your ad to. This is the trickiest part to get right with your Facebook ads but also the most important, since having a well-defined audience will decrease your cost-per-click.
There are lots of ways to define audiences. But the two easiest for our purposes are the following:
A. Use the retargeting pixel.
Retargeting means showing your ads to people who have already visited your website. Since they’re familiar with your brand, they’re more likely to convert.
However, this option requires you to already have the Facebook pixel up and running for at least a few weeks. While you wait for the pixel to collect data, you can start on the second type of audience creation.
B. Steal your competitor’s audience.
If you don’t have a retargeting pixel, the next best option is to target your competitor’s audience.
This is done by targeting their Facebook page using the “Detailed Targeting” section.
For example, you can target Death Wish Coffee’s audience by simply typing their page in the form.

Feel free to target multiple competitors at the same time, and adjust the demographics to suit your needs.
You can also consider adding restrictions to further define your audience. This will vary greatly depending on your target market, but some ideas could be restricting to a certain age group or geographic region.
If I was running an ad for my RV checklist, I would restrict the age group to 25+ (since most RV owners are older than 30, plus a few stragglers in the 25-30 range).
I would also test restricting the ad to only people who own an RV — just keep in mind that Facebook doesn’t 100% know who owns or doesn’t own an RV, so you could severely limit your audience with a restriction like this.
Once you’ve defined a target audience, finish filling out the rest of the settings on this page (including setting your ad budget), then click “Continue”.
Step 2: Upload your ad creative.
Your ad creative — your copy and image — isn't quite as important as your targeting. But it's still important!
If you’re not a great copywriter, try writing something up and adding power words to it, such as:
Sale
Free
Best
Mind-blowing
Ignite
Fascinating
Supercharge
Let’s say you’re giving away a free checklist of items to take with you for an RV trip. Your copy might sound like this…
“Prepping for a thrilling adventure in your RV this summer? Click “Learn More” below to get your FREE RV prep checklist so you don’t forget anything!”
Notice the copy also tells you exactly what the next step is — clicking “Learn More”. The more obvious you can make the viewer's next step (your call to action), the better.
Pro tip: Try to use the same wording and graphics in your ad and landing page. Matching text/images like this avoids confusion and reduces friction.
Next, you’ll want a kick-ass graphic to advertise your lead magnet.
The easiest way to do this? Canva.
Head to your Canva account and choose the Facebook Ad template (it’s 1200 by 628 pixels). From here, you can choose one of the ready-made graphics or make your own from scratch.
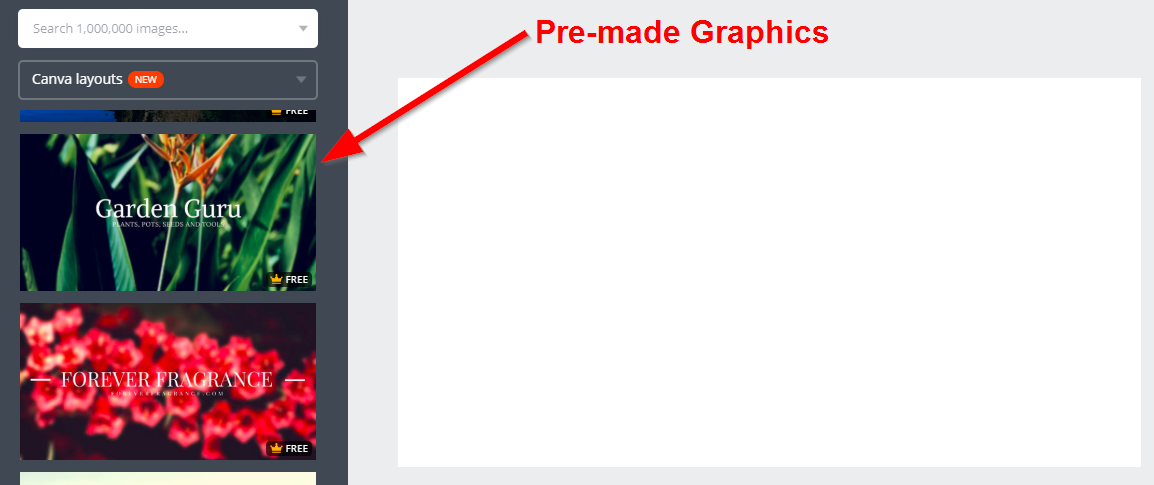
I recommend either picking a stock one and editing it or creating your own, because the stock templates aren’t usually made specifically for your business's needs.
Here are a few tips when creating your ad image:
Facebook Ads recommend no more than 20% text. Try to use as little text as possible.
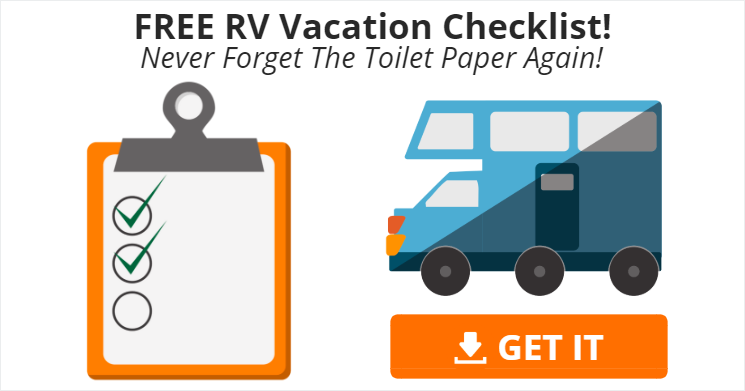
Include the word “FREE” and the main benefit, if you can. Mine might say “FREE RV Vacation Checklist!” and in smaller text, “Don’t forget your toilet paper ever again!”.
Add a call to action that looks like a button.
Use a picture of your product, a picture of the upgrade they will be getting for free, or a graphic that showcases the benefit of your upgrade.
Here’s one I quickly threw together to show you what it might look like:
Once you’ve made your graphic, upload it to your Facebook ad setup along with your copy, choose where to display it (just leave it to Facebook’s default options for now), and submit your ad!
It can take up to two days to be approved, but usually happens within a few minutes.
Want examples of real-world Facebook ad creative to grow your email list?
Click here to get our Facebook Ads Swipe File
Congratulations, you’re now able to grow your email list with Facebook ads!
Step 3: Monitor Your Results
Depending on your budget, you should run the ad from 48 hours to 2 weeks to see if it’s working. (A big spend, like $100+ per day, can be reviewed after 48 hours. Less than that can take up to 2 weeks to be shown to enough people.)
How can you tell if it’s working?
If you’re getting conversions, it’s working.
If you’re getting clicks but no conversions, there’s an issue with your landing page or your offer.
If you’re getting impressions but no clicks, there’s either an issue with your audience targeting or your ad itself (your copy, your image, your offer, or a combination of the three).
If your ad isn’t working, you’ll need to run some A/B tests to determine the reason. Depending on the issue you’re having (from the previous paragraph), either try a different offer, ad copy, or audience. Then run the ad again for another 48 hours to 2 weeks, depending on your budget.
If you don’t have money for ads or you want more ways to grow your email list, another great option is Facebook groups.
Leveraging Facebook Groups To Acquire More Emails
Facebook groups are another way to grow your email list without needing an existing Facebook fan base.
Anyone can join most Facebook groups; as long as you become a valuable member of that community, you can post things there that will help to build your list.
Note: When I say Facebook groups, I don’t mean starting your own Facebook group (although that can be a great way to grow your business in itself). Rather, I mean leveraging other people’s groups.
So let’s talk about how it’s done!
Step 1: Find High-Quality Facebook Groups
Since literally anyone can start a Facebook group for free, there are TONS of Facebook groups on nearly any topic. Finding them is easy. Finding high-quality groups is a bit more challenging.
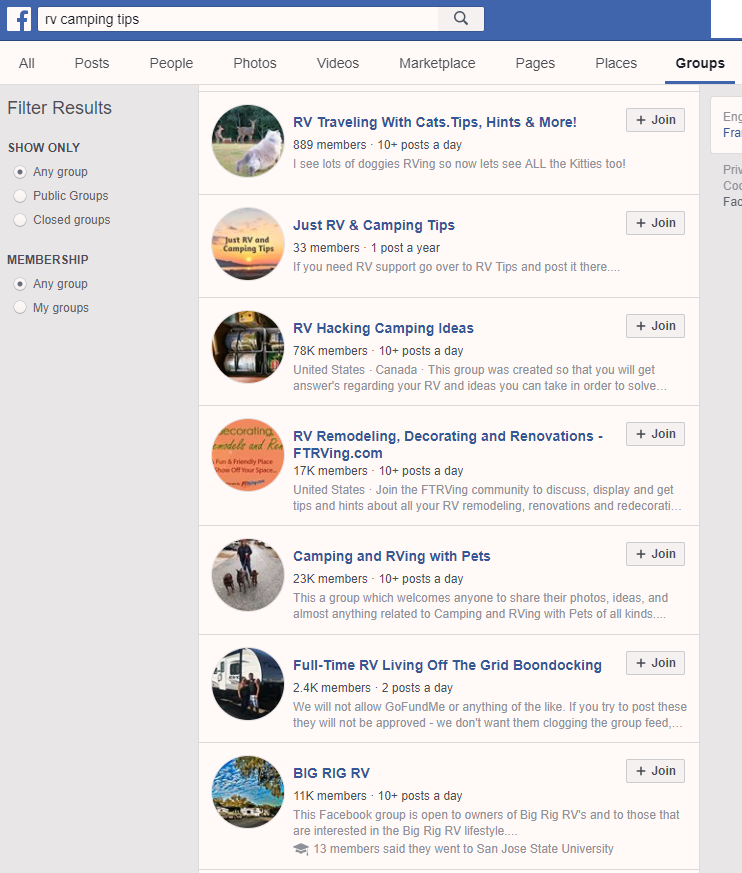
Of course, you can type a keyword into Facebook’s search bar and click “Groups” to browse thousands of groups.
You can get an idea of how active a group is by the “X posts a day”. Look for groups with the “10+ posts a day” tag, then dig deeper and look for these qualities:
High engagement. Lots of people comment on and share the posts.
Frequent posting. If the last post was two months ago, the group is probably dead.
Encouragement. Just because a group is relevant and active, doesn’t mean it’s a good place to market your business. Try to avoid groups with a lot of toxic people (people who are harsh, quick to judge things negatively, or downright rude). This will help you avoid getting ousted by the community if you share something they don’t like.
Once you find a promising group, before you join it and get invested, read the group rules (if there are any) to see what’s allowed. That way, if they have rules against sharing your content or even commenting with links, you don’t waste time becoming a part of the group.
One way to reduce this research is to ask your network (colleagues, friends, acquaintances, etc.) if they’re in any high-quality Facebook groups related to your niche. For example, I’m in a few invite-only Facebook groups for digital marketers.
Finally, you can also check out what groups your competitors have joined. Pages only recently gained the ability to join groups as a page, and the groups have to turn on the setting to allow pages to join the group, so it’s rare that this will work. But it’s worth a shot!
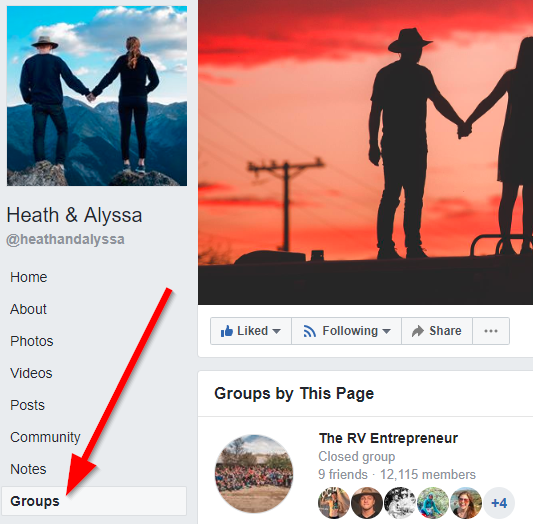
To see what groups your competitors are in, go to their Facebook page and click “Groups”. If this option isn’t there, it means that page hasn’t joined or created any groups yet.
If none of your friends or colleagues know of any and you can’t find some through your competitors, you’ll have to settle for the public groups. But that’s OK — they can still help you grow your email list.
Step 2: Become a Valued Member Of Society (Or At Least Of Your Group)
The fastest way to get ousted from your new group is to post your lead magnet without any prior engagement.
The second fastest way is to post it with barely any prior engagement.
If you’re going to join a Facebook group to grow your email list, you need to be willing to be in it for the long haul.
We’re talking dozens of posts and lots of free help for the other members before you even think about posting anything related to your business.
What do you do to get there?
Comment on other people’s posts. It can be helpful, supportive, or just a funny meme or GIF.
Post other people’s content (especially the group creators' content) and write something insightful about it, such as a key takeaway.
Befriend the group’s creators and reach out to them directly to see if there’s any way you can help them.
Here are a few examples of great Facebook posts/comments:
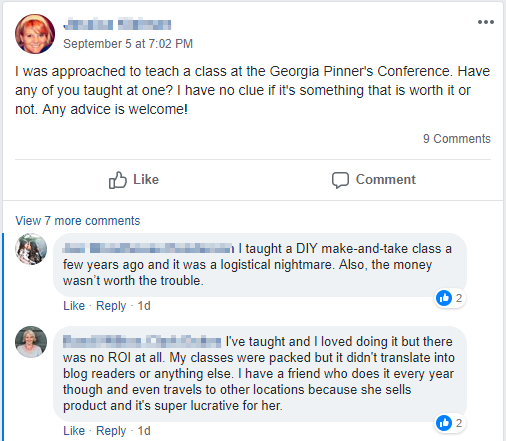
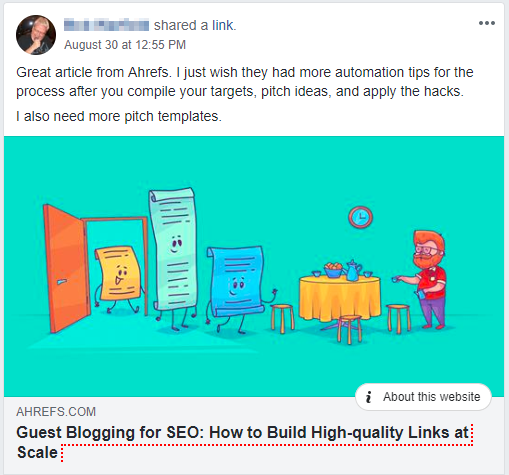
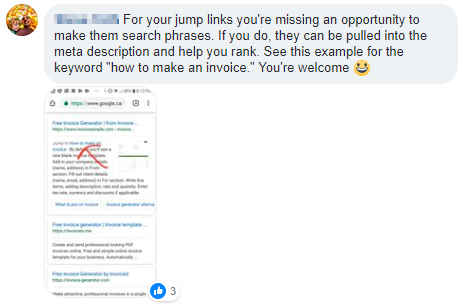
As you can see, your comments and posts don’t need to be long or complex; just offer some advice or an article you enjoyed once a day or at least a few times a week.
Step 3: Get Dem Emails
Once you’ve been around for a few weeks helping people out, it’s time for “the close.”
Reach out directly to the group owner or moderator and ask them if it’s OK if you post your lead magnet in the group. (Just don’t call it a “lead magnet”, of course!)
This was for a job ad, but the concept is the same:
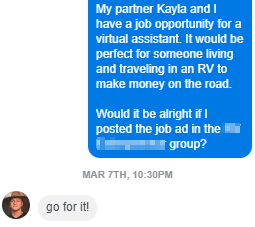
Most people are more than happy to let you post in their group, as long as they know you’ve been helpful and you ask nicely.
You might say something like this:
“Hey, [group owner]!
I’ve been in the [group name] group a while now, and I personally run [business name]. We recently created [lead magnet] to help [audience] achieve [result].
Here’s a link for you to check it out: [landing page URL]
Would it be OK if I shared it in the group?
Thanks! :)
[Name]”
Once you get the go-ahead, write up a helpful post and share your lead magnet. It’s that easy.
Get My Facebook Ads Swipe File
That’s it! These two methods will help you grow your email list with Facebook, even if you don’t have a large following or a huge budget.
These two methods work for every kind of business, from ecommerce to affiliate sites, consultants, software providers, you name it.
Want some Facebook ad examples with instructions for how to use them? Click the button below to get your Facebook Ads Swipe File, with three real-world examples.
Get The Facebook Ads Swipe File
The money is in the list. Facebook is an easy way to grow your list.


Comments