What's your revenue this week? How many sales are you making? Which traffic sources are driving the most revenue?
There’s so much to keep an eye on in an ecommerce business that it can be hard to keep on top of it all.
An ecommerce dashboard will bring all your key data into one place and keep your whole team on the same page while giving you a quick snapshot of your business. This means you can ensure you’re hitting targets and identifying new opportunities.
In this post, I’ll walk you through the importance of building an ecommerce dashboard, and how to build a dashboard of your own (for FREE) using Google Analytics.
Let’s get into it:
%(tableofcontents)
What Is An Ecommerce Dashboard?
An ecommerce dashboard is a hub for important business and performance data, enabling you to get a snapshot view of your business and dive into your most important data.
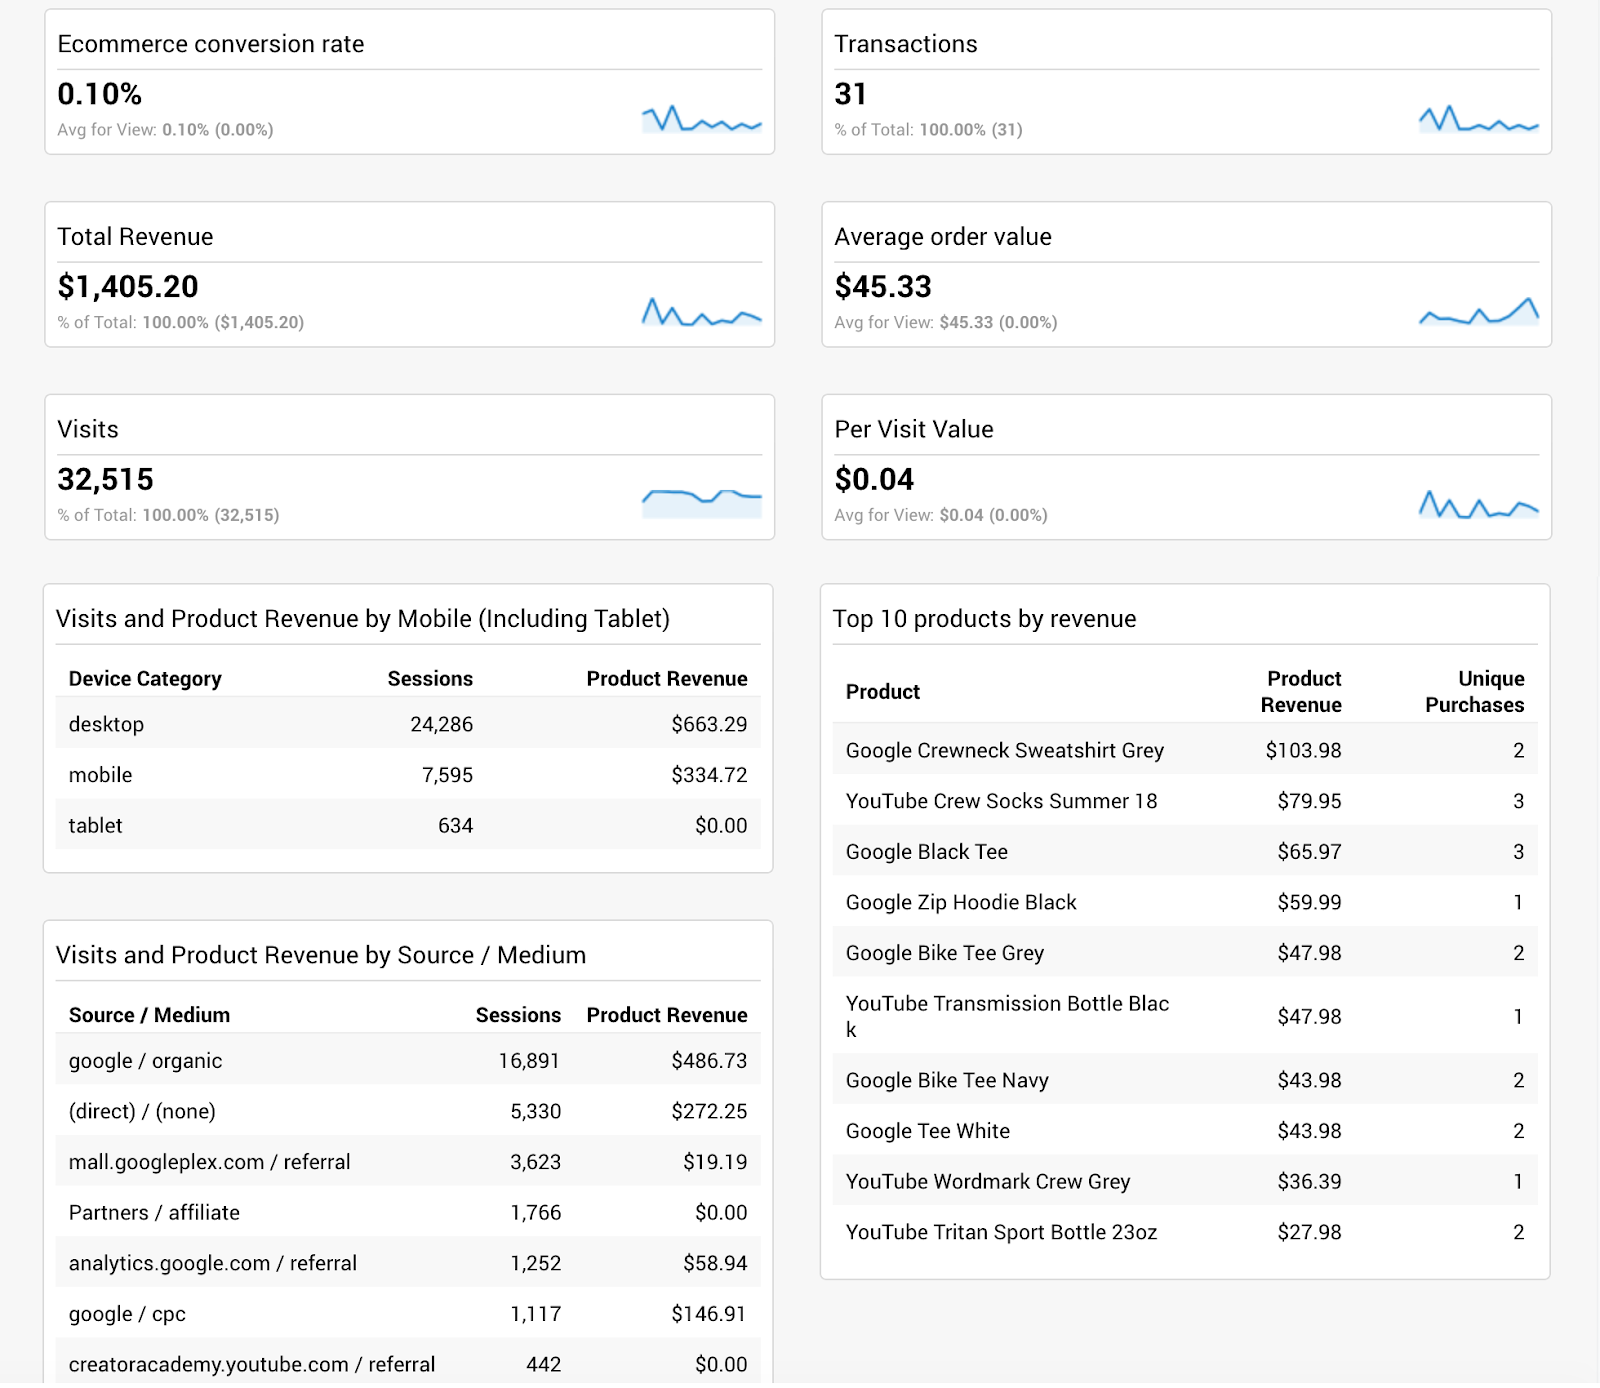
At a glance, the dashboard can show you everything you need to know about your online store, including:
-
How much traffic you’re getting (and where it’s coming from).
-
Your revenue and sales figures.
-
Your most valuable traffic sources.
Here’s an example dashboard:
What To Include In An Ecommerce Dashboard
To build a successful ecommerce business, you need to know what’s going on day to day. Understanding what’s happening helps you make the best decisions possible for your business.
Ultimately, what you include in your ecommerce dashboard depends on your business goals and what you want to accomplish with the data.
But as a starting point, it’s good to pay close attention to these two areas:
-
Traffic sources. Traffic is essential for any ecommerce business. By monitoring your traffic sources, you can see which channels drive the most visits and revenue. If traffic from Facebook converts higher than any other channel, consider a strategy to help you generate as much Facebook traffic as possible.
-
Revenue: This is an obvious one, but there are a ton of ways you can use revenue data in a dashboard. You could include overall revenue to give a snapshot of your business, or you could break down revenue by channel, product, and much more.
Creating Your Own Ecommerce Dashboard In Google Analytics
Google Analytics (GA) allows users to create custom dashboards, and is the perfect tool to create something unique to your business and goals.
The dashboards are made up of widgets to show you the metrics that matter most to your business. Each widget shows you a snippet of data relating to your ecommerce store, and you can use up to 12 widgets per dashboard.
Setting Up Your Ecommerce Dashboard
The first step is to create a new dashboard in your Google Analytics account.
Note: To do this you’ll need to have Collaborate, Edit or Manage Users permissions.
Open GA; under the Customization option on the left-side menu, select Dashboards.
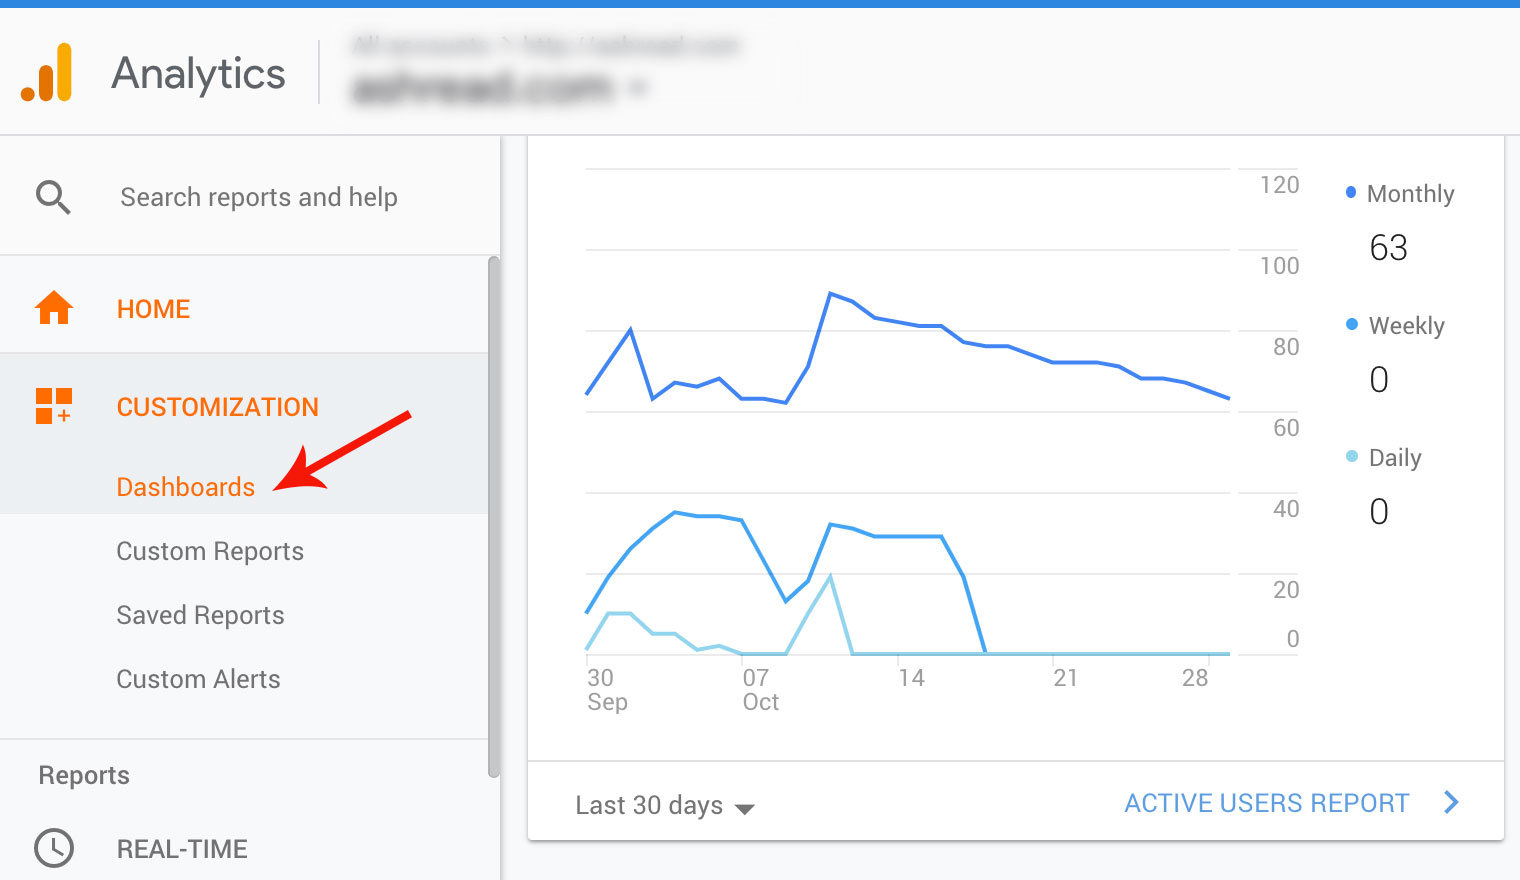
Now we’re going to create our own dashboard, based on Google Analytics official instructions.[*]
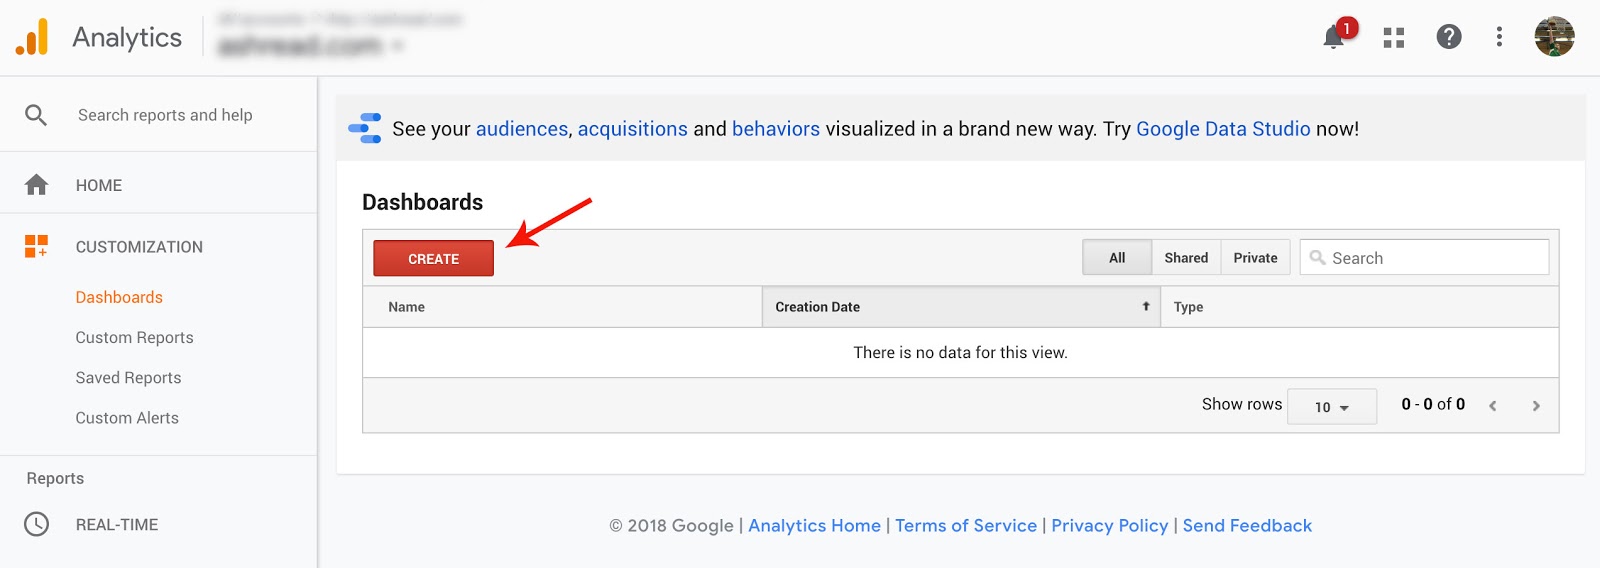
In the main panel, select Create.
Next, select Blank Canvas (no widgets) or a Starter Dashboard (GA default widget set). You can also import a dashboard from the Gallery — we’ll cover this option later in the post.
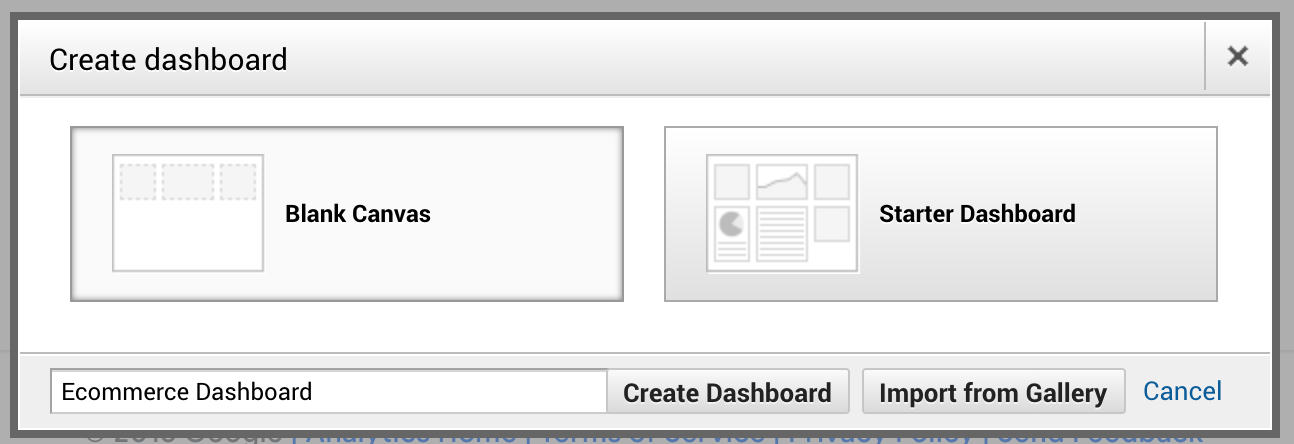
For this example, select the Blank Canvas option, then give your dashboard a title and click Create Dashboard.
Creating Widgets For Your Dashboard
Now your dashboard has been started and it’s time to add widgets.
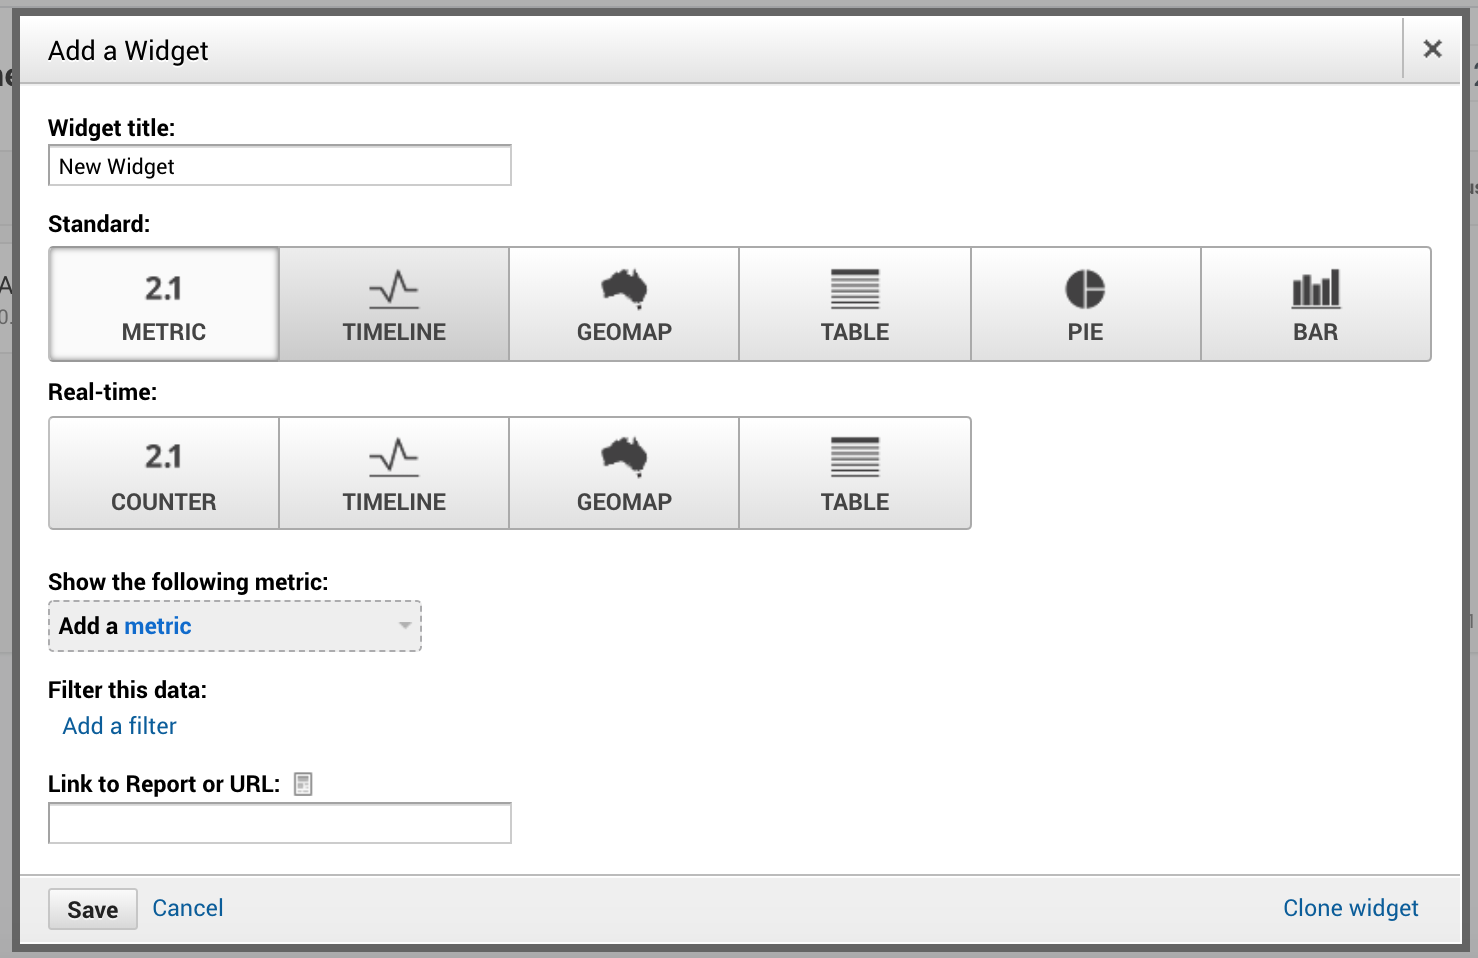
Google Analytics offers six types of widgets:
-
Metric: Displays a simple text report of one selected metric.

-
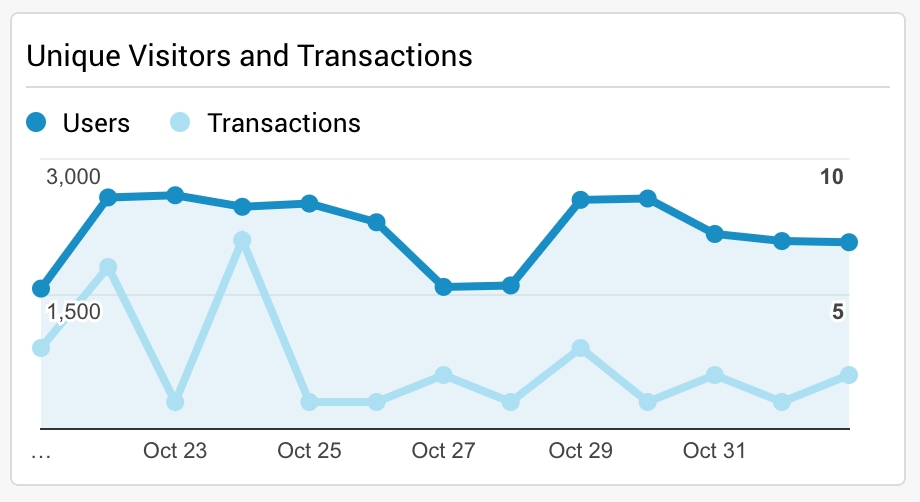
Timeline: Displays a graph of a selected metric over time. You can compare this to a secondary metric.
-
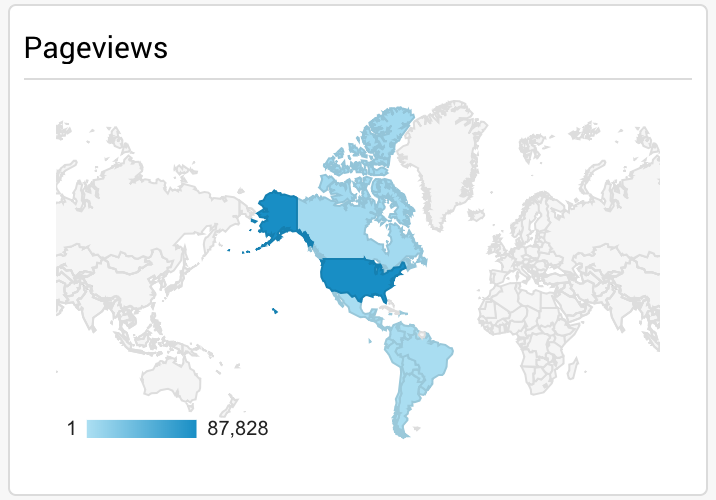
Geomap: Displays a map of the selected region, with the specified metric plotted on the map. Hover over the map to see the actual values.
-
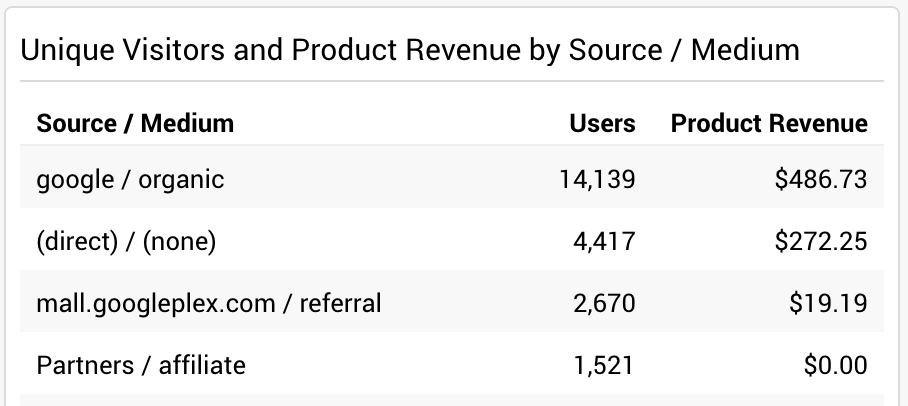
Table: Displays up to two metrics describing the selected dimension, laid out in a tabular format.
-
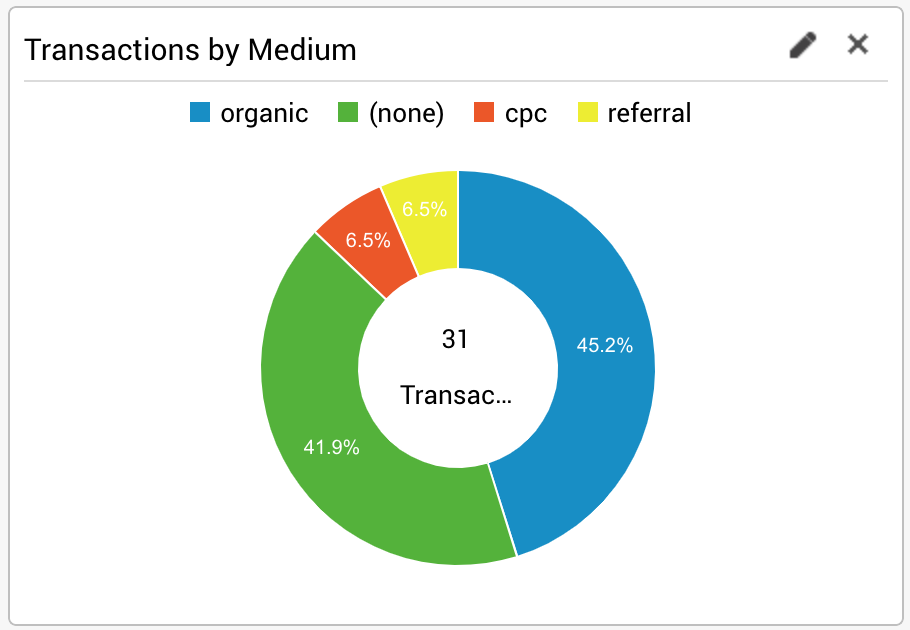
Pie: Displays a pie chart of the selected metric grouped by a dimension. Hover over a slice to see the specific values.
-
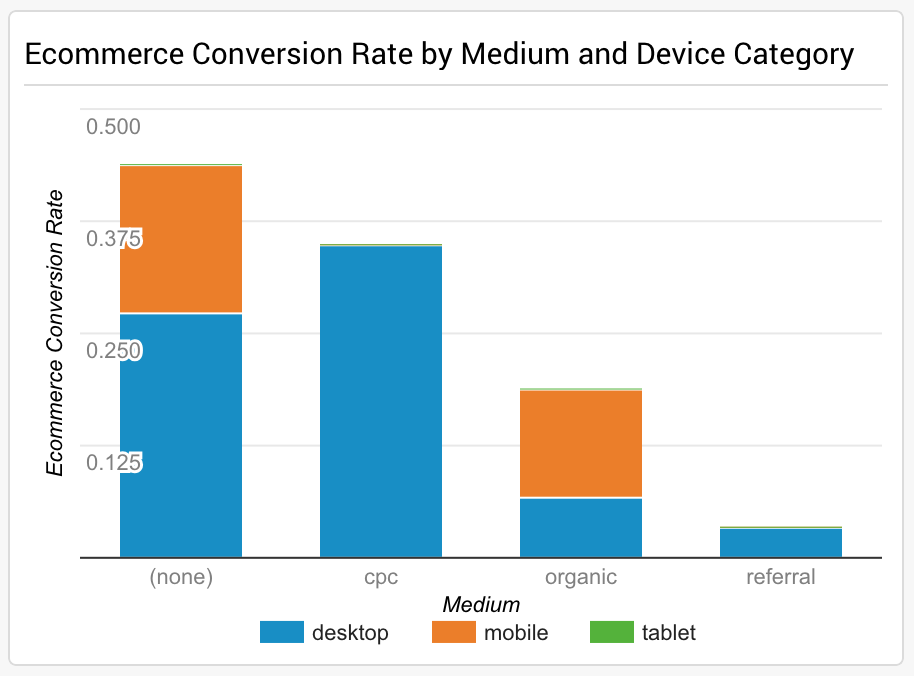
Bar: Displays a bar chart of the selected metric grouped by up to two dimensions. Hover over a bar to see the specific values.
You can select Standard or Real-time widgets for your dashboard:

Standard widgets refresh every 15-30 minutes, while Real-time widgets are constantly updating, but can only show you Active User data (the number of unique users currently on your site).
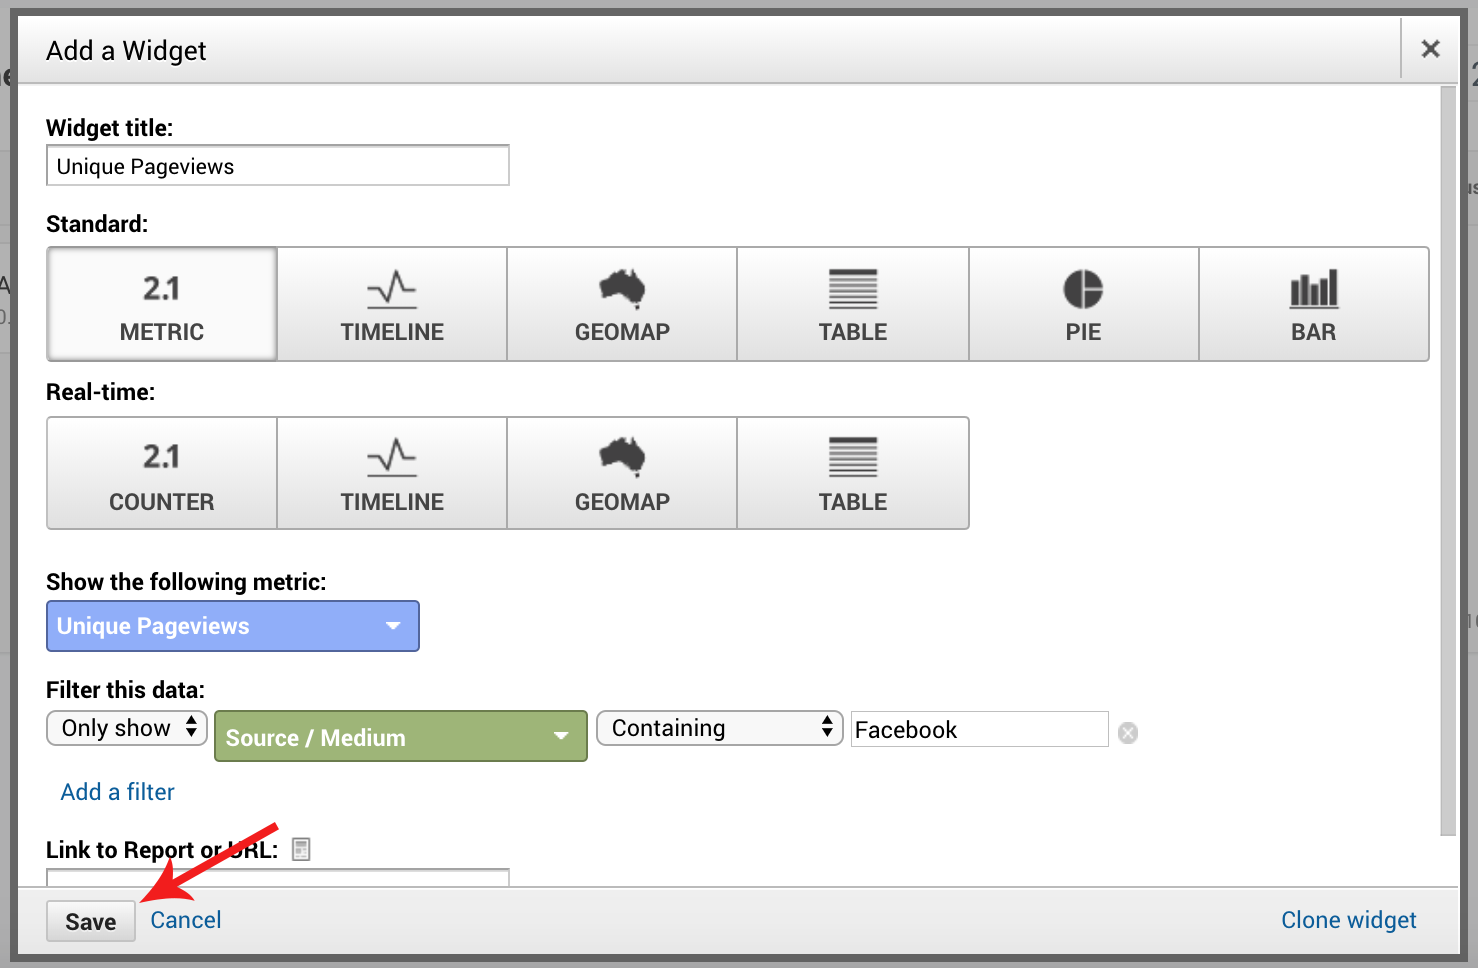
Once you’ve chosen your widget type, select the metric to display in that widget:

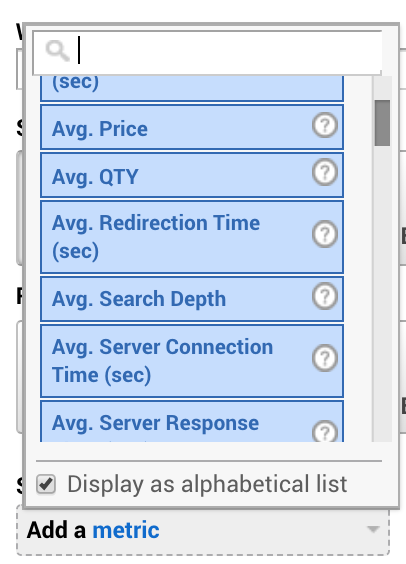
Click the metric box and you’ll see a long list of available data.
You can also search for a metric using a keyword:
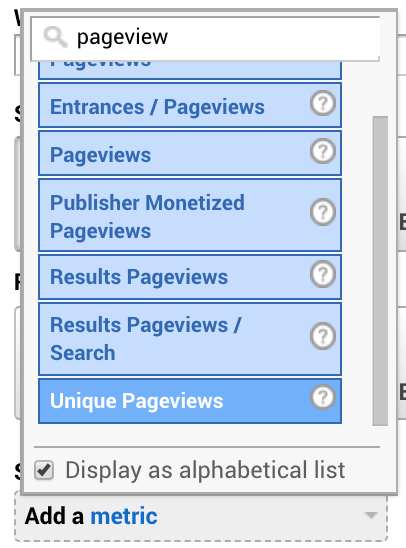
For this example, I’ll use Unique Pageviews.

Next, you can choose to filter your data. So if I wanted to display only Unique Pageviews from Facebook, I might select:

Once you’re happy with your widget, click Save, and it’ll be added to your dashboard.
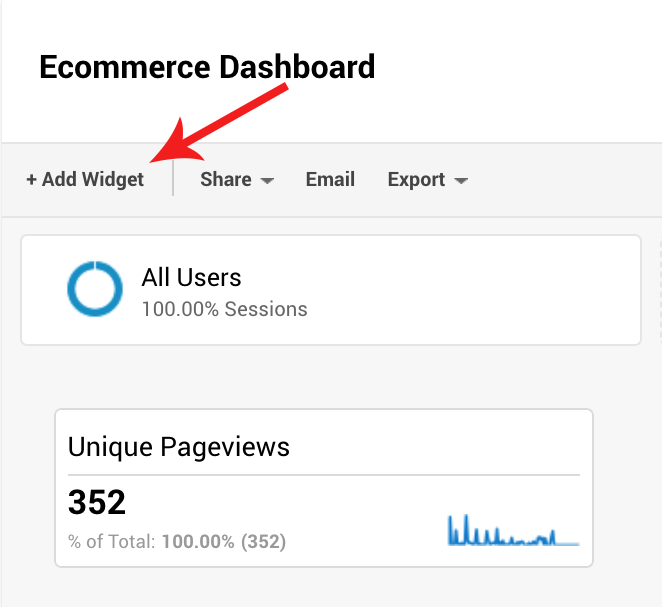
To add more widgets to your dashboard, click the + Add Widget button:
Adding Revenue Data To Your Dashboard
As an ecommerce business, it’s important to display revenue data within your Google Analytics dashboard to give you a true snapshot of business performance.
However, before you can view this data in your dashboard, you need to ensure your revenue data is connected to GA.
Here’s how to do this:
Connecting Shopify Data
If you use Shopify to manage your ecommerce store, integrating with GA is incredibly simple.
The first step is to add your Google Analytics code to your Shopify store. To do this, go to Shopify, select Online Store from the left-side menu then select Preferences.
Now you’ll see a space to add your Google Analytics code:

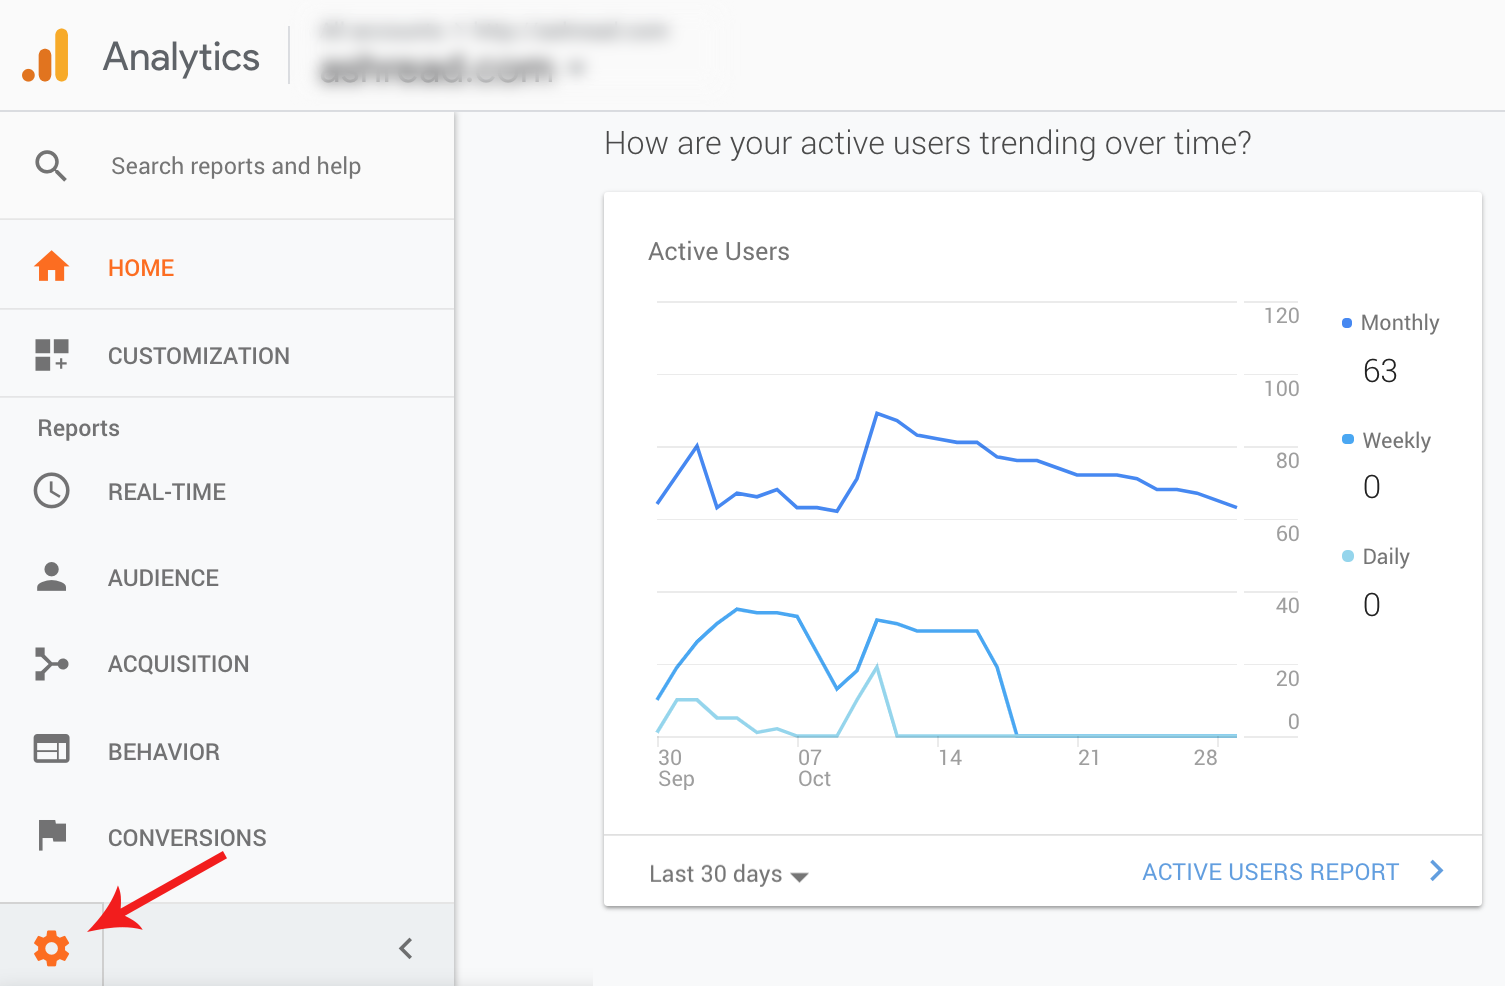
Next, you’ll need to head to Google Analytics and click the Admin button (next to the Gears icon) in the bottom-left corner.
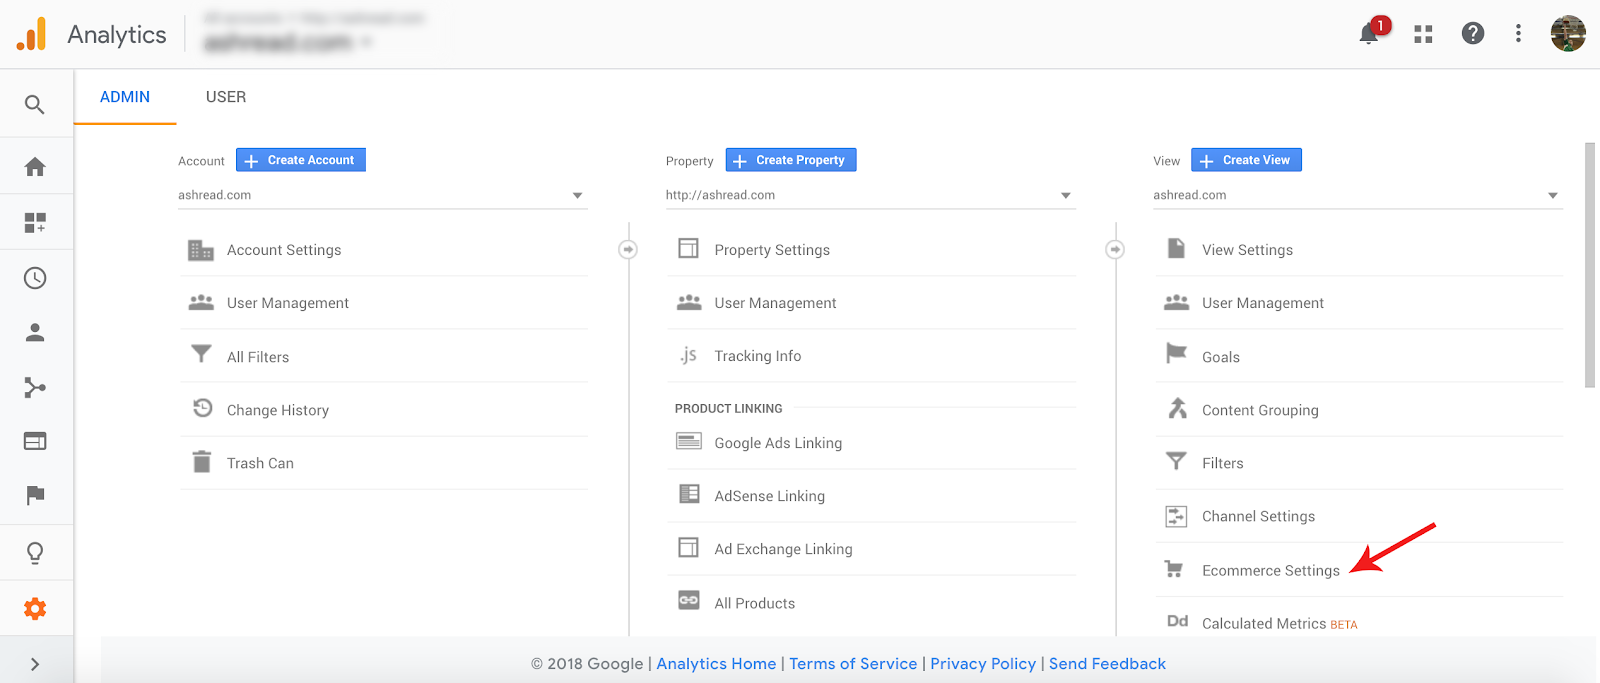
In the View menu (the third column), select Ecommerce Settings.
Finally, switch the Enable Ecommerce toggle to On.

And that’s it. Your revenue data is connected to Google Analytics.
Note: This is what Shopify calls ‘Basic’ ecommerce tracking — your transaction and revenue data will now be passed from Shopify to GA.[*]
Connecting Other Ecommerce Provider Data
If your ecommerce store isn’t running on Shopify, check the documentation from your provider to see if they have any integrations. If not, you might need a developer to install the Google Analytics Web Tracking code on your site.[*]
Enhancing Your Dashboard With Revenue-Related Widgets
Now that you’ve connected GA to your ecommerce site, it’s time to add revenue data to your dashboard. This is where your dashboard levels up and becomes a goldmine for your business.
To add your first revenue-related widget to your dashboard, click the + Add Widget button at the top of your dashboard, then choose the type of widget you’d like to add (Metric, Timeline, Geomap, etc.):

Then in the Add a metric drop-down menu (all widget types give you the option to Add a metric), search for Revenue, and you’ll see a bunch of revenue metrics you can add to your dashboard:
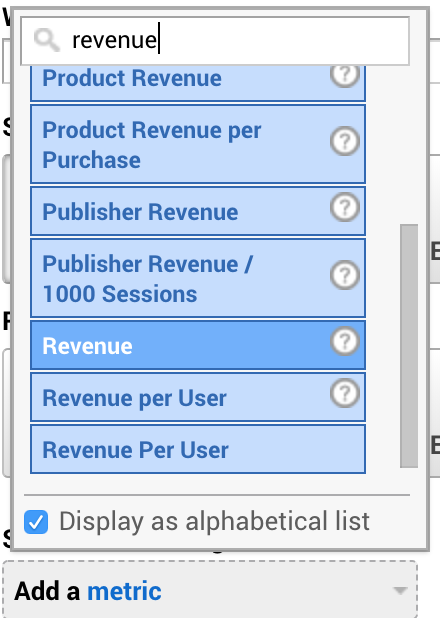
A few of the most important and common metrics for ecommerce dashboards include:
-
Revenue: The total revenue from your web ecommerce store.
-
Revenue per User: Average revenue per unique user (your revenue divided by the number of unique visitors).
-
Transactions: The number of completed purchases on your site.
-
Ecommerce Conversion Rate: The percentage of sessions that resulted in an ecommerce transaction.
-
Average Order Value: Average value of transactions.
-
Product revenue: Shows you the revenue generated by individual products or overall product sales on your ecommerce store.
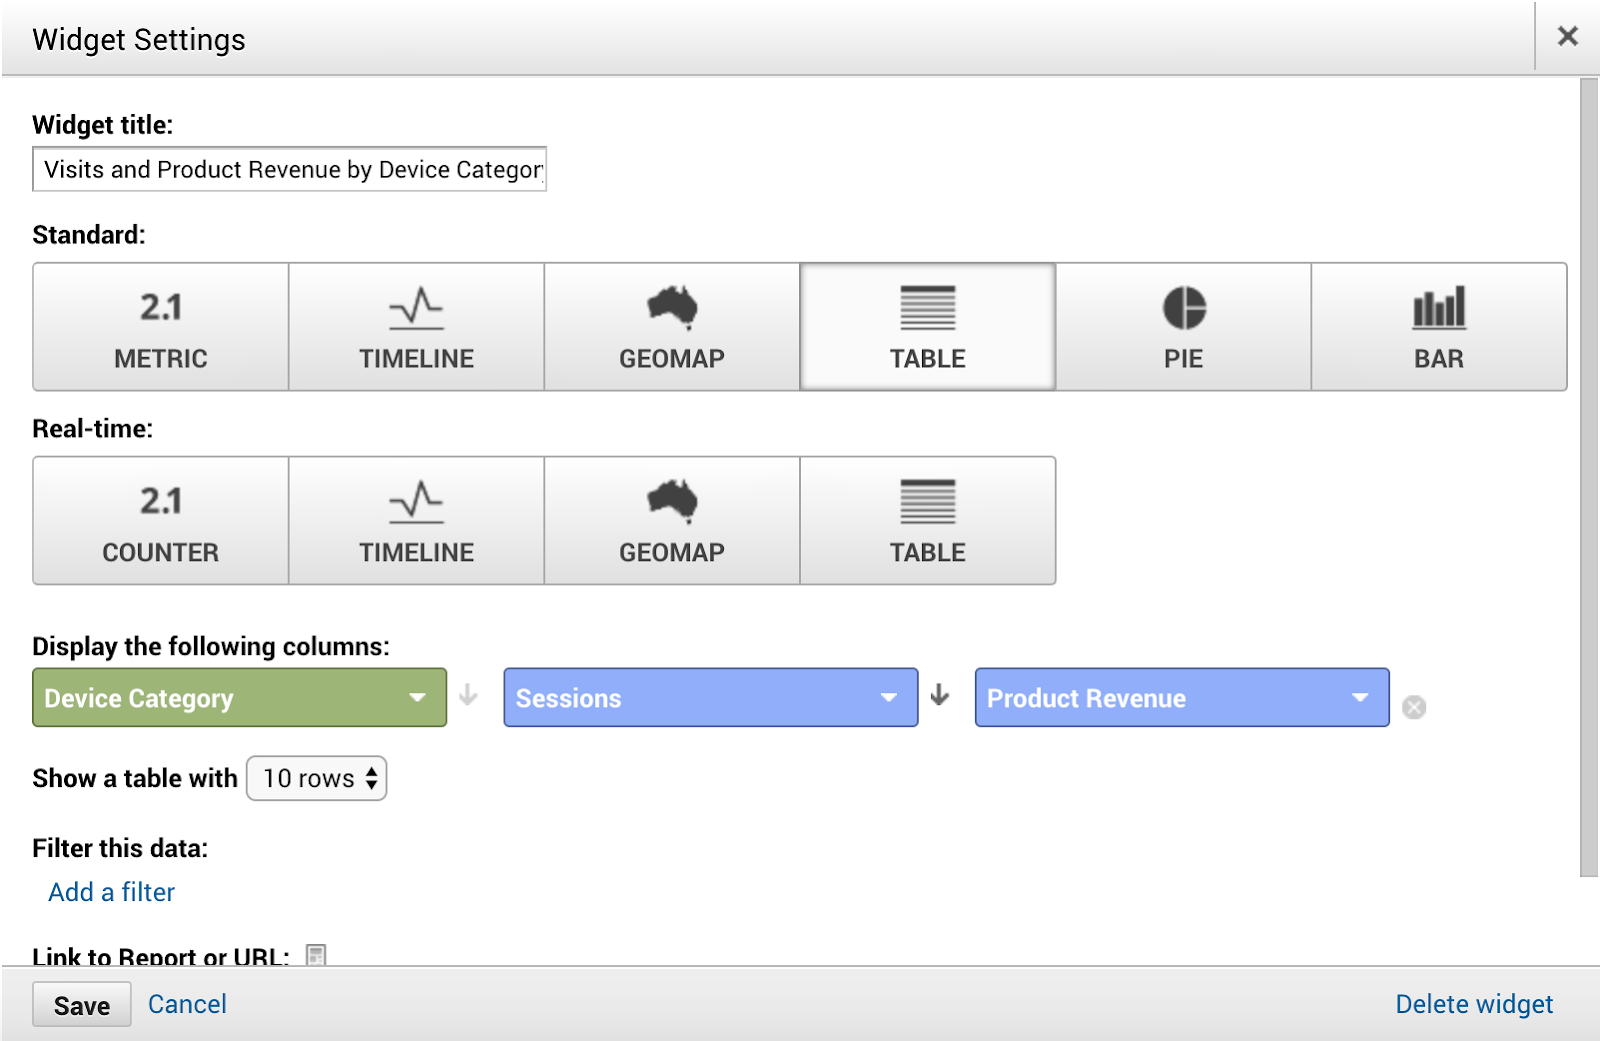
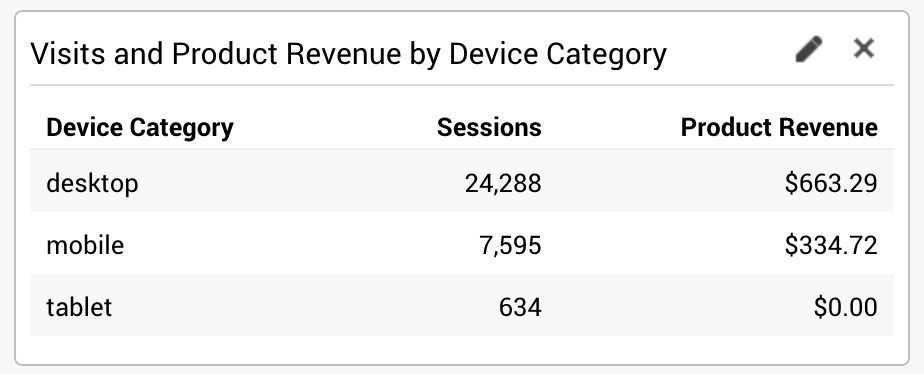
You can also build out more complex widgets using multiple pieces of data. To break down your product revenue by device used (showing how much revenue you’re making from purchases on desktop, tablet, and mobile), you could use a Table widget.
Here are the options you’d select to create this widget:
And here’s what that widget looks like within a dashboard:
Tip: If you’re just getting started with dashboards, experiment with different widget types, data and filters until you find what works for you and helps you to build the most useful dashboard for your business.
Another great way to get started with ecommerce dashboards is to use templates.
5 Ecommerce Dashboard Templates You Can Use Instantly
Google’s Analytics Solutions Gallery features over 5,200 ecommerce dashboards you can connect with your Google Analytics data in just a couple of clicks.
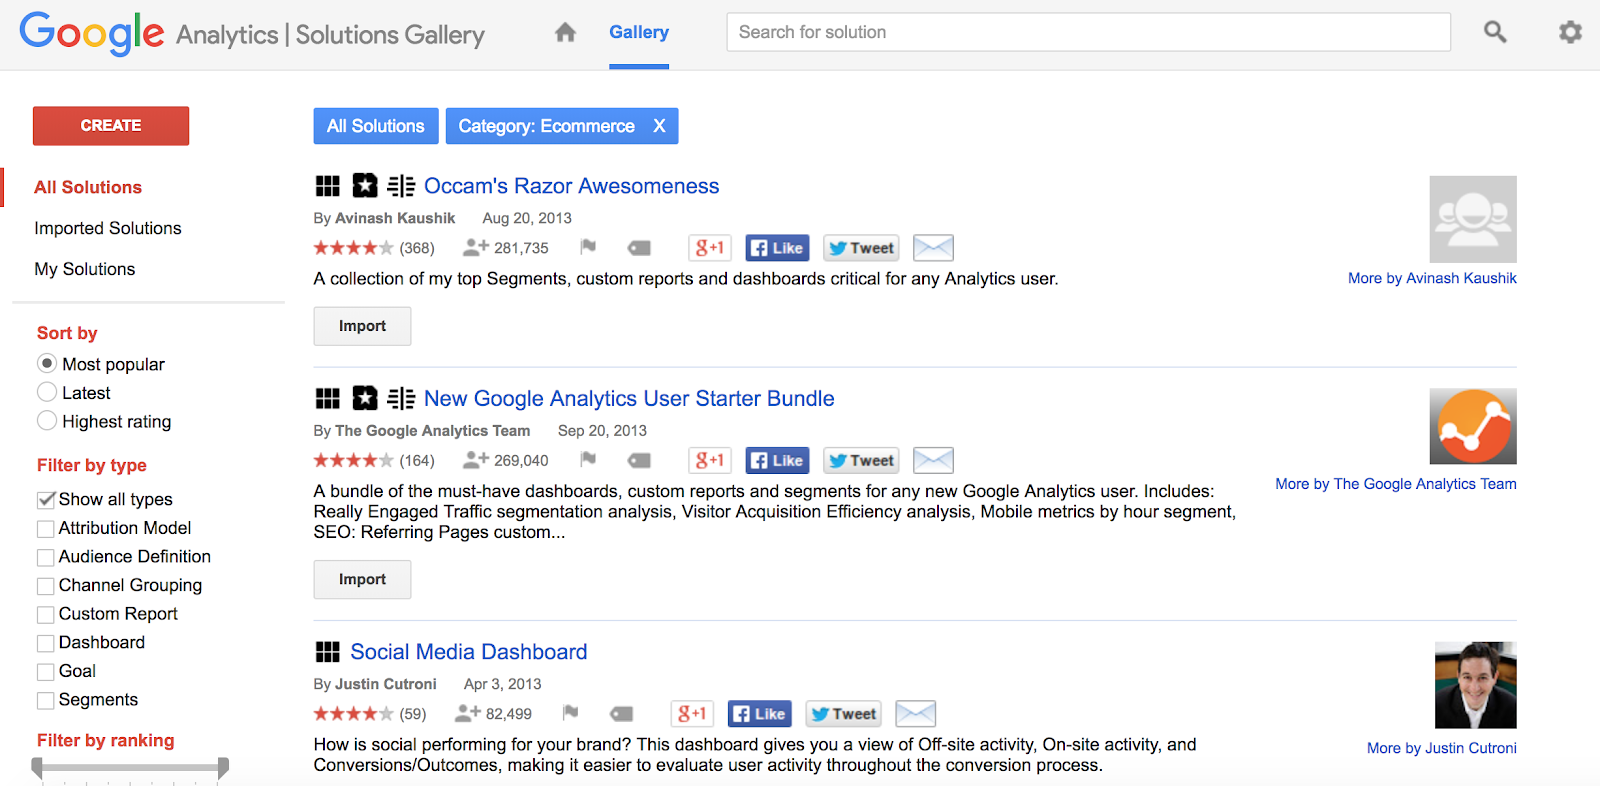
Here are five of the best ecommerce dashboards available in the Google Analytics Solutions Gallery.
1. All-in-one Ecommerce Dashboard
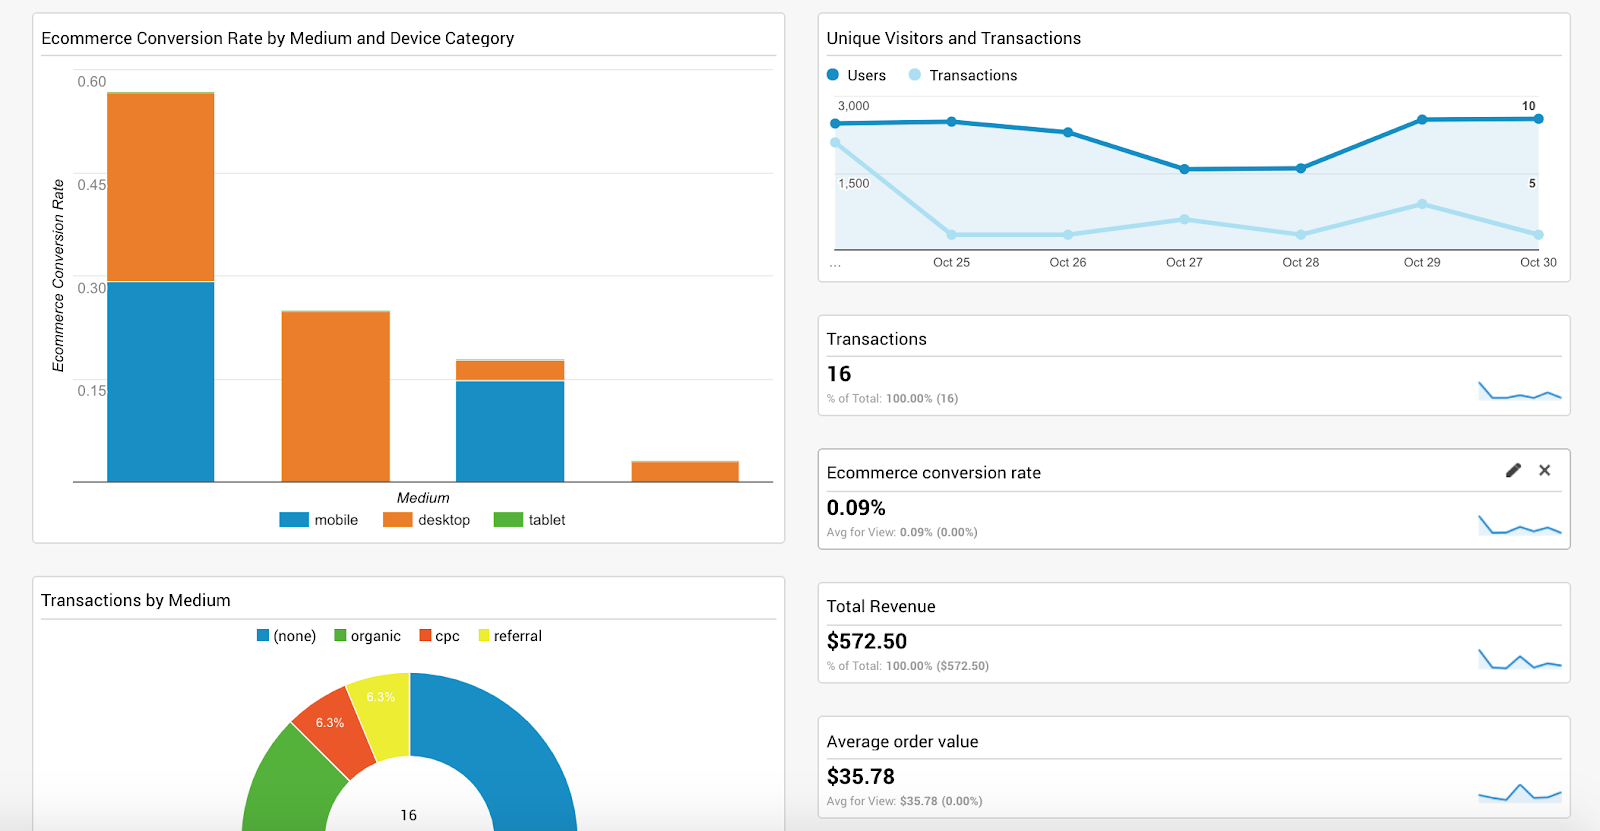
This dashboard gives you a snapshot of key data relating to your business using simple graphs and highlighting important revenue data. This dashboard shows:
-
Number of transactions over a chosen period of time
-
How visitors and transactions compare.
-
Total revenue, conversion rate, and average order value.
Check out and import the All-in-one Ecommerce Dashboard here.
2. Ecommerce SEO Dashboard
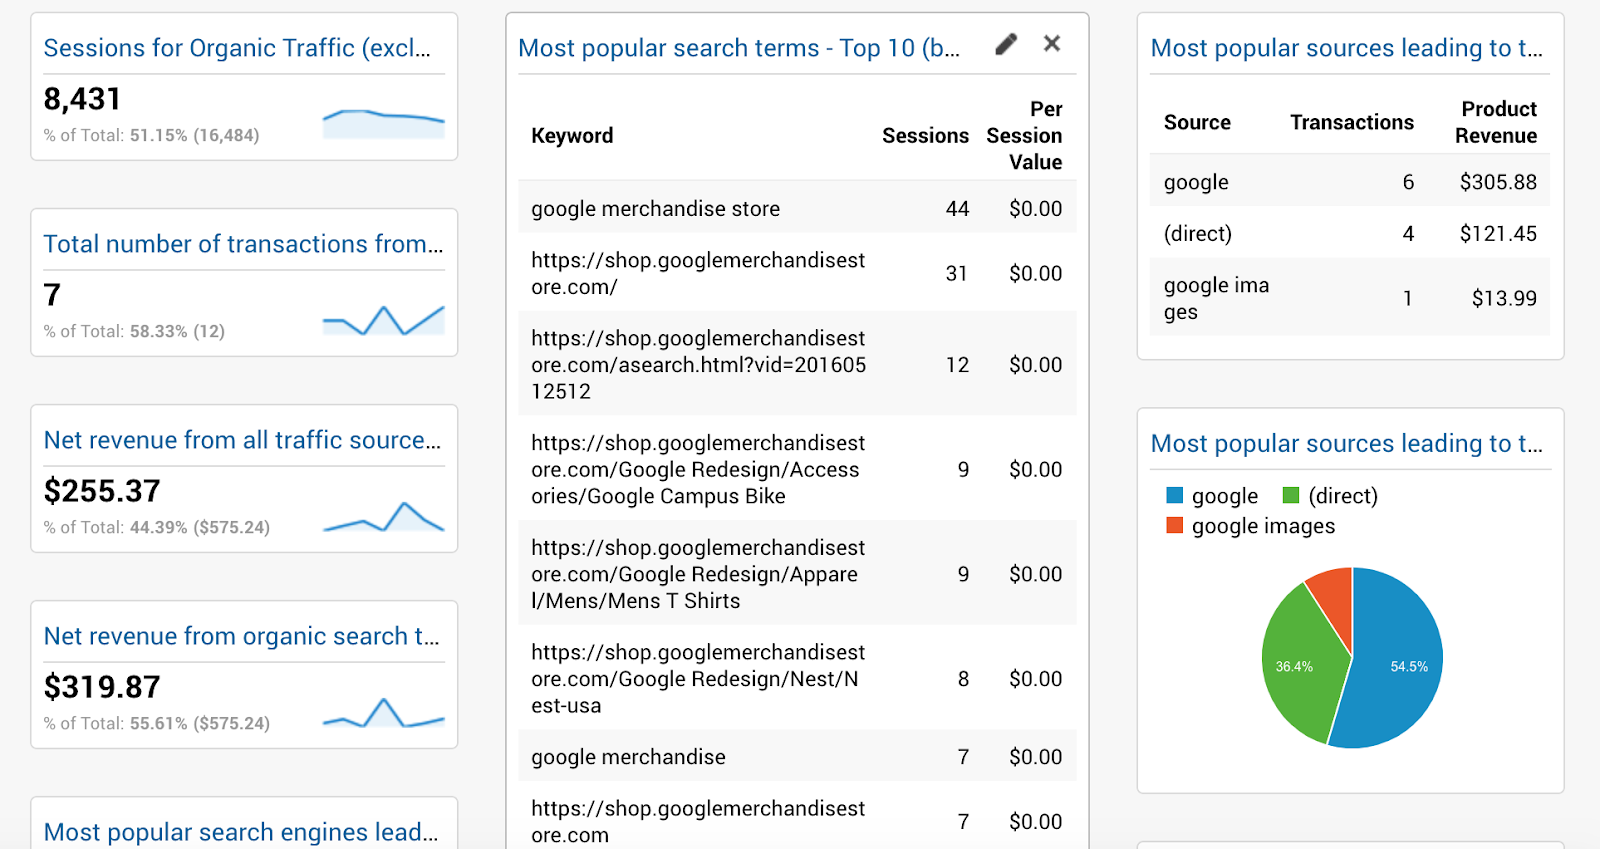
This ecommerce dashboard is perfect if you’re looking for an in-depth breakdown of how SEO affects your store. This dashboard shows:
-
Your net revenue from organic search.
-
The most viewed pages from search.
-
Total traffic generated from search.
Check out and import the Ecommerce SEO Dashboard here.
3. Mobile Ecommerce Dashboard
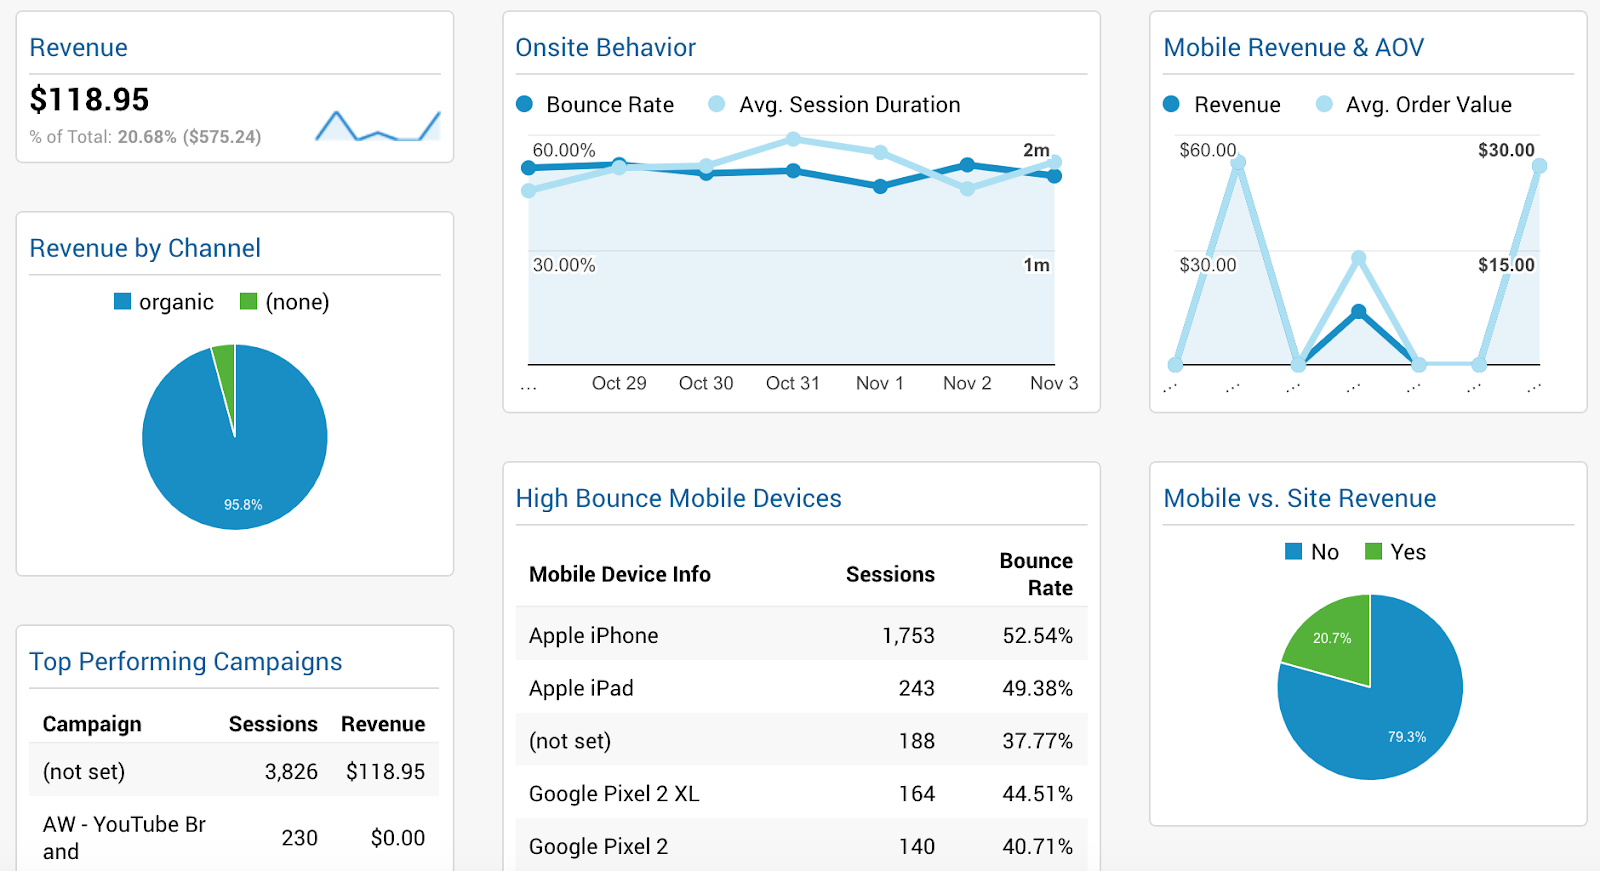
This dashboard makes it simple to understand how mobile visitors interact with your site and how much revenue mobile visitors generate for your business. This dashboard shows:
-
How much of your site’s revenue is generated by mobile.
-
The most popular mobile devices and the bounce rates for each device.
-
Mobile average order value.
Check out and import the Mobile Ecommerce Dashboard here.
4. Ecommerce For Decision Makers
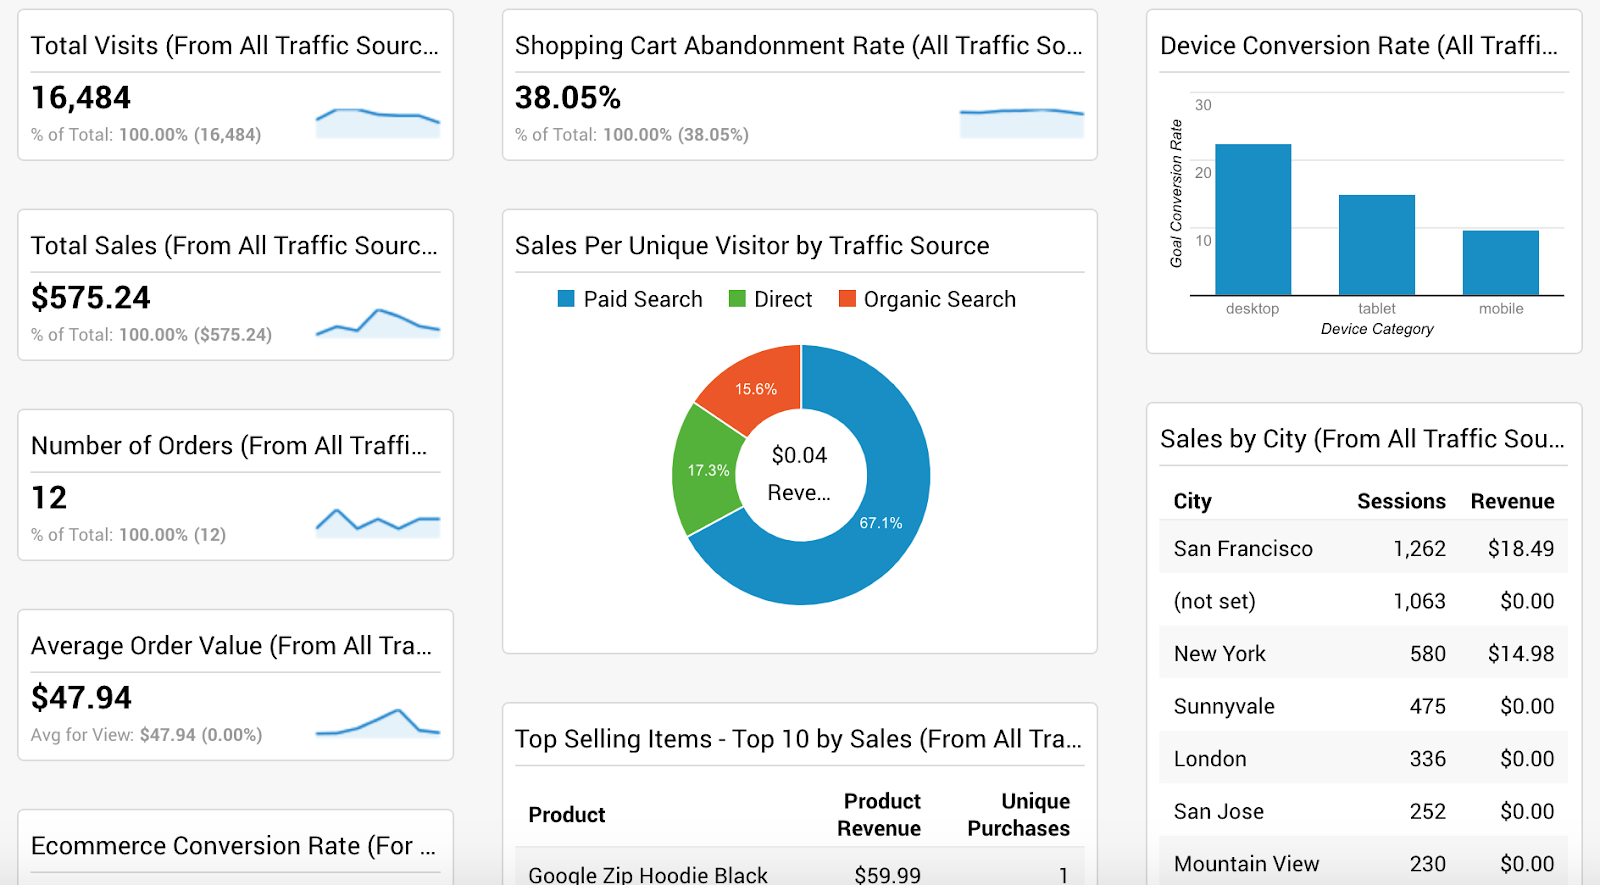
This dashboard gives ecommerce business owners and decision makers a clear and uncluttered overview of the data that matters most to their store. This dashboard shows:
-
Top-selling items
-
Sales by city.
-
Average order value, revenue, and total visits.
-
Cart abandonment rate.
-
Device conversion rate.
Check out and import the Ecommerce For Decision Makers dashboard here.
5. Social Media Dashboard
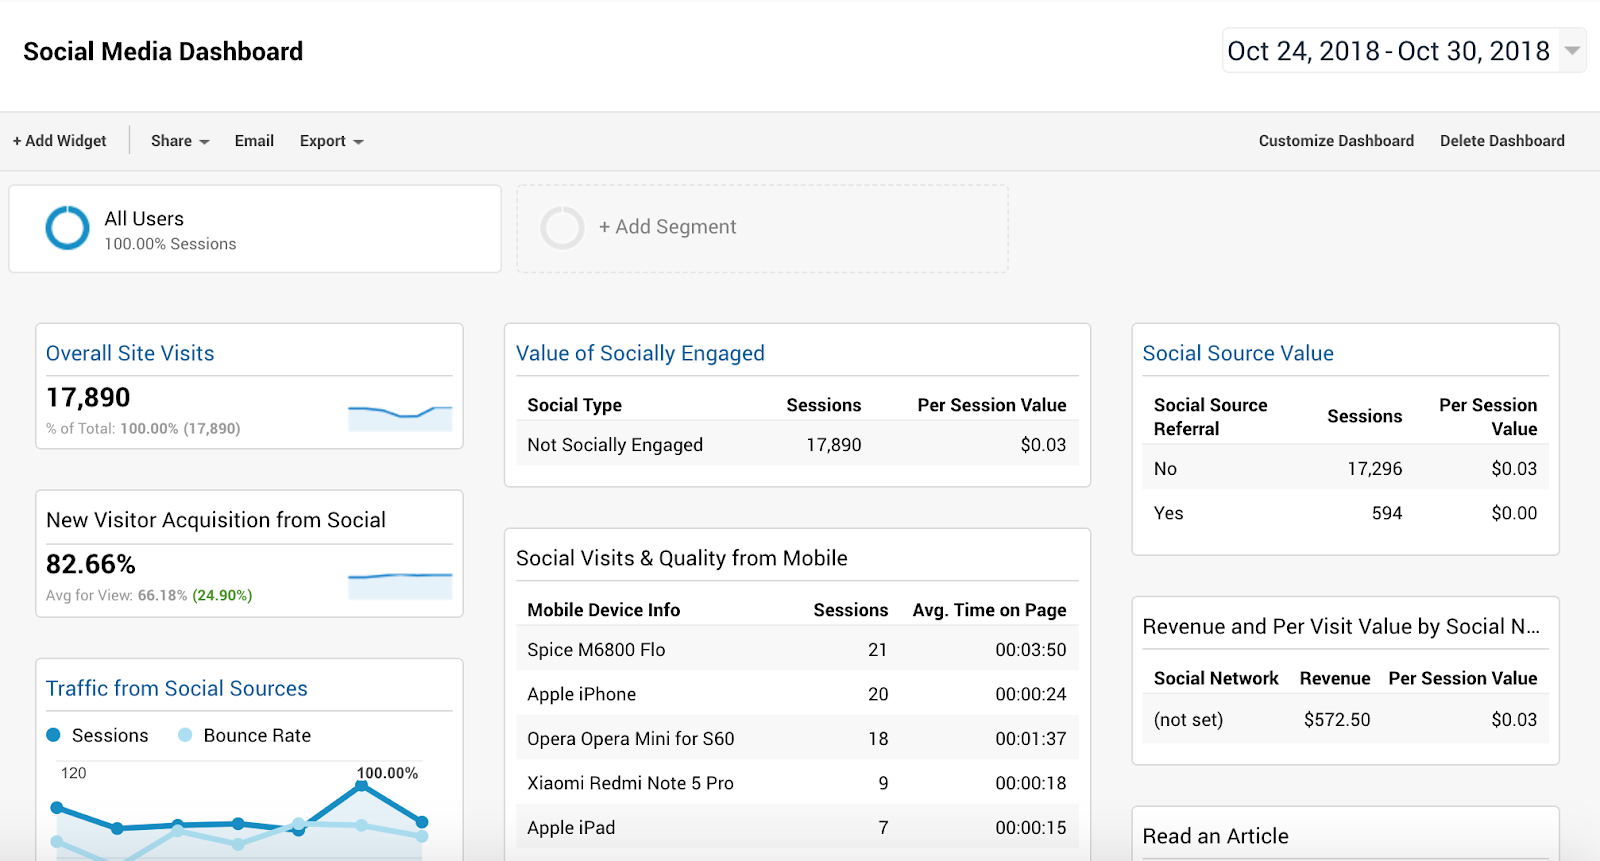
This Social Media Dashboard by Justin Cutroni helps you to understand exactly how social media traffic is helping your business. This dashboard shows:
-
Visits from social media (including new visits).
-
Which social media sites send the most traffic to your store.
-
Total revenue and revenue per visit from social media site referrals.
Check out and import the Social Media dashboard here.
Now It’s Your Turn
Want to see more dashboard templates you can use to track ecommerce email marketing performance, hourly sales performance, and more?
Click the button below to get all 10 free dashboard templates you can start using with Google Analytics instantly.
10 Ecommerce Dashboard Templates
Don’t waste any more time wondering what’s happening with your business. Set up a dashboard today, and KNOW exactly what’s going on at all times.
Add A Comment
VIEW THE COMMENTS