5 Steps To Create An Email List From Scratch In One Hour

Last Updated Aug 25, 2019
Last Updated Aug 25, 2019
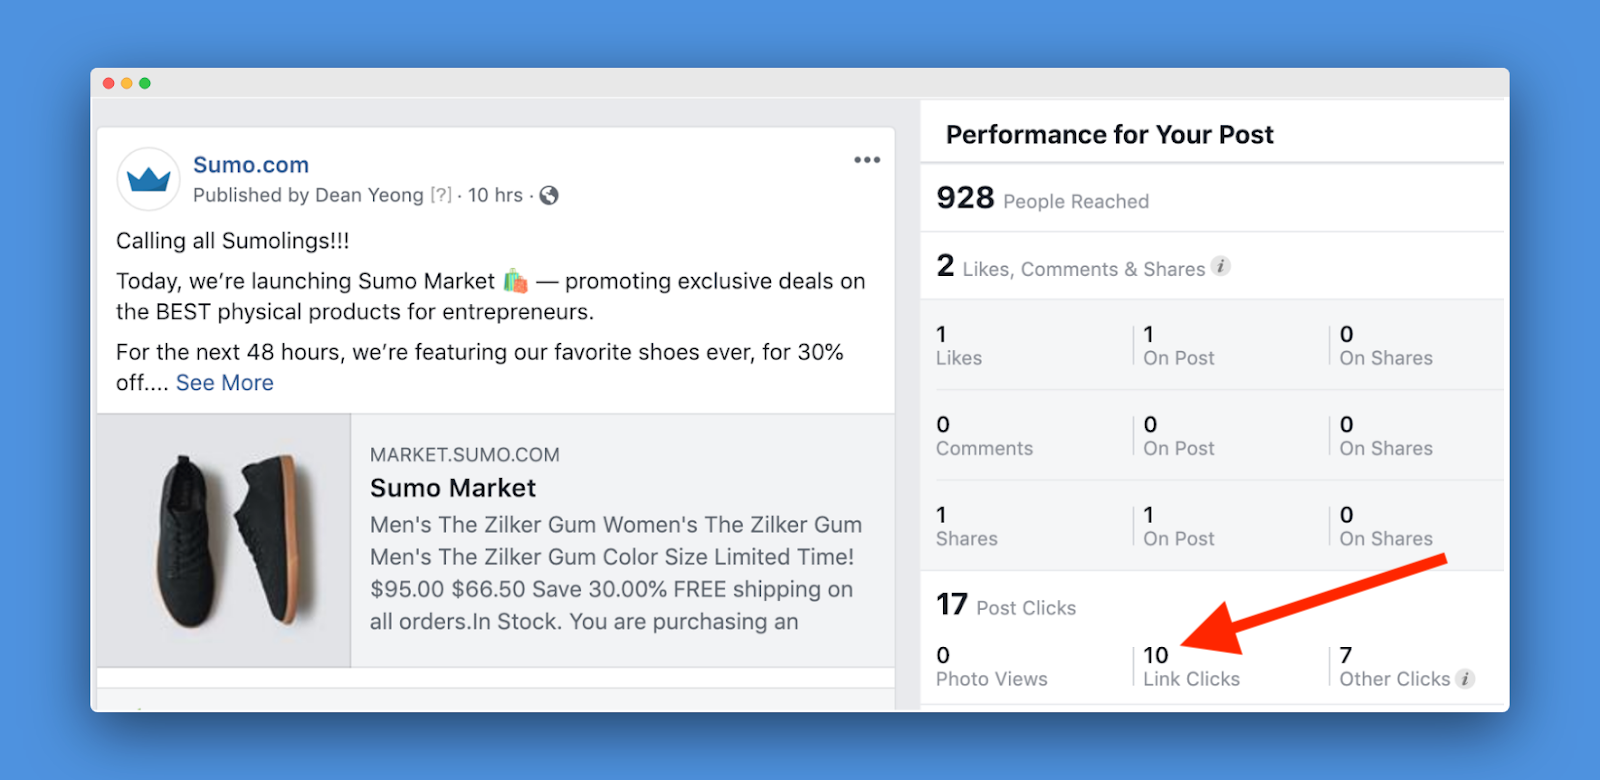
This Facebook post to 74k fans got 10 link clicks:
This email with the same message to 81k subscribers got 4,203 clicks:
In 10 hours, the email had 420x more clicks!
Plus with email, you OWN the list. Not Facebook.
Want to learn how to create an email list to drive clicks to your content and offers?
In this article, I’m going to show you how to get started with Sumo to create your email list and send your first email to your subscribers.
To help you grow your email list and make the best use of Sumo, click the button below to get our FREE 7-Day Email Marketing Masterclass.
Get Access To The Sumo Email Marketing Masterclass
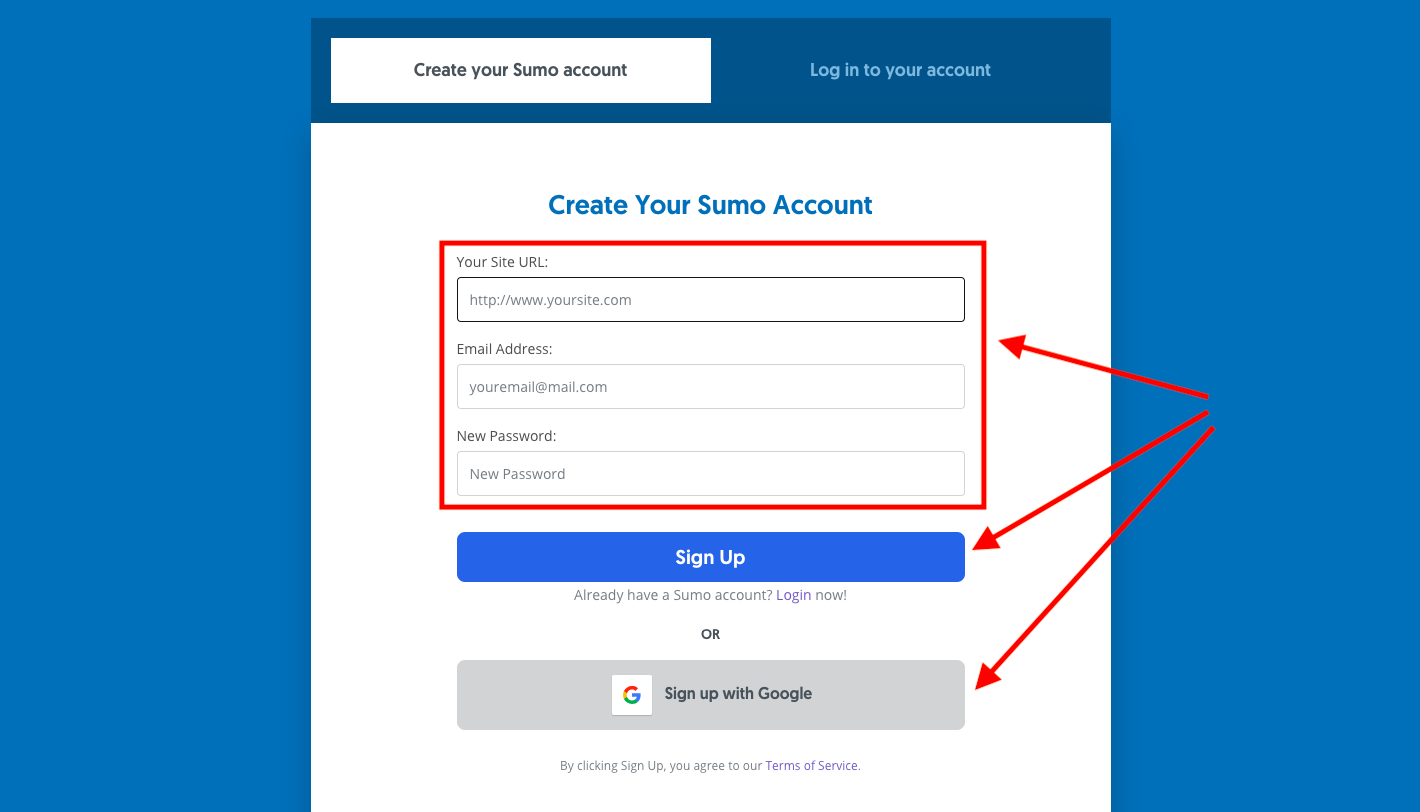
The first step to creating an email list is to register for a forever free Sumo account and install Sumo on your website. Here, I’m going to cover the two most popular website platforms where Sumo is being used (WordPress and Shopify).
On the registration page, fill in your info and click Sign Up or Sign up with Google.
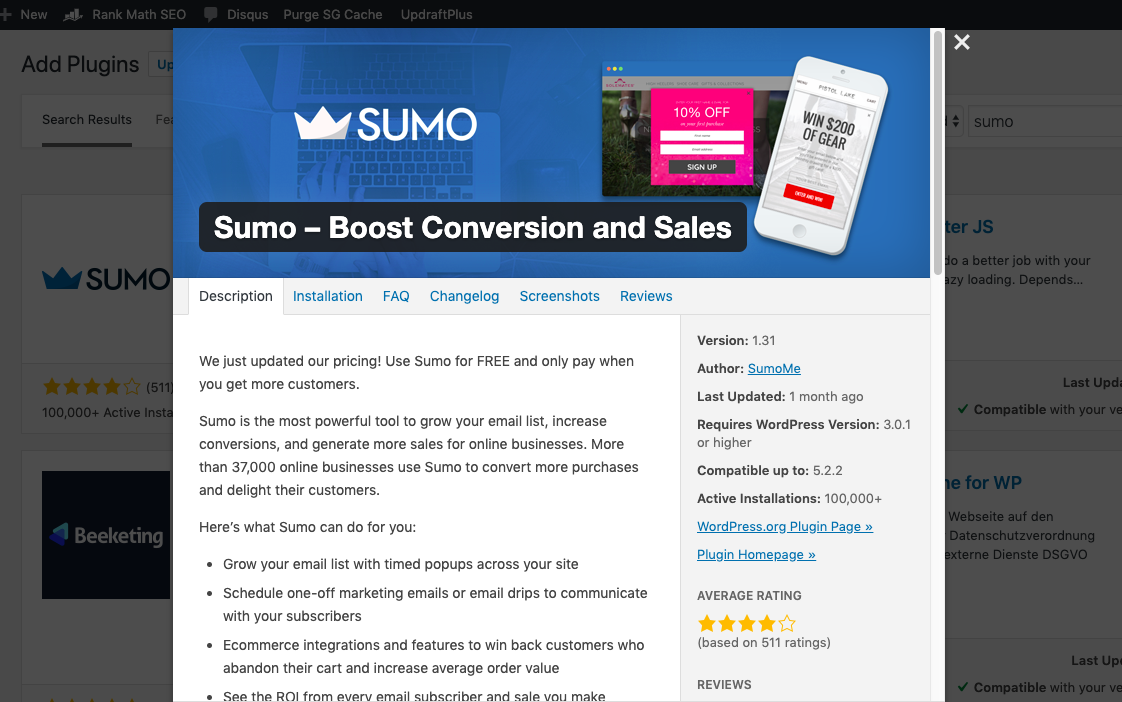
Next, it’s time to install Sumo on your website.
Installing Sumo on your WordPress site is simple via the Sumo WordPress Plugin.
Please note that your website must be a self-hosted Wordpress.org website and NOT a Wordpress.com website.
Then, follow these steps to install Sumo on your WordPress site.
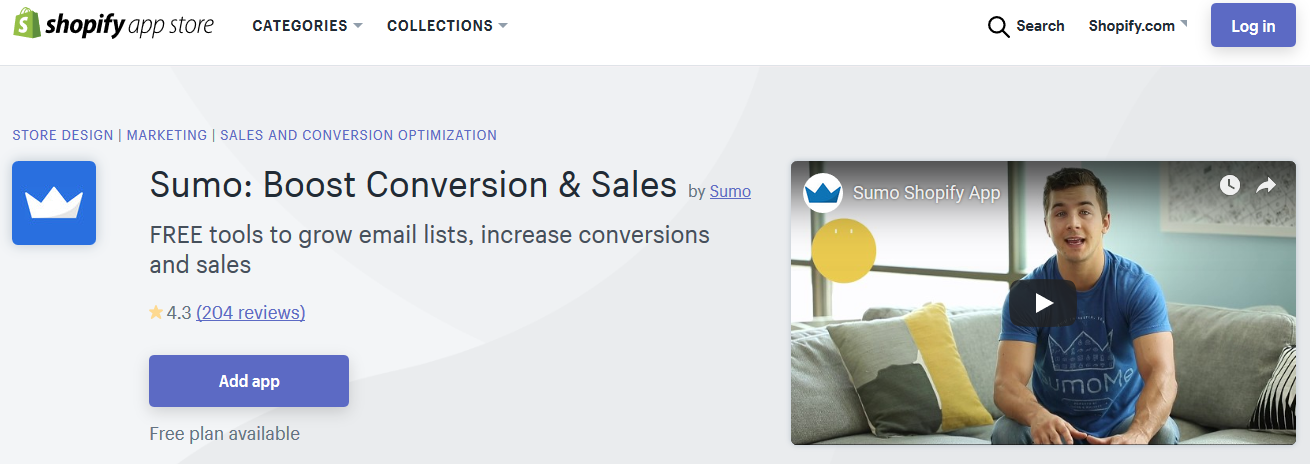
If you’re running an ecommerce business using Shopify, fret not! Sumo works well with Shopify stores.
All you need to do is download and install the Sumo Shopify App on your Shopify store.
For detailed instructions, click here.
If you’re using Sumo on any other platform, click here to find installation instructions.
After you’re done installing Sumo on your website or Shopify store, it’s time to set up a group of contacts.
A Group is where you segment all the contacts you get so you can:
Import existing contacts to the Group.
Email a specific Group of your choice.
Add a contact into an Automation once they join a Group.
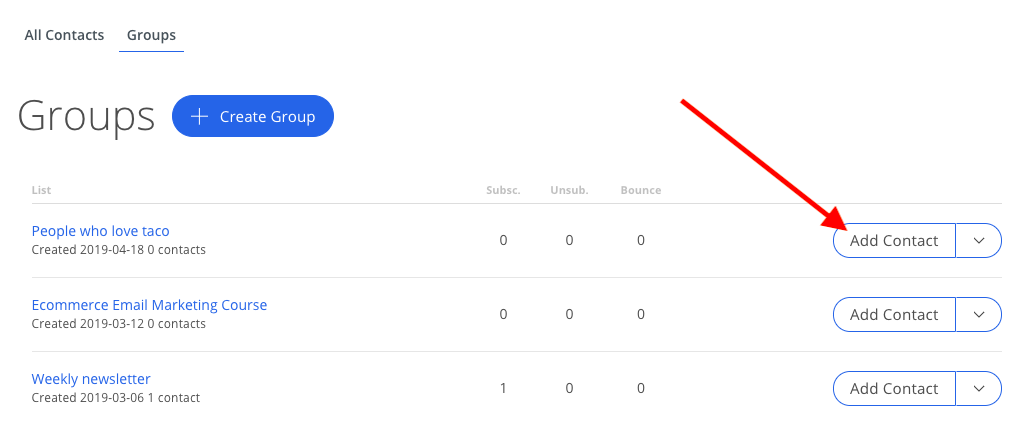
Creating a Group on Sumo is simple. Click Contacts > select the Groups tab, and click the Create Group button.
Name the Group whatever you prefer (you can edit the name of your Group anytime you like) and click Save Group.
There are three ways to add contacts to a Group.
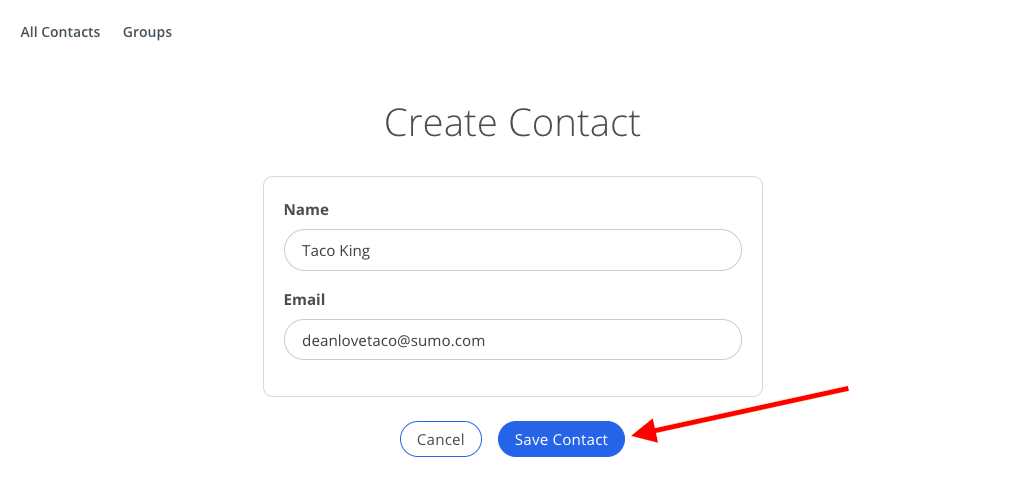
1. Import contacts one-by-one.
On Contacts > Groups, click Add Contact.
Then, add the name and email address of the contact manually, and click Save Contact.
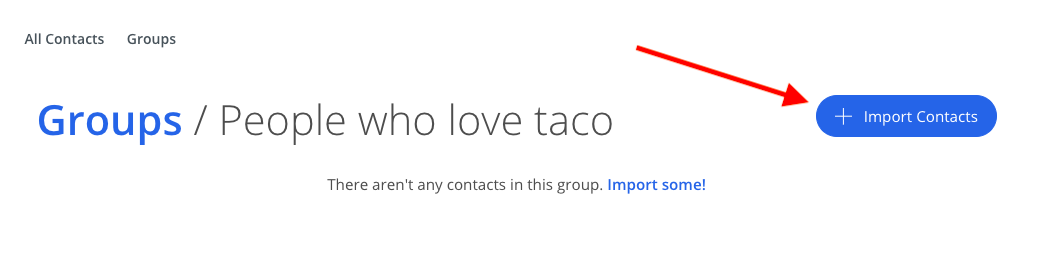
2. Import contacts in bulk.
On Contacts > Groups, click the name of the Group. Then, click the Import Contacts button to upload a CSV file with existing contacts.
3. Automatically add contacts to a Group via Forms.
You can also add a contact to a Group automatically based on the form they used to sign up. I’m going to show how to do this in Step 3.
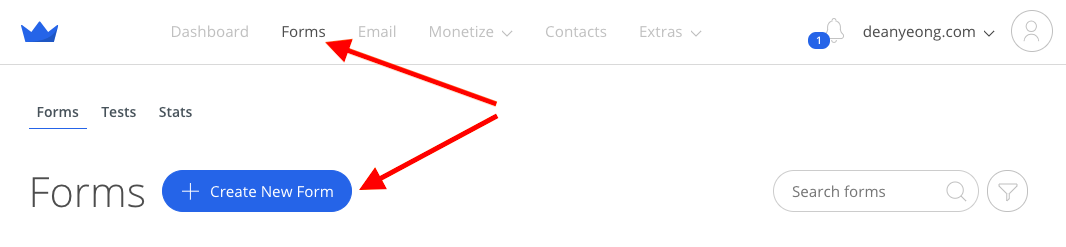
Once you’re done setting up a Group, it’s time to create your first email opt-in form.
Click Forms on the main navigation bar and then click the Create New Form button.
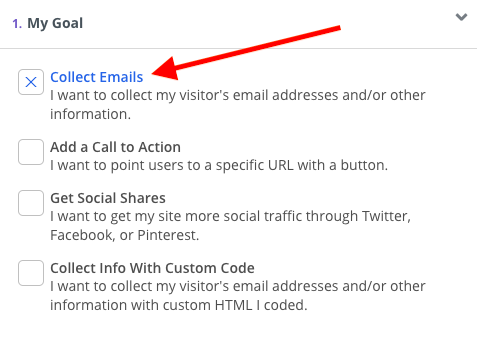
You can use a Sumo Form to:
Collect emails.
Add a call-to-action.
Get social shares.
Collect info with custom code.
To start building your email list, select Collect Emails as your goal.
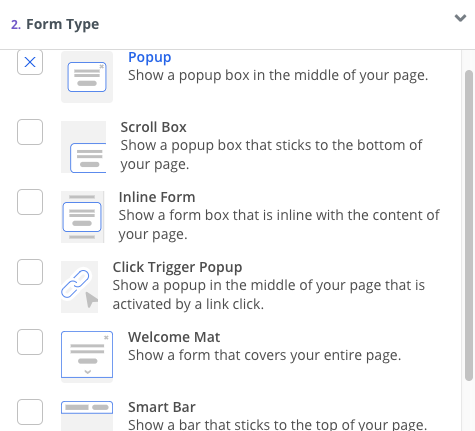
There are six form types you can choose from:
Popup
Scroll Box
Inline Form
Click Trigger Popup
Welcome Mat
Smart Bar
Based on the results existing Sumo users get, a Popup is the most popular form type that works well in most situations.
You can set up and design a Popup form to grow your email list with an:
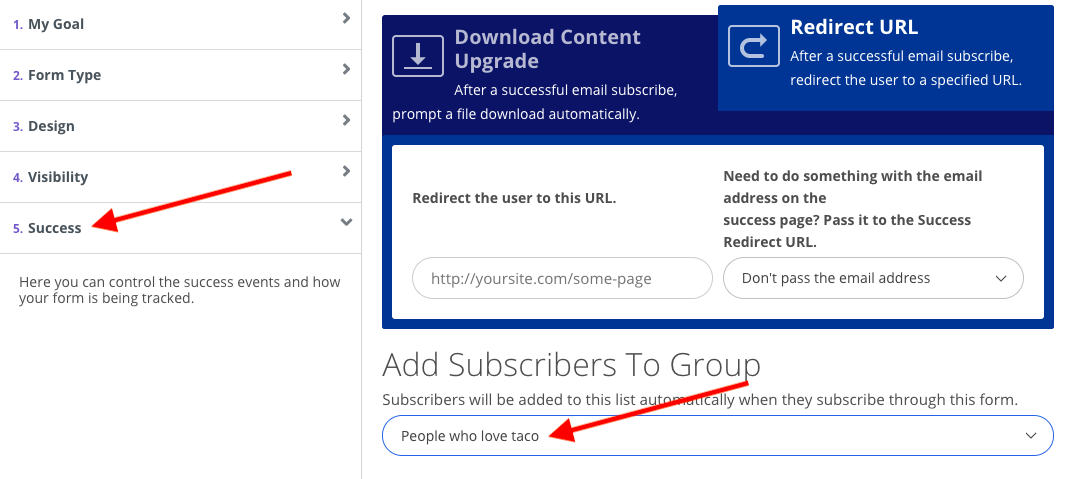
Head over to the Success tab when you’re done designing the form. On the Add Subscribers To Group field, select the Group where you want to add subscribers who opt-in via the form.
At this stage, you have:
Sumo working seamlessly on your website or ecommerce store.
A Group where you segment and store your contacts.
An email collection form to start growing your email list.
I know you can’t wait to start sending your first email to your subscribers. But before you start sending any emails, you want to make sure your email settings are set up properly.
By default, welcome@sumomail.com will be what your subscribers see on emails you send.
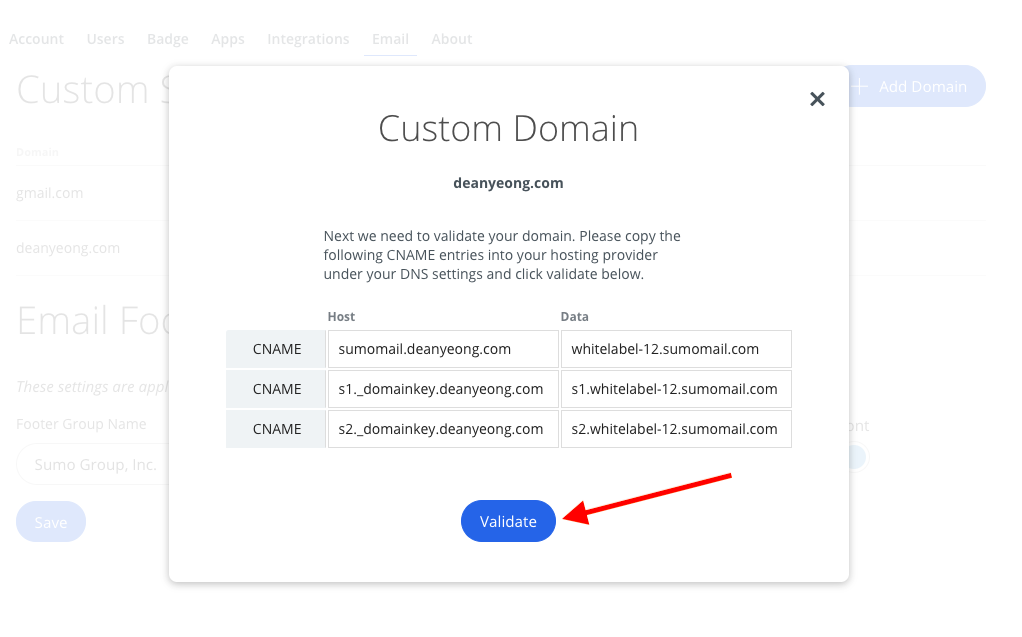
To use a custom email, you need to add and validate your custom domain.
To do that, you'll need to have the ability to add a CNAME record in your email host's settings. If you're not sure how to do that, check with your email host for instructions (Note: this is usually the same company your website is hosted with).
Once you know how to set a CNAME record in your email host's settings, hover over your profile image/icon > and click Settings.
In Settings, click Email and then select the Add Domain button.
Enter the three CNAME entries into your email host. Click Validate to make sure everything works properly.
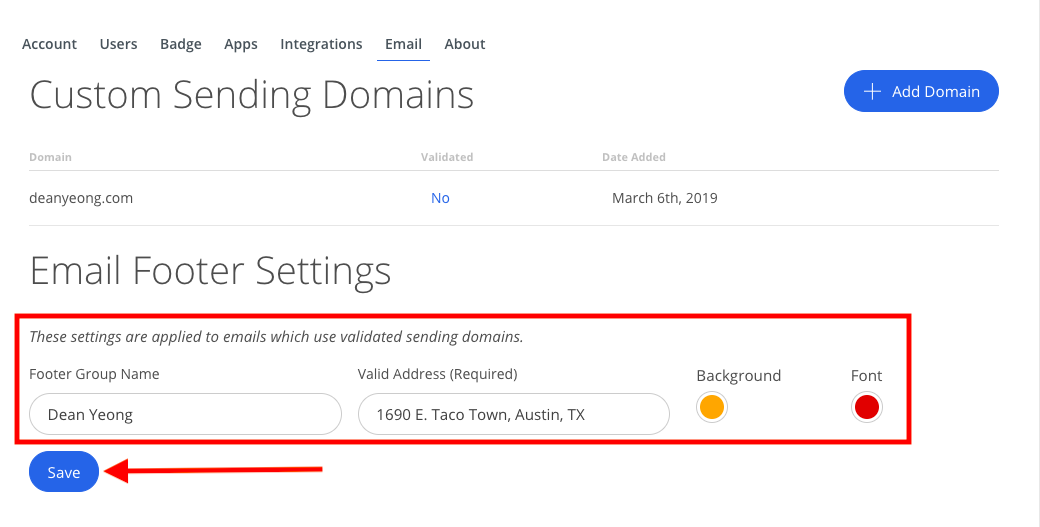
The next to edit is the email footer setting. By default, the Footer Group Name and Valid Address are filled with Sumo company name and office address.
In the Email tab update the text fields, select your footer background and font colors, and click Save.
You don’t want to leave your subscribers in the cold after they subscribe. In fact, the best time to build rapport with your subscribers is when they first subscribe.
They like and trust you enough to give you their email addresses. So you want to reach out to them before they forget about you a day or a week later.
With Sumo, you can create an autoresponder or automation to email new subscribers automatically — even when you’re asleep.
Here are two ways to email your new subscribers automatically:
The first method sends a single email to your new subscribers based on the form he or she uses to opt in.
You can use it to deliver a unique lead magnet you offer on a specific form.
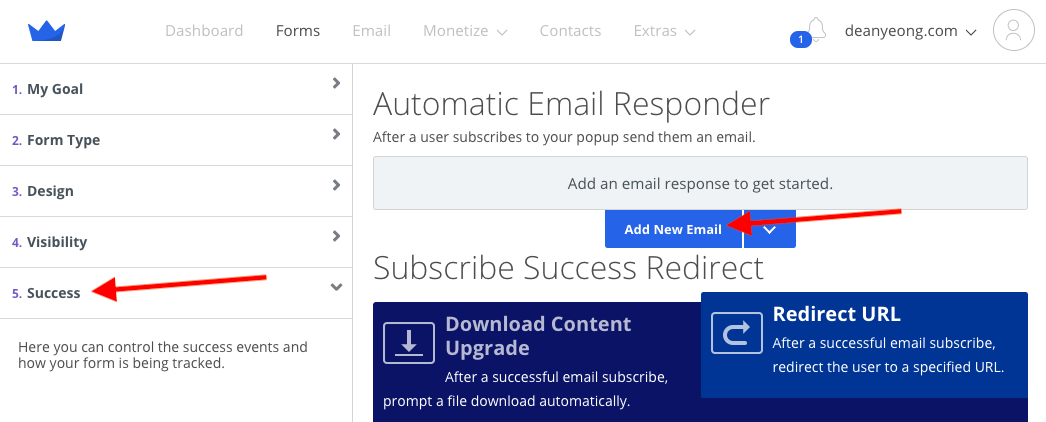
To set up the autoresponder, select a form you’ve created. On the Success tab, click Add New Email in the Automatic Email Responder section.
Edit the sender’s details and email content using the email editor. Click Save Email and update the form.
Automations in Sumo allow you to send an email drip to your subscribers.
When a new subscriber joins your selected Group, the Automation gets triggered and starts sending emails to the subscriber based on the email delay time you set.
Before you get started, prepare your emails in a doc.
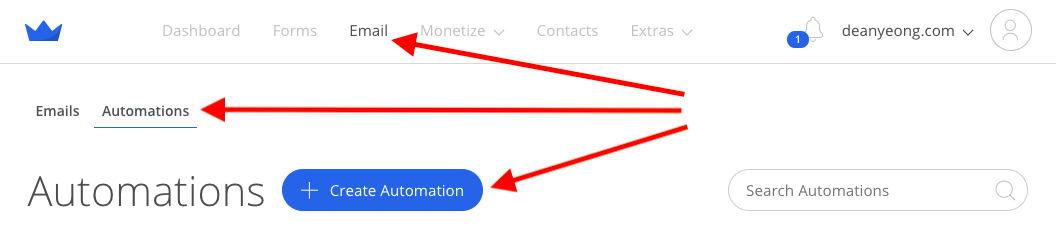
When you’re ready, click Email > Automations > Create Automation.
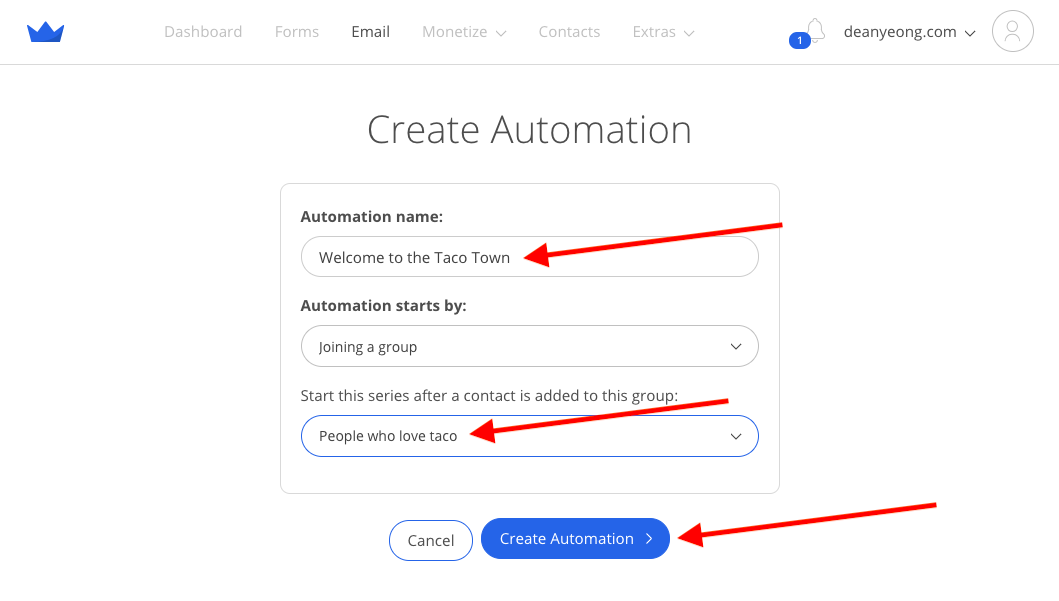
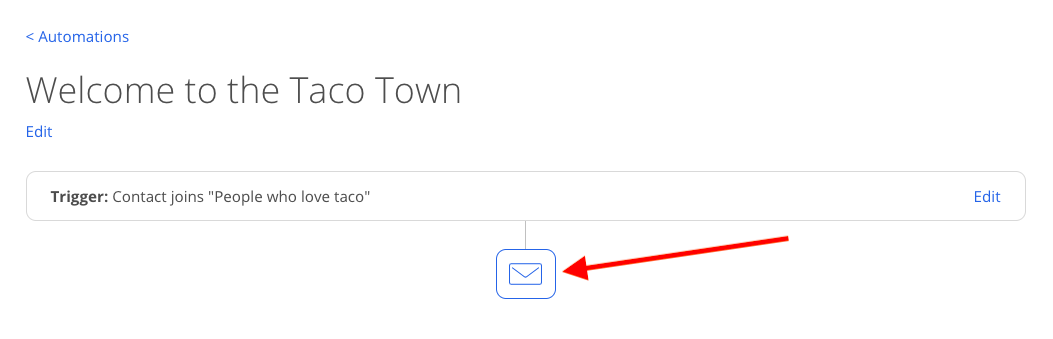
Give the Automation a name, select the Group that triggers it, and click Create Automation.
To add new emails to the Automation, click the email icon.
Here’s a video that shows you how to create an email using the Sumo email editor.
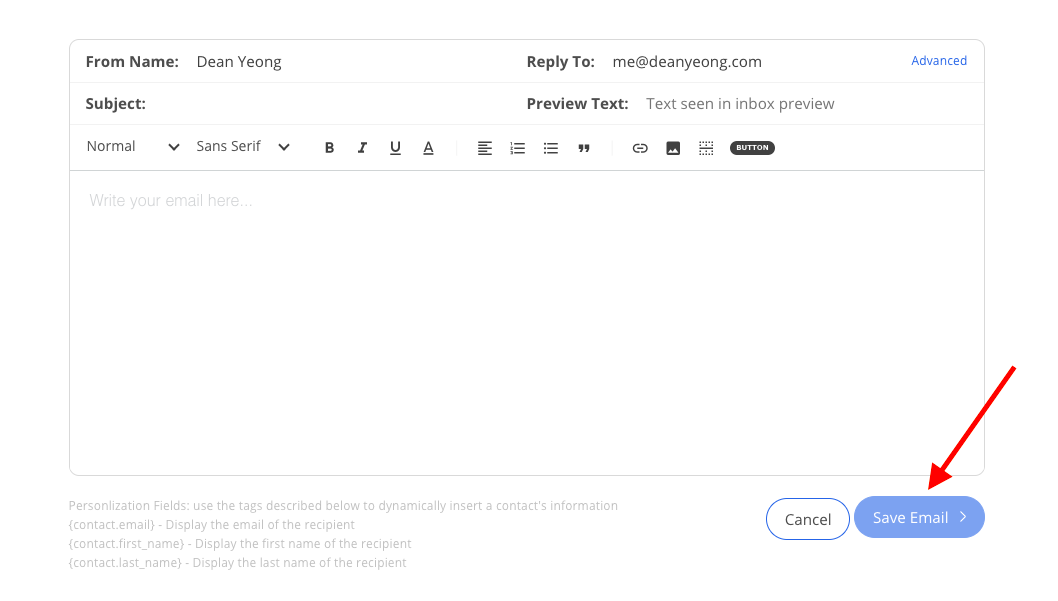
Update the sender’s From Name and Reply To email address, then copy and paste the email content you’ve written into the email editor. Click Save Email.
Repeat the process (click the email icon and add the email content to the email editor) to add more emails to your Automation.
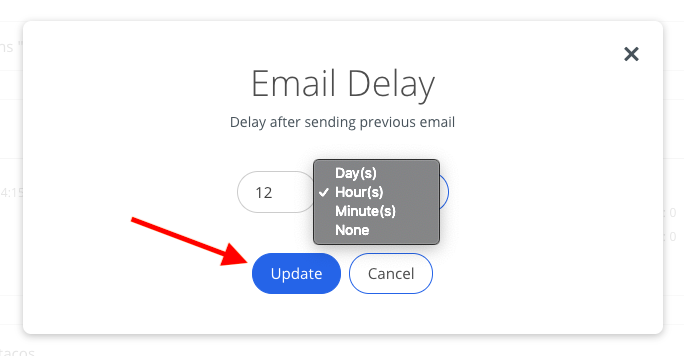
When you’re done, edit the email delay time between each email by clicking the 1 Day (default delay time).
You can set the delay by Day(s), Hour(s), or Minute(s). Then click Update.
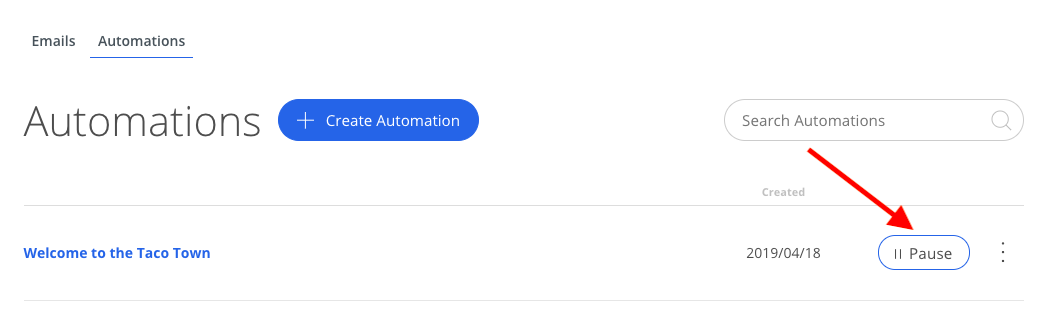
Awesome! You’ve successfully set up your first Automation.
The Automation is live by default. If you want to pause the Automation, head to the Automations page and click Pause.
That’s the five simple steps to set up an email list using Sumo.
You can do it all for free, using Sumo’s forever free plan.
If you’re ready to take action, click the button below to get started.
When you’re done creating your email list, head over to our most popular posts to grow your email list and level up your email marketing game.


Comments